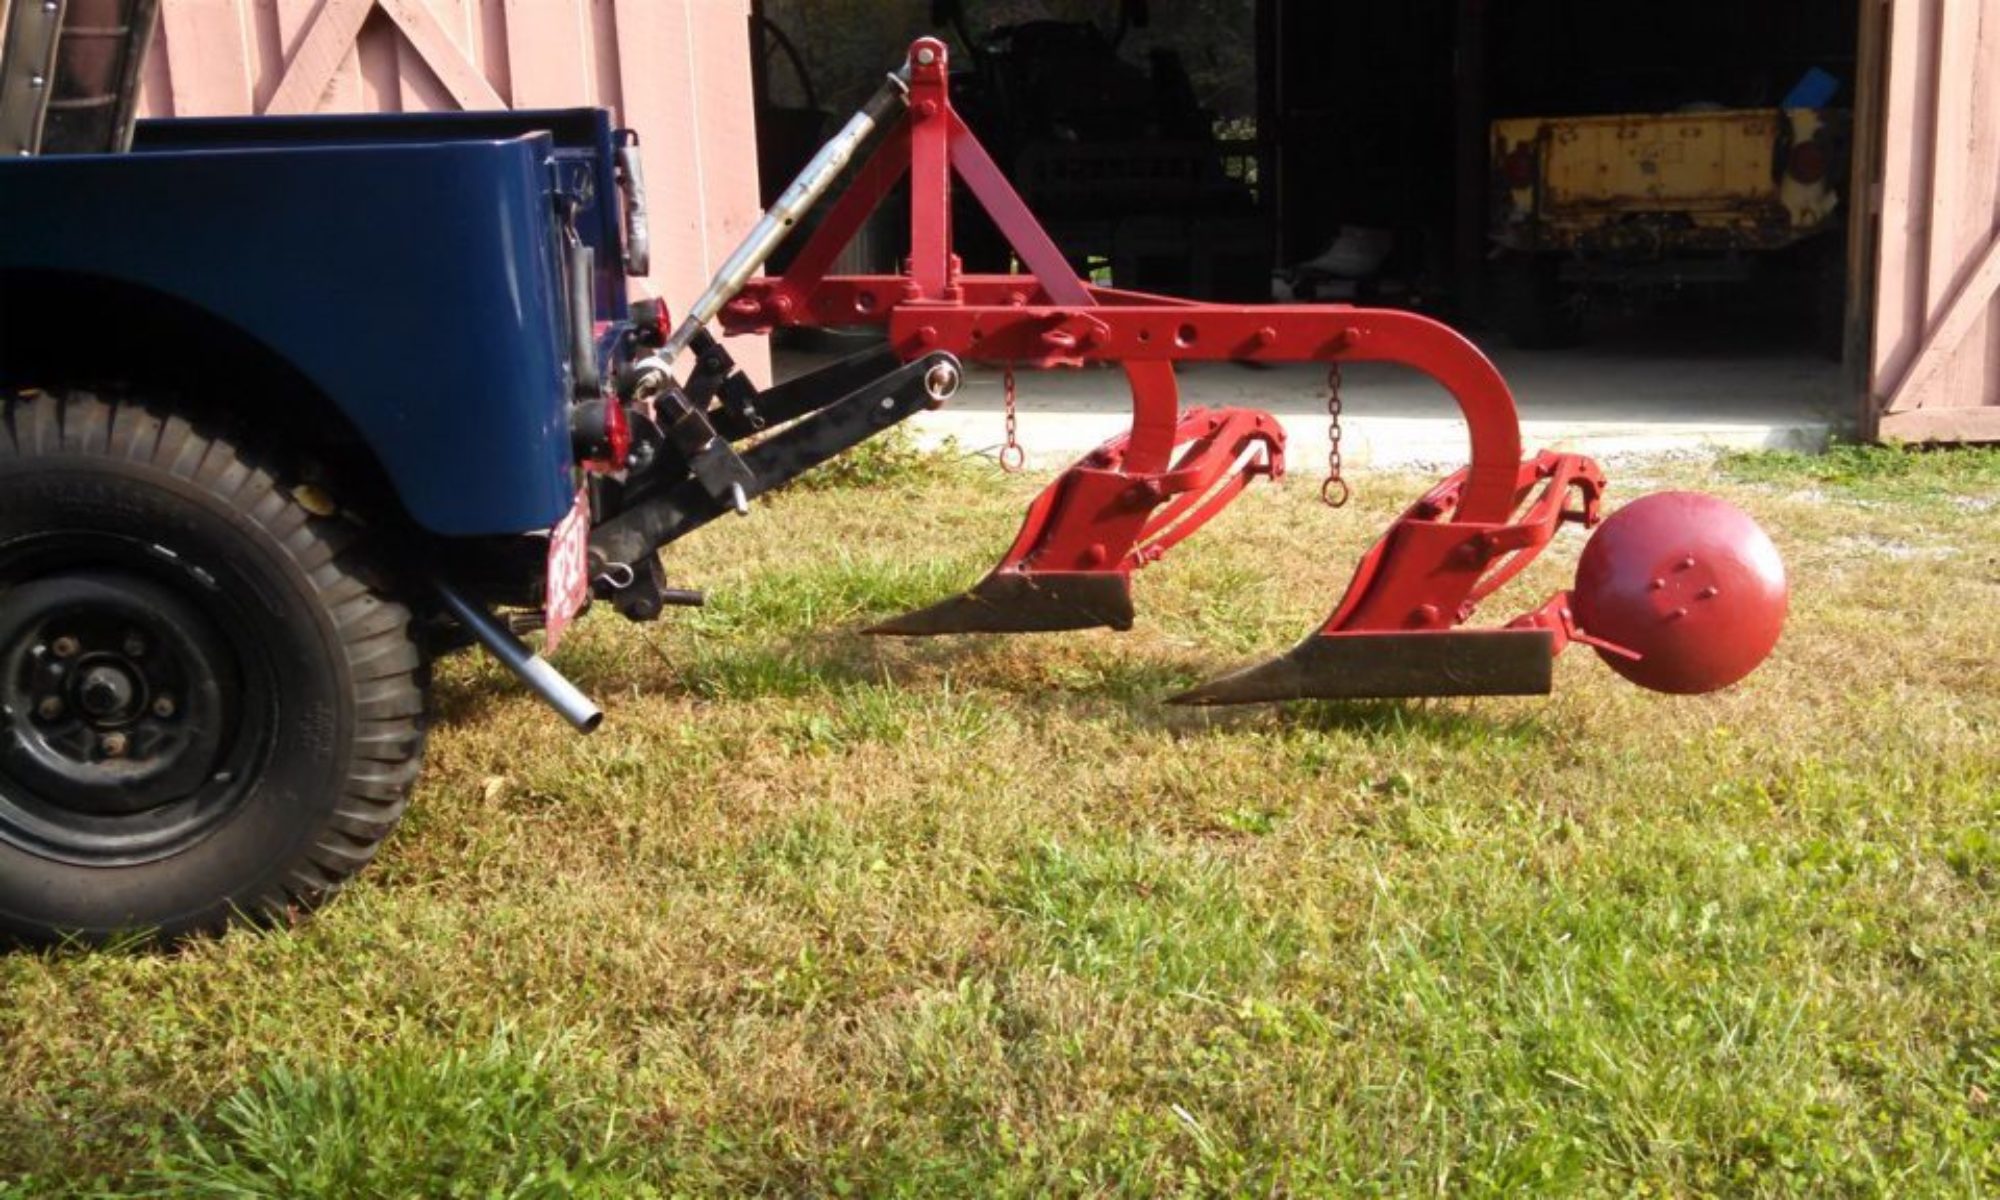
Sometimes too much hydraulic pressure is worse than not enough. Too much pressure can be dangerous and can result in damage to the pump and other components. Modern hydraulic systems have built-in pressure relief valves, but 70+ years ago, Newgren designers omitted this safety feature. We have added a pressure relief valve to our lift and will explain how we did so in this post. However, we are not experts and present this as an example and not as a definitive answer to adding a pressure relief valve!
The Basics
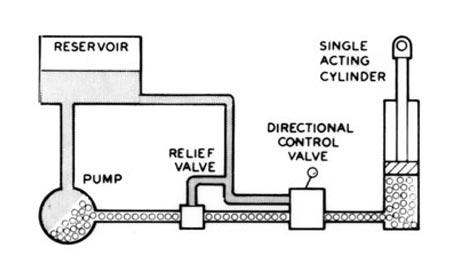
In the diagram above, you can see the relief valve placed between the pump and the control valve. If pressure exceeds a set level, the relief valve opens and fluid flows straight to the reservoir. In the above system, relief valve and control valve share the same return line to the reservoir. In most modern systems, the relief valve and control valve are a single unit.
In the Newgren system, the control valve sits directly on top of the reservoir and doesn’t allow us to tap into the reservoir return line. So we need to modify the reservoir by installing another inlet or use the port relief inlet on the top of the Newgren tank.
Our solution
We have wanted to keep our Newgren lift as original as possible. But after damaging two pumps by excess pressure, we decided we would add a relief valve. On a side note, the excess pressure appears to be the result of a faulty control valve. We made a couple of attempts to replace the control valve with a modern style control, but these would have resulted in major modifications. So our solution was to insert the relief valve without modifying either the control valve or the reservoir.
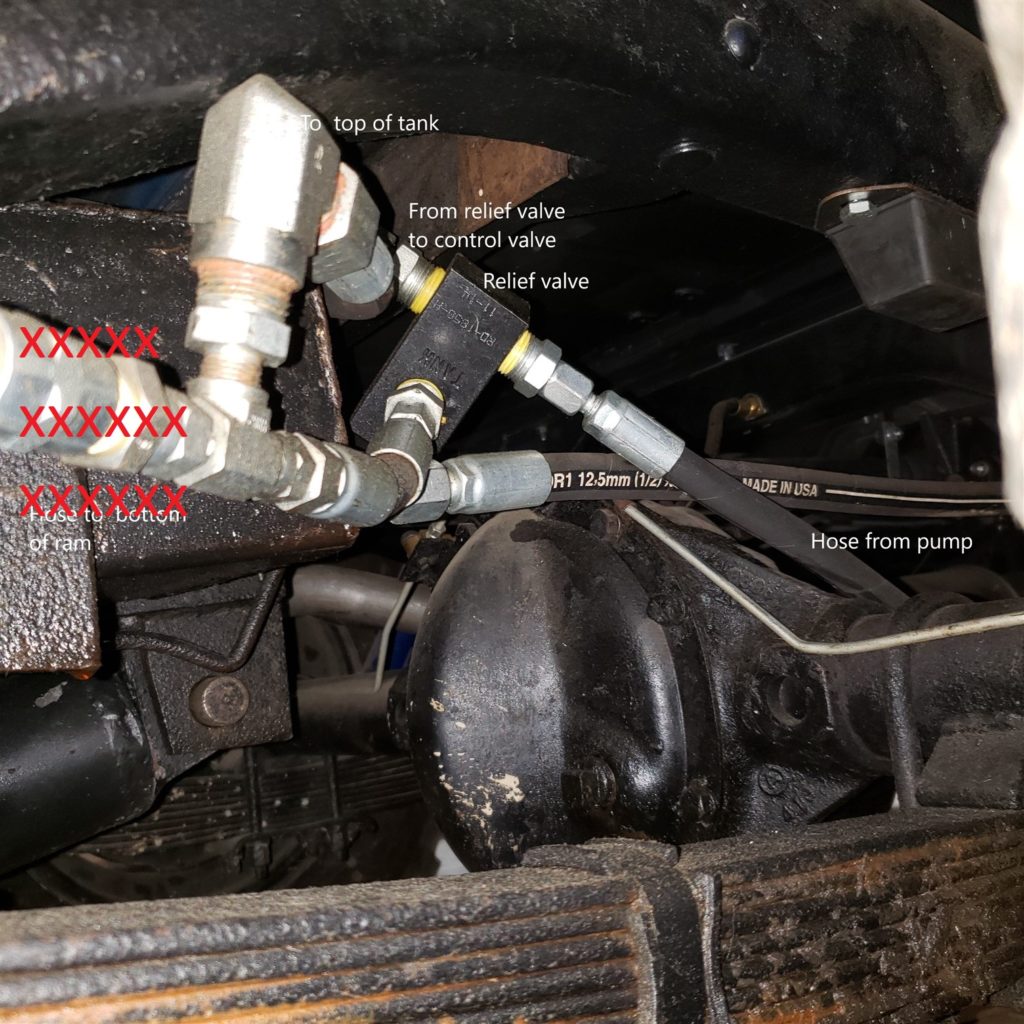
The relief valve we used is the Prince Adjustable Relief Valve. It fits between the high pressure hose from the pump and the control valve inlet. A short piece of hose is used to connect the outlet (normal operation) to the inlet of the control valve.
The next task is to connect the relief valve excess pressure outlet to the reservoir tank. Not wanting to modify the tank, we choose to add a “T” to the cylinder relief port on the top of the tank. As can be seen above, we ran a hose from the inlet (located on the top of the tank on the driver’s side) to a “T” on the passenger side. To make all of this easier, we added an elbow to the “T”. One side of the “T” goes to the relief valve and the other side goes to the relief port on the bottom of the cylinder. Read on before taking this approach.
Is that last part really necessary?
The simple answer is no. A quick review of how a single action cylinder may be useful. In a single action system hydraulic fluid under high pressure is used to extend the cylinder and raise the implement and the weight of the implement retracts the cylinder to lower it. A control valve is used to direct the fluid for the required action. To raise the implement, the valve must direct the fluid to the upper (or top) chamber of the cylinder. To maintain the position of the implement, the valve must shut off flow to the cylinder and dump the fluid being pumped under pressure into the reservoir. To lower the implement, the valve must open the upper chamber and allow the fluid to empty into the reservoir. On the bottom of the cylinder, a relief port allows air to enter and exit the cylinder as it extended and retracted.
To keep dirt and dust out of the cylinder, Newgren used the space at the top of the reservoir as an “air tank” and attached a hose from the cylinder to the top of the reservoir. That hose could be left unhooked from the top of the reservoir. In that case, you would simply attach the outlet of the relief valve to the reservoir and eliminate the “T”. You should also add a small breather plug to the end of the hose or to cylinder port.
The things you learn
After writing this post it is clear that we over-engineered the solution. Unless you have excess fluid seeping past the cylinder seals, we would not include the “T”. In fact, linking the pressure relief valve and the cylinder port may result in damage to the cylinder. We would recommend trying a simple connection from the top of the reservoir to the relief valve. We will be making this change to our lift in the future.