Better Furrows when using the Farm ‘Jeep’
by Clint Dixon
I was recently asked if I would be interested in writing a short piece on how plowing with a Jeep would be different than plowing with a normal tractor. At first that task sounds fairly straight forward. But the more I thought about it, the more I realized that plowing is a very complex subject. Hence, the question is not one that I can adequately answer in a short piece. I am a brute for punishment though, so I’ll unseal the catacombs, dig through the archives, and share what I have learned.
For my writing I generally follow a self-imposed rule to not cite websites as sources for the information I have found. There seems to be more incorrect information out there on the internet than correct information. However there is a good chance that readers who have arrived at this article may be finding themselves in the very early learning stages in regards to plowing, and/or are looking for additional help to allow them to turn better furrows moving forward. With that in mind, I will approach this as if I am talking to someone who has very limited knowledge on the subject. I will include links to specific pages of vintage literature as well as select magazine and web articles that have proven to pass the litmus test for accuracy. The best place to start is not with Jeeps or tractors, but closer to the beginning.
I should first share the image below. It contains all of the important terminology related to plows:
The image above is from my 1941 manual titled Instruction PLOW BOOK, Ferguson-Sherman Manufacturing Corporation. Although it covers the very early Ferguson plow, many of the same parts were later sourced by The Newgren Co. and used on their second-generation Farm Tested plows. The Ferguson plow was first designed to hitch to, and work in conjunction with, The Ferguson System – a Three-Point Free-Link ‘implement‘ Attachment method (hydraulic three-point hitch) invented by Harry Ferguson and integrated into the Ford N-series of tractors beginning in 1939. Harry Ferguson later produced his own tractors and again used The Ferguson System on those tractors and the Massey-Ferguson tractors that followed. He also sold Ferguson plows for use with them as well. Beginning at the time of the Ford and Ferguson split, Ford switched to their own new line of Dearborn implements, including the plows. For the remainder of this discussion, the terms “Ford”, “N Series”, and “Ferguson” will be used interchangeably as far as describing all of the particular tractors that use the The Ferguson System.
The hydraulic three-point hitch is commonly known as the “Three-Point Hitch,” or the “Three-Point Lift.” Both names correctly describe the implement attachment system. For this discussion, the terminology – “3-point lift” will be used not only for convenience, but also to remain consistent as most implement attachment systems designed for the Jeep contain the word “lift” in their name.
Another important thing to note is that all references to left or right orientations are assuming the viewer is standing behind the plow and looking across it towards the Jeep, tractor, or draft animals that are pulling it. This applies to all the literature and links I am listing here.
Common plows designed for use on the Jeep were those distributed by The Newgren Co. A double bottom second-generation Newgren plow is shown below. Note the shared components between this Newgren and the Ferguson plow shown near the beginning of the article. Also, note how even the remaining plow parts are quite similar between the two plows:
Below is another link to a vintage reference piece of literature showing plow components along with their matching terminology:
The particular plow shown above is an early first-generation Newgren branded plow produced by the Wiard Plow Company of Batavia, New York. It was designed to be used on the Jeep by attachment to The Love Hydraulic Lift System distributed by Newgren. There will be more discussion on the differences between the first and second-generation Newgren plows later in this article.
Armed with these plow terms we can communicate how adjustments and/or physical conditions of various components of the plow directly influence plowing results. Also included within the text above is an introduction to plow adjustment. Before getting too involved with studying what the various adjustments actually do, it would be of benefit to learn the reasons why plows need adjustment and what can happen when they are out of adjustment. The best way to illustrate this is to go back even further to get a feel for the basics. I can think of no better way than to consider the Walking Plow.
The link below is to a short entertaining read, but more importantly, it is a first-hand account of how plows behave, for lack of a better term, authored by Jeff McFadden and published in Small Farmer’s Journal:
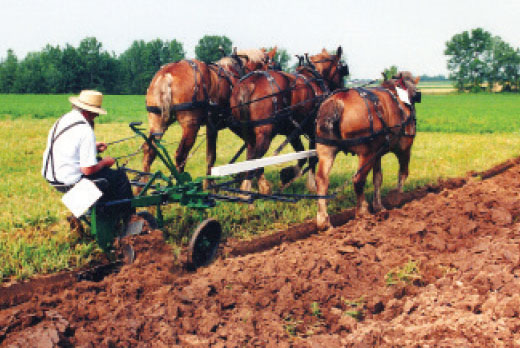
We have all probably seen the images on TV or in the movies of a pioneer farmer struggling behind a walking plow pulled by a horse, mule, or oxen, trying to plow hard dry prairie soil. The animal’s hooves as well as the plow are stirring up a cloud of dust with the plow share barely scratching the surface of the soil. Part of the reason for this is that the actor has never been behind a walking plow in their life. Another reason is that it is simply creative liberty being taken by the film director in order to add to the drama.
Mr. McFadden’s real-life article really cuts right to the core of the whole concept. There are a lot of variables that go into making nice, straight, evenly plowed furrows. Even though the plow he was working was being pulled by horses, he was continuously making manual adjustments to the plow in real-time. These were in response to varying soil conditions, pre-adjustments made to the plow between the plow and hitch, the hitch and horses, as well as adjustments that the horses were also making in real-time. On top of all of that, he was trying to make adjustments in response to his inexperience. That, of course, is one of the best ways to learn and we all go through it, learning from our mistakes.
The next link below expands upon the previous by highlighting the sulky plow, authored by Sam Moore and published in Rural Heritage:
https://www.ruralheritage.com/new_rh_website/resources/draft_equip/hitching_sulky_plow.shtml
The sulky plow was an evolutionary improvement over the walking plow. The article enforces the concept that all moldboard plows, regardless of vintage or complexity, need adjustment to correct and control the same mannerisms. This article, in particular, explains the geometry shared by them – line of draft: Vertical and Horizontal Hitch.
Now we can move onto the more modern plows. By “modern” I am referring to the common types that we will probably find ourselves wishing to use behind our Jeep. There really is much more vintage information to be found out there on Ferguson, Dearborn, and Ford plows than was ever published on any of the plows intended for use with the Jeep. So I will begin with one of the more common. Keep in mind that the whole concept of considering and understanding the condition and adjustment of plows really has not changed throughout the years. What was applicable to the Walking Plow is still applicable to the 3-point lift plow as well as trail-behind plows connected to and pulled by the drawbar.
The following link contains a wealth of information on the Ferguson plows. The subject of the link, The Moldboard Plow Service Manual, is a scan of a 1947 piece of literature from Harry Ferguson, Inc. It is hosted in the NTC Manual Library section on the N Tractor Club site:
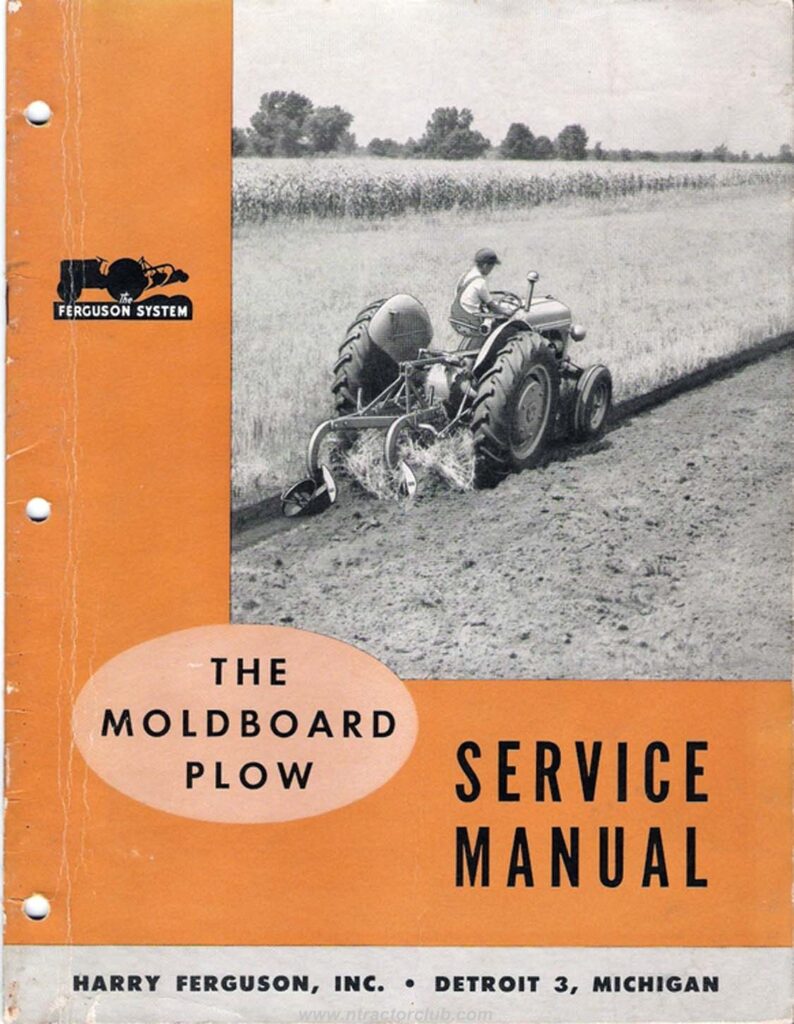
The manual above includes a picture of a newer Ferguson plow than the one shown near the beginning of this article, now with redesigned struts. Newgren would later use virtually the same struts on their second-generation plow designed for use with the Monroe Hydraulic Lift Kit. This image also contains terminology for the parts of the plow. Probably the most benefit to be gained from this literature can be found in the detailed explanation of Plow Bottom Characteristics, starting on page #4, with accompanying photos of clean plowing with nicely turned furrows. The different styles of moldboard plow bottoms are shown and explained along with the varying soil types and conditions that each is designed to work the best in. For reference, page #10 begins the explanation of Uneven Depth and Difficult Penetration, again with a very good photo to illustrate the point.
Regardless of whether one plans to plow with Jeep by utilizing a mounted implement with plow attached, or by pulling a wheeled plow from the Jeep drawbar, this piece of literature is one of the best I have found and I feel it should be kept in every plowman’s library – and referenced often.
An old piece of Jeep specific literature has recently surfaced. This one was published with the intent of training the Jeep dealer on how to demonstrate the Jeep, Monroe Hydraulic Lift Kit, and attached farm implements to potential customers. It is titled: Product Merchandising Manual. A small section related to plows and plowing can be seen below starting on page 23:
The initial plow adjustments outlined in the Product Merchandising Manual above read almost word for word to those found in Ferguson and Dearborn literature. This is because there are more similarities between those plows and the second-generation Newgren plows than there are differences. For instance, I was able to purchase a brand new share and landside for my 16-inch single bottom Newgren plow by searching for parts using the Ford/Ferguson part numbers. The parts were a direct interchange. All I had to know was the size of the plow, type and size of the bottom (share, landside, and moldboard) and whether my Newgren was a first-generation (rebranded Wiard) or a second-generation. I have also found absolutely no differences between the coulters and jointers on the second-generation Newgrens and those on the Fergusons and Dearborns. The Newgren furrow wheel (rolling landside) is slightly different from the Dearborn version, although the two will interchange and also function in the same way.
The real difference between either generation of the Newgren plow, and those produced by Ferguson and/or Dearborn, is that the Newgren plows required a depth wheel when attached behind any vehicle that had no automatic response method of hydraulically controlling plow depth. The Ford and Ferguson tractors had a built-in hydraulic draft control system that controlled plow depth in reaction to draft on the plow shares. We will not go into further detail here other than to say that the 3-point lifts designed for the Jeep did not have this feature. Newgren was able to get around this by employing a special hub that clamped to a main beam of the plow. With a spare tire and wheel mounted to this hub, the assembly could be adjusted to a predetermined measurement in order to control the overall depth of furrow(s) that the plow would be turning.
Next up, we need to learn about the different types of furrows and the recommended patterns to follow when plowing fields with the Jeep. These two pages below are from my old Willys-Overland Motors publication, titled The Universal ‘Jeep’ In Agriculture:
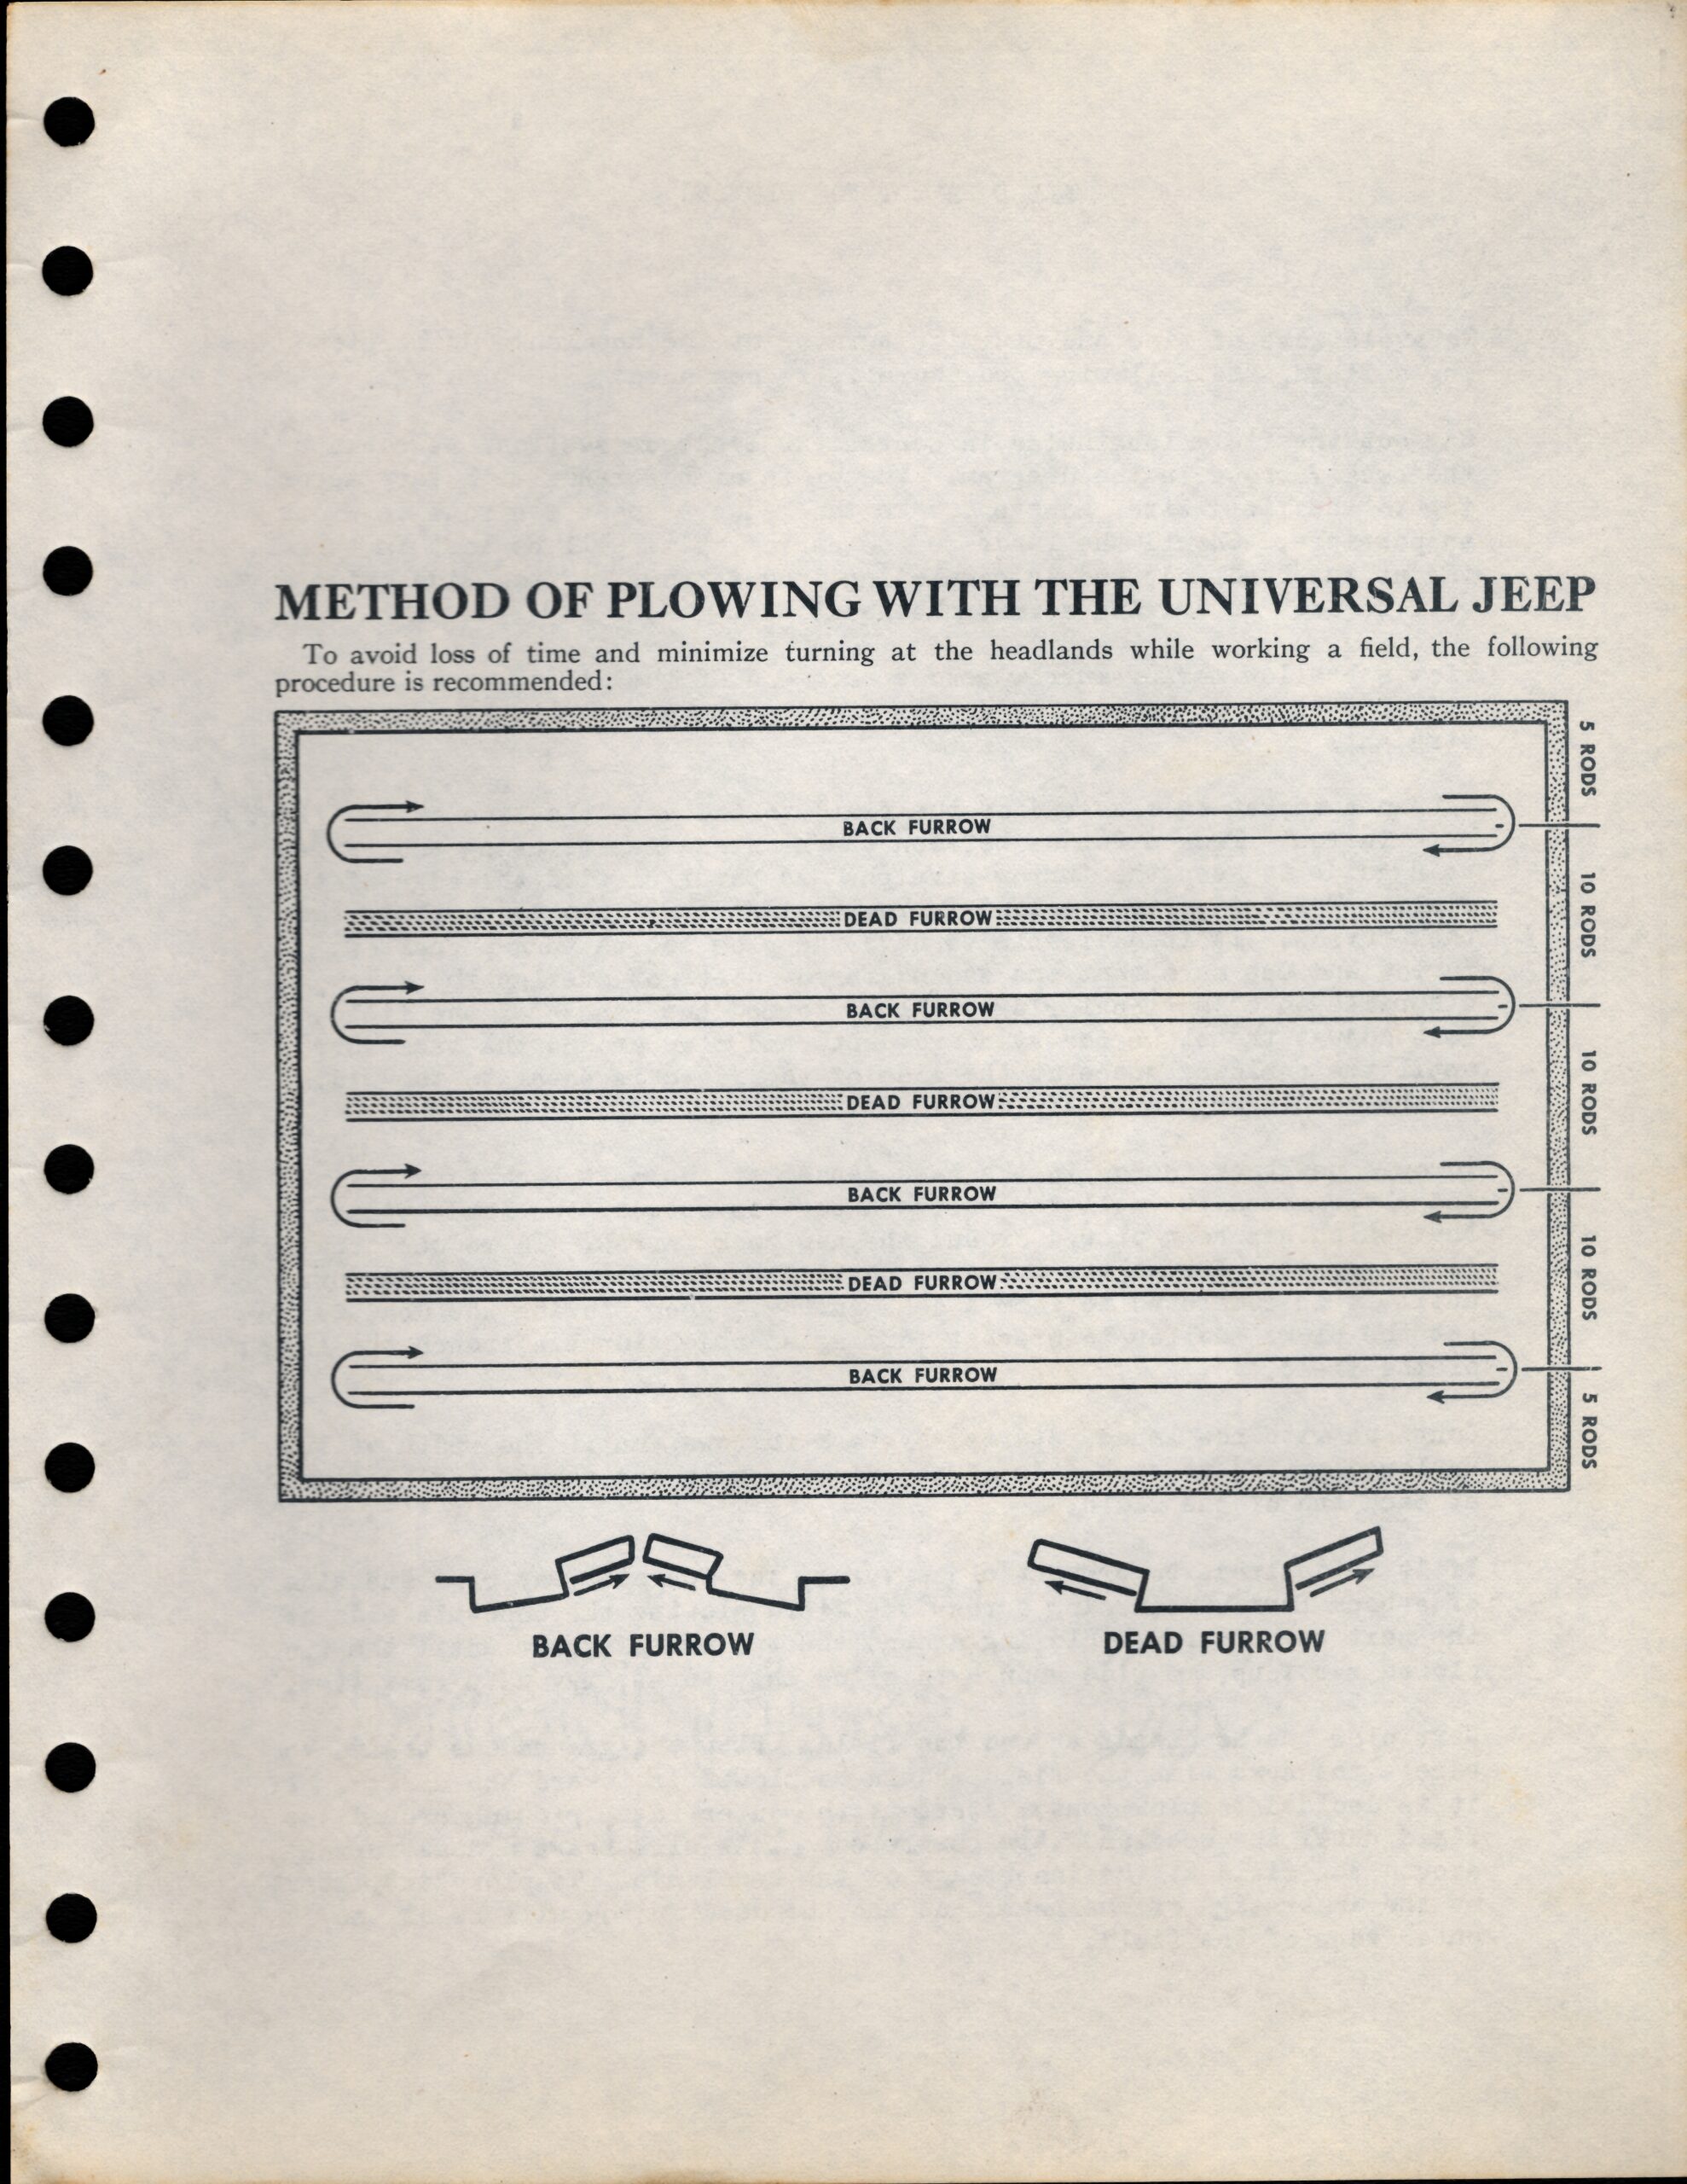
Note that this piece shows Back Furrows and Dead Furrows.
A normal furrow gets filled with overturned soil during the next pass across the field with the plow. To explain further – the plow creates a new furrow right next to, and parallel with, the last furrow created during the previous pass. The soil from this new furrow replaces soil overturned and displaced from the previous furrow. If there were no back furrows or dead furrows in a field, the overall height of the overturned soil across the freshly plowed field would be uniform. However, having no back furrows or dead furrows is not possible. The first pass with a plow down the field is naturally going to create a back furrow because it is placing the turned over soil on top of existing undisturbed soil instead of placing it into an existing furrow. The last pass down the field is going to create a dead furrow because plowing has stopped and there is no longer soil being turned to fill that last furrow.
In a perfect world, each field would have only one back furrow and one dead furrow. The back furrow would be at the side of the field where plowing started and the dead furrow would be at the opposite side of the field where plowing stopped. However, this would be very inefficient, costly, and time consuming as it would require dropping the plow at one corner of the field to plow in one direction to the corner at the opposite end. The plow would then have to be lifted and transported back to the other end of the field where the first furrow started in order to plow again in the same direction. By the time the field was fully plowed, half of the time spent would have been wasted doing nothing productive but driving back to where one started with the plow never touching soil during the trip.
That is why The Universal ‘Jeep’ In Agriculture book recommends a zigzag pattern where the plow remains in the ground except when changing direction at the ends of the field. This allows plowing to be accomplished in both directions of travel. This results in a double back furrow where two back furrows are created in the middle of the field and soil is turned towards each other from each furrow. This creates a humped strip down the field at that double back furrow.
A hump in the middle of the field is not desired, but not all as bad as it may sound. Because there exists no furrow for the right side tires of the Jeep (or tractor) to travel in, the vehicle is parallel to the ground instead of being naturally leaned over to the right. Normally, while it is leaned over with the right side wheels in a previous furrow the plow remains level as it trails behind. When there is no existing furrow for the right side vehicle wheels to ride in the vehicle remains parallel to the ground but now the plow is leaned over towards the left side. This means that, on a single bottom plow, the point of the plowshare is not quite as deep in the ground as it normally would be and that the trailing edge of the plowshare is barely turning any soil at all. This results in a reduction in the height of the hump but means that the soil underneath this hump remains unturned. The same holds true for plows with two or more bottoms. That first bottom to the right is not going to be moving much soil but any bottoms that follow in succession to the left will be plowing progressively deeper (but only during the two passes that create the double back furrow. Once the right side tires are in a furrow, all furrows that follow will be at the same depth as long as everything is adjusted correctly, the soil type does not change drastically, and the amount of trash in the soil does not change.
A zigzag pattern as illustrated creates dead furrows in addition to back furrows. These are created where plowing by traveling in opposite directions eventually causes the furrows to come together to meet each other. This creates a ditch down the field. This is even worse than a hump created by a back furrow. The Jeep literature describes how to partially correct this by setting the plowing depth shallow when this dead furrow is created. This is referred to as “finishing the land.” It is described even further in the, Instruction PLOW BOOK, Ferguson-Sherman Manufacturing Corporation, mentioned at the beginning of this article. The technique can be viewed in the link below.
Note that the Plow Book also talks about Headland Furrows, the reason for them, and the proper time to lift or lower a plow when entering or leaving them. The images show a Ford tractor of course. In your mind, just substitute the rear tires on your Jeep for the rear tires on the pictured tractor. This book also shows a zigzag method for plowing a field with the Ford tractor. Notice that it differs slightly from the Jeep version. The most noticeable difference is that the Jeep version recommends one to position their back furrows 10 rods apart from each other (165 feet). The Ford tractor version does not specify a distance.
This brings us to the point where I share my first answer to the question of how plowing with a Jeep would be different than plowing with a normal tractor.
Pure and simple, the turning radius of a Jeep is atrocious compared to that of a tractor. By using the turning brakes, a Ford N-series tractor can turn a dime – pivoting with whichever rear tire you prefer to have planted firmly upon that dime. The turning radius of a CJ-2A is 17 feet. THAT would make for a lot of back-and-forth jockeying at the end of a field if it were not for modifying your plowing pattern with a wider spread between back furrows. Having back furrows in close proximity to one another would not be so unbearable with a mounted plow on a Jeep implement lift (although still time consuming, and probably resulting in turning your arms into rubber bands), but with a towed plow attached to the Jeep drawbar, it would make the job virtually impossible.
While the Jeep falls short on turning ability, it makes up for it in track width – to a point.
The track width of the CJ-2A is 48.3 inches. This is measured from center of tire to center of tire. The track width on a Ford N-Series tractor can be adjusted from 48 inches all the way to 76 inches, again measured center of tire to center of tire. Most models of plows made for use on N-Series tractors required the track width to be set at 52 inches. The tires on an N-series are wider than the tires on a Jeep so the inside-to-inside measurements end up being very close to one another, as long as the Jeep is fitted with tires of original widths. We have to consider the inside-to-inside measurement because it is the inside sidewalls of the tires on the right side of the Jeep and tractor that ride against the previous furrow wall in order to control the location of the next furrow created during the next pass with the plow through the field.
So this tells us that the plows designed to be hitched to The Ferguson System 3-point lift on a tractor should share the same adjustable geometry as those designed to be hitched to a Monroe Hydraulic Lift Kit on a Jeep. No wonder it is of no surprise to find second-generation Newgren plows in the stables of Ford and Ferguson tractor collectors. They look the same to the untrained eye and share many parts in common. On October 26, 1947, Willys-Overland Motors, Inc. actually announced that they had reached an agreement to become sub-distributors of Ferguson farm implements. This agreement fell through before it ever got off the ground, but the premature announcement reinforces the fact that Ferguson and Dearborn plows are interchangeable with the second-generation Newgren plows and all can be used on both the Jeeps and the N-series tractors. This includes interchangeability of many of the parts as well as adjustment techniques. The Ferguson and Dearborn plows just need a depth wheel attached in order to control plowing depth when used behind a Jeep.
This brings us to the point where I share my second answer to the question of how plowing with a Jeep would be different than plowing with a normal tractor.
When it comes to attached plows, each tractor company had its own method of attaching implements to the hydraulic implement hitch on the tractor (if so equipped). They could not infringe upon Ferguson’s patents, so they had to come up with their own system of attachment. Ferguson and/or Newgren plows would attach to very few tractors from manufactures other than Ford and Ferguson. This is another area where plowing with a Jeep can differ from plowing with a tractor.
There existed more than just one 3-point lift system specifically designed for the Jeep. First on the scene in 1947 was the Love Hydraulic Lift System, patented by Jabez A.Love and, distributed by The Newgren Co. Newgren quickly re-engineered a few minor details and then referred to their modified version as the Hydraulic Linkage System For The Jeep. The next one to arrive on the market is still up for debate. It was either the Monroe Hydraulic Lift Kit (arriving in 1948), or the Love Hydraulic Lift-Hitch For Willys Jeep (also arriving in 1948). This later Love version was distributed directly by Jabez A. Love. The final 3-point lift system was the Stratton Hydro-Implement Lift For “Jeep” Vehicles that appeared sometime between 1956 and 1960. Of these five systems, the Monroe Hydraulic Lift Kit was the only one that could effectively lift and control the Ferguson, Dearborn, and second-generation Newgren plows. Other implements were not much of a problem but the plow is unique in that it is designed to penetrate to a predetermined depth within the soil, to maintain that depth, and to assure that the resulting furrows are level both fore and aft and side-to-side. The plow relies heavily upon draft as we have learned in previous attachments and links referenced in this article. Other implements do not rely as heavily upon draft and most do not penetrate as deep as the plow as the majority of them are designed to groom the top few inches of the soil in preparation for seeding. Mast heights come into play here.
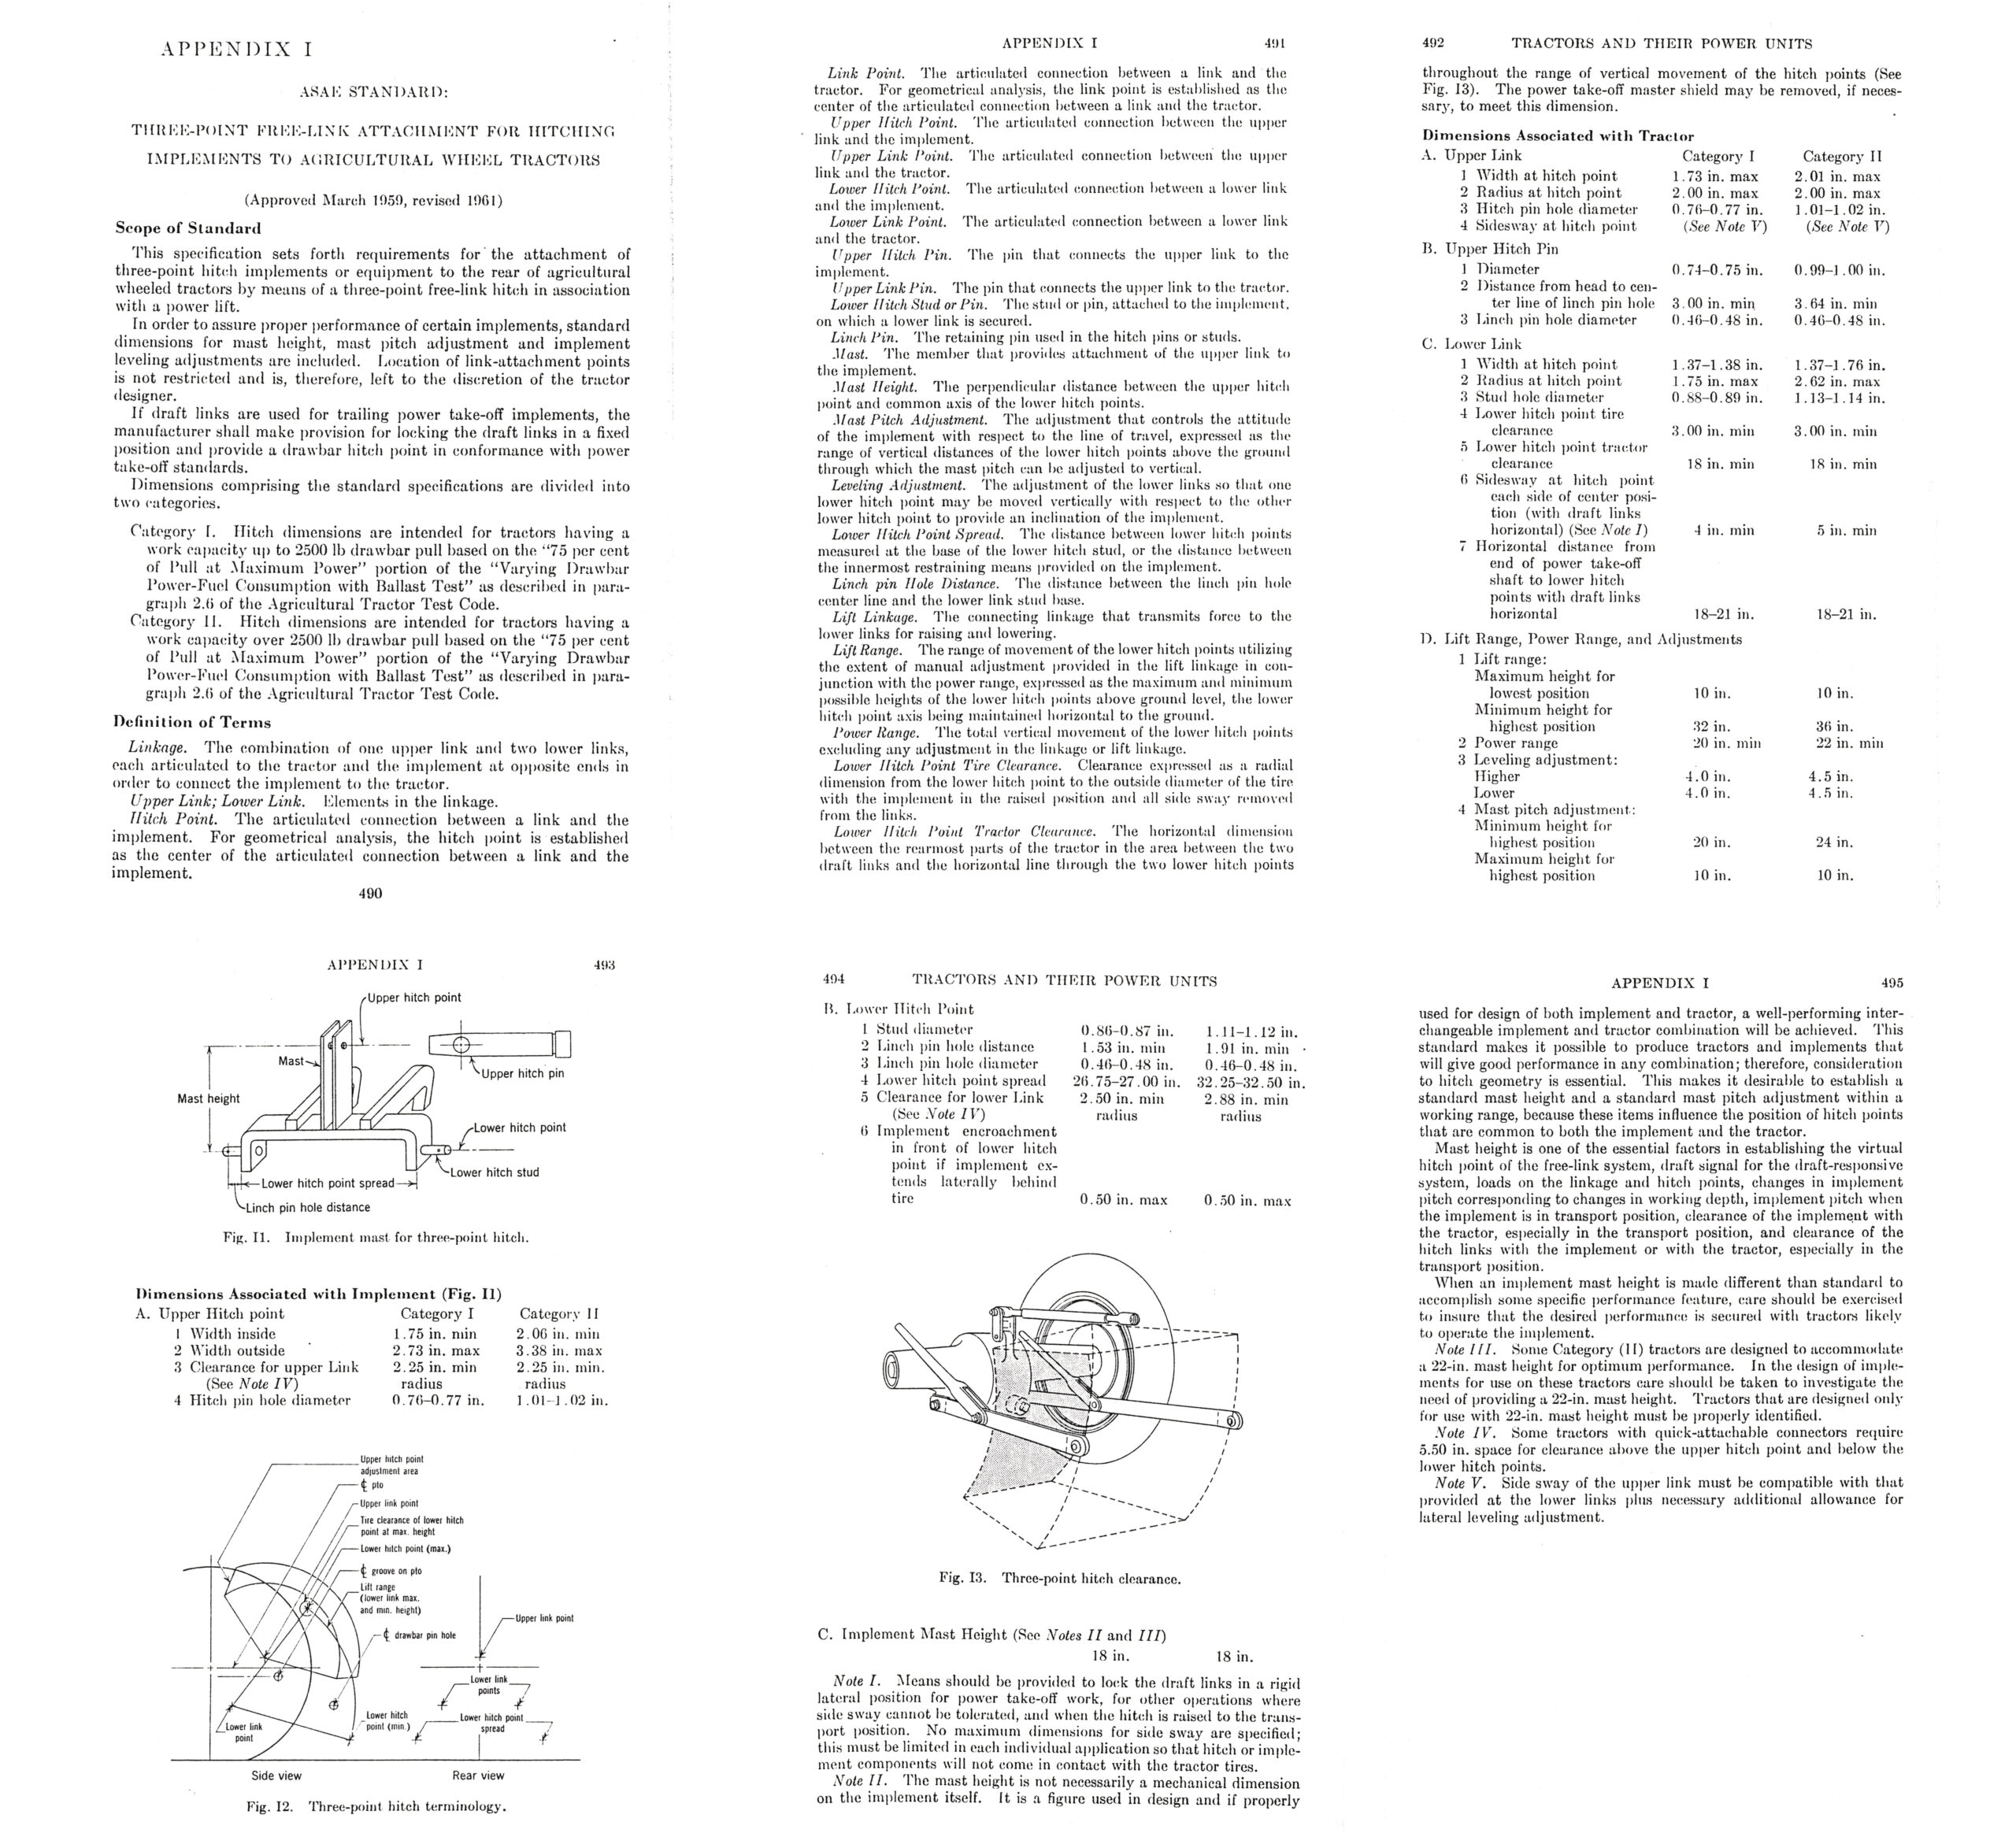
Mast heights are not discussed in the Ferguson plow literature. For our concerns, mast heights are dimensions specified in the ASAE Lift Category standards that were developed through the 1950’s. The Ferguson System that started the whole ball rolling in 1939 is known as Category I. There is way too much about it to discuss here, but in a nutshell, it establishes a multitude of dimensions (both working and static) between parts. One of these dimensions is the 18-inch mast height. This dimension is actually found on the implement rather than the 3-point lift itself, but it assures that said implement will lift, follow, and penetrate correctly within the Category I scope. Other categories are Category 0, Category II, and Category III. Each has its own unique working and static dimension standards. The Monroe Hydraulic Lift Kit is the only one of the five 3-point lift systems designed for the Jeep that fulfills the Category I standards. This means that all implements to be used with the Monroe Hydraulic Lift Kit must have a mast that is 18-inches in height. Making up the mast assembly is all of the parts that attach to the plow frame, extend upward, and terminate at the Upper Hitch Point. Measuring from the upper Hitch Point down perpendicular to the common axis between the two Lower Hitch Points would equal 18-inches. In the case of the plow, the Lower Hitch Points are located one on each end of the cross shaft. These three hitch points are what connect an implement to the two lower links and the one upper link on a 3-point lift. See the ASAE terminology and geometry for Category I 3-point lifts below:
Both the Love Hydraulic Lift -Hitch For Willys Jeep, distributed by Love, and the Love Hydraulic Lift System, distributed by Newgren, had much shorter designed mast height requirements for the implements. This was because Jabez Love designed both of the 3-point lifts so as to not interfere with the tailgate on the Jeep. Hence, the first-generation Newgren branded Wiard plow was designed with a very short mast height. I have not had the opportunity to see a plow produced by Love for dedicated use on his lift. I have also not inspected a Stratton Hydro-Implement Lift For “Jeep” Vehicles in person, but it appears from photos and vintage literature that the mast height would fall somewhere between the Monroe and Love designs.
If one tries to use a tall mast Newgren plow on a short mast 3-point lift, the plow will be tilted noticeably forward when lifted for transport (tail-high). The real problem is when the plow is lowered into contact with the ground. It may be possible to adjust it level upon first contact, but as it is penetrates into the ground from draft on the plowshares, it will develop more of a nose high tilt the deeper it goes. This in itself will cause the plow to immediately loose draft and penetration and return to the surface. The geometry no longer works correctly. One is trying to, “Put square pegs into round holes,” to coin a phrase. One may not even have any success getting the plow to penetrate to begin with.
If one tries to use a short mast Newgren plow on a tall mast Monroe Hydraulic Lift Kit, the opposite will happen. The plow will be tilted noticeably rearward when lifted for transport (tail-low) with the furrow wheel barely clearing the ground. Again, the real problem is when the plow is lowered into contact with the ground even after adjusting it to be level upon first contact. However, as it penetrates into the ground from the plow share draft, it will quickly develop a tail-high tilt and be sucked uncontrollably into the ground. At which point the Jeep will not be able to pull it and the plow will become the perfect deadman.
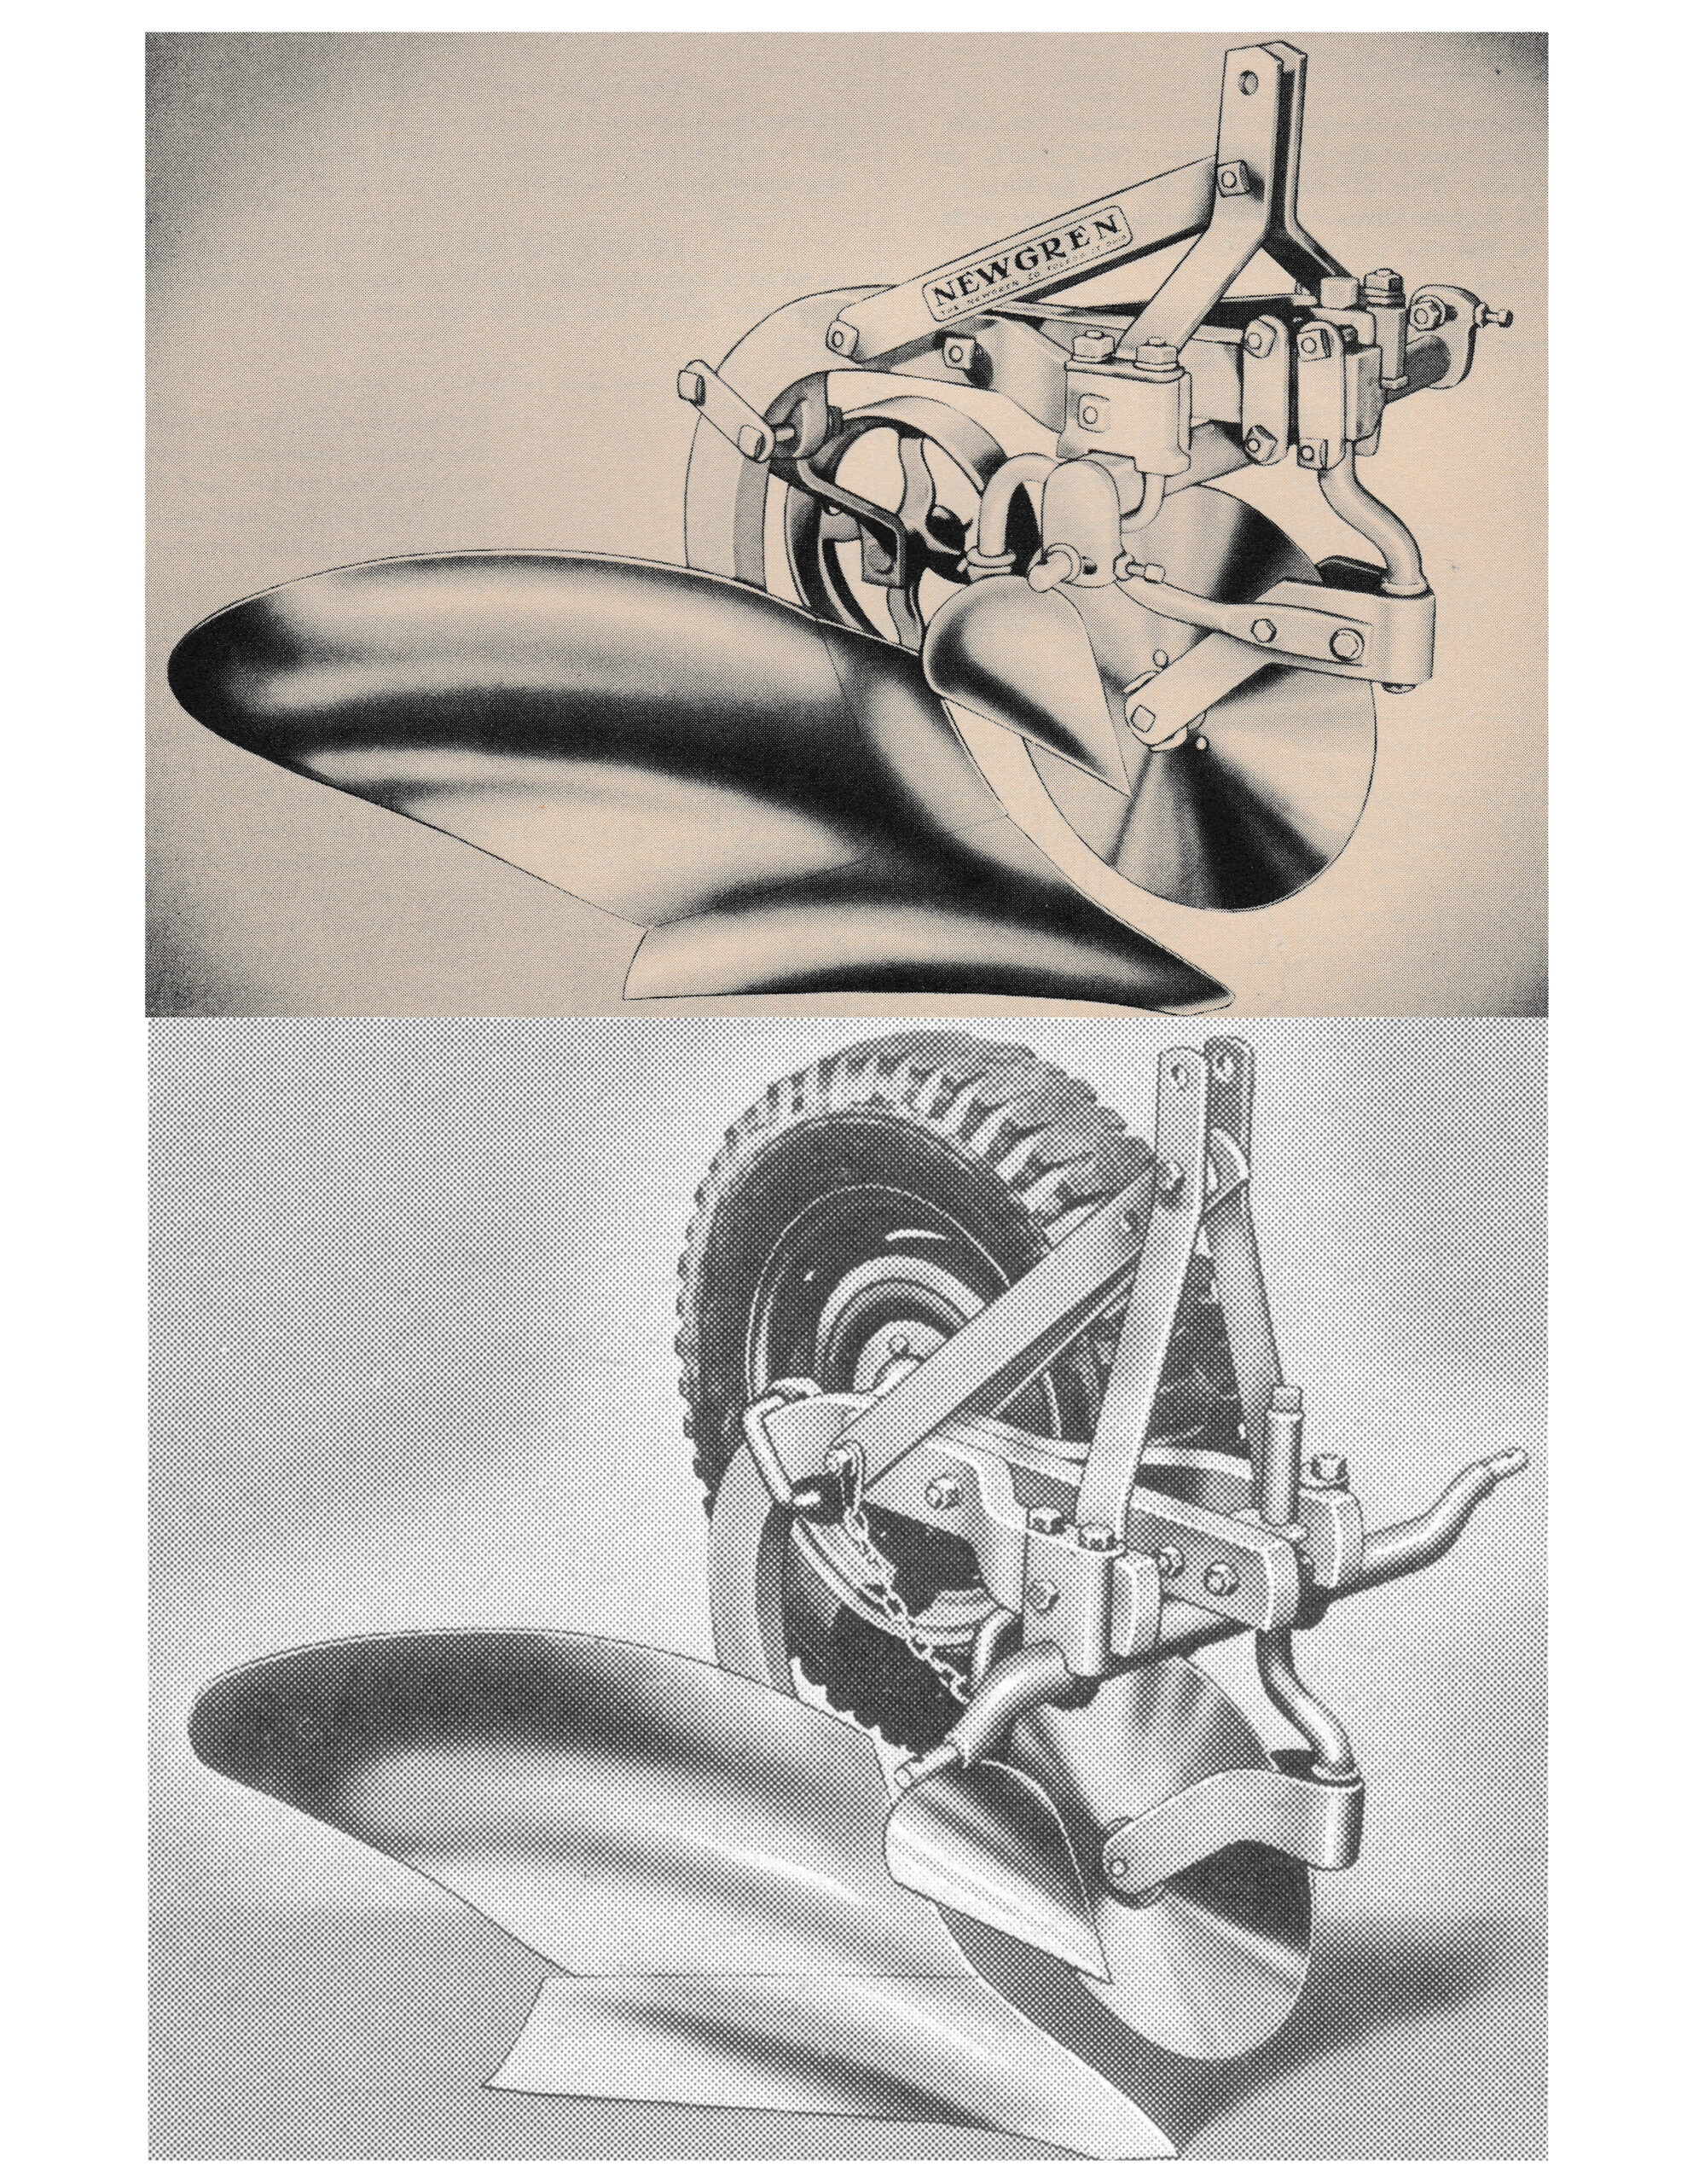
Below is an image providing a visual comparison of both generations of the Newgren plow. The plow pictured at the top of the image is first-generation Newgren branded Wiard plow. Notice the short mast. The short mast matches the geometry designed into the Love Hydraulic Lift System that was distributed by Newgren. The plow pictured at the bottom of the image is a second-generation Newgren plow. This one most closely resembles the Ferguson and Dearborn plows, Note the much taller mast allowing for geometry that measures at the Category I standard of 18-inches between the Upper and Lower Hitch Points. This tall mast matches the geometry designed into the Monroe Hydraulic Lift Kit:
Tractor guys only have to know that they have acquired the correct plow for their tractor. Jeep guys have an additional hurdle in that they need to have the correct plow for one of the five different 3-point lifts – which ever one they happened to find and have now mounted on their Jeep. That is the second answer to the question.
One must keep in mind that we have been talking about only the five most commonly found 3-point lifts that were designed for the Jeep. There were other implement lifts out there that may not have officially attained factory approval for use on the Jeep, but were nonetheless produced successfully in small quantities. These are rare and some may consider them to be orphan lifts. Nevertheless, they are desirable and worth searching for as they can occasionally be found. Each has their own design geometry and characteristics unique to the companies that built them. Most do not meet any of the ASAE Category standards established for 3-point lifts as they employ their own unique methods of attaching implements. Because of this, they typically require specialized farm implements designed to attach to them. Some of these include the implement lifts manufactured by Hydraulic tool & Equipment Co. (Hyteco Hydraulic Implement Lift), Farm-Aid Implement Co. (Farm-Aid Hydraulic Attacher), and Scheneker Iron Works, Inc. (Scheneker All Purpose Lift).
My third answer to the question centers upon one advantage that a Jeep does has over a tractor, except for plowing that is. Tractors have no suspension. So when everything is set correctly on a plow that is hitched to a 3-point lift, the plow acts as an extension of the tractor and follows the ground just as the tires, axles, and the rest of the tractor do. But with a Jeep having suspended axles, a problem now surfaces. The plow is hitched to the 3-point lift, but the lift is not connected to the axles and tires that are following the ground. It is attached to the frame above the axles with a compliant suspension system in between. As soon as draft takes control and the shares get sucked into the ground, the rear suspension of the Jeep squats in reaction to the load. This is not the worst of the problem as it eventually all reaches an equilibrium (assuming everything is adjusted correctly) and the plow then more or less acts as an extension of the Jeep. The worst part is that the plow needs to maintain a level condition from side-to-side as well as fore and aft. With a required depth wheel on the left side of the plow, that side is limited to the depth that the left side of the share can penetrate to (on a single bottom plow), or how far the furthest left bottom can penetrate (on a plow with multiple bottoms). But there is nothing on the right side to keep the plow level side-to side. Depending upon the adjustment of the plow, type of soil, and condition of the rear suspension of the Jeep, the leaf springs on the right side of the Jeep can compress substantially in response to the draft from the plow. This can make the whole show do an exaggerated tilt to the right. The plow is no longer level and no longer cutting flat and level furrows. Worse yet, some furrows are going to be deeper than others. That is the third difference between plowing with a Jeep and a tractor.
Somewhere along the way though, someone came up with a band aid fix. It can be viewed in the image below:
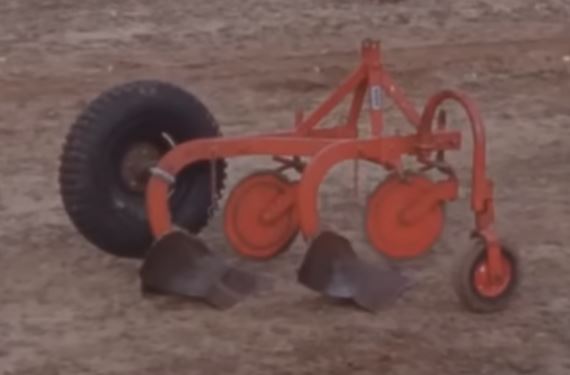
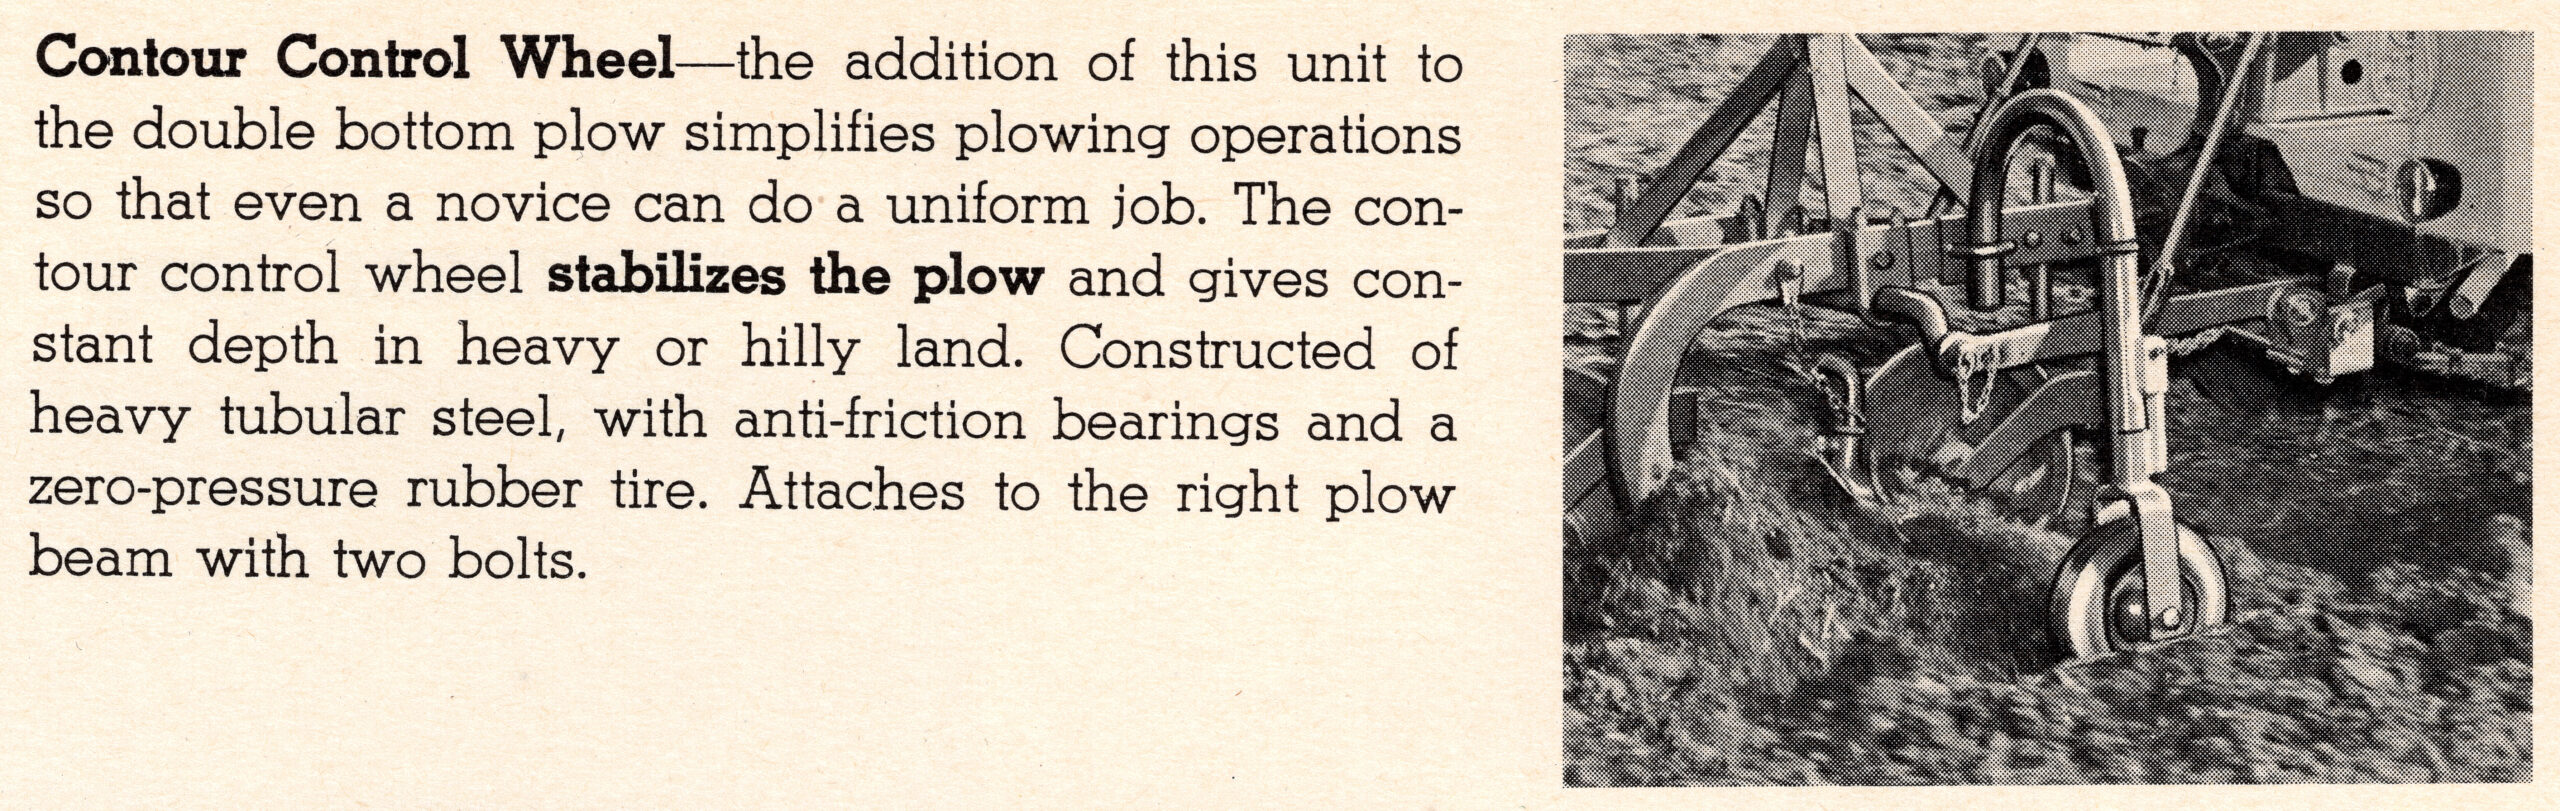
This additional wheel first appeared in factory literature, photos, and film in about 1953. I have yet to actually see one in person. The wheel itself is quite small and obviously designed to roll in the last furrow created during the previous pass across the field. The main design intent of this wheel (that I can see) is to take the load from the right side of the plow that results from draft, and direct it straight down to the ground. This, in effect, performs the same function as that of the large spare tire depth wheel located on the left side of the plow. This piece of optional equipment was referred to as the Contour Control Wheel and was designed for the double bottom plow. With it bolted in place, the unchecked load was no longer being transferred to the right side only of the Jeep. As a result, the leaf springs on that side were no longer reacting to heavy soil or hilly land and compressing in response. I hope to discover more about this mysterious plow attachment in the near future. The original sales literature description of the Contour Control Wheel can be viewed below:
That covers my third answer, now on to the fourth.
My final answer to the question of how plowing with a Jeep would be different than plowing with a normal tractor is one concerning visibility. One simply cannot view an attached plow as well from the seat of a Jeep as they can from the seat of a tractor. Not that one is supposed to be looking back at the plow all of the time. As long as everything is in good condition and adjusted correctly, the driver should be looking straight ahead at the previously plowed furrow and concentrating on keeping those right side tires against the wall of that furrow. But, we are still learning, and we have to look back once in a while.
So you have an implement lift all in working order and mounted on your trusty steed. You have located and acquired a correct plow with the required mounting geometry needed to attach to the particular make of lift that you happen to have at hand. You have absorbed every piece of reliable information you can find about plows, correct plow use, plow adjustment, and the elusive art of plowing, whether physically toiling behind a plow pulled by beasts of burden, or by comfortably sitting in a seat while in complete control of the agricultural vehicle of your choice with plow attached behind, and with the combination of either of the two above faithfully following your commands.
You have checked the condition of your plowshares, landsides, coulter discs, jointer, and furrow wheel. You have made sure that your plow beams, cross shaft, and mast struts have not been abused and sprung out of shape. All hardware is in place and tightened appropriately. You may have found that you had to buy new plowshares and/or landsides to replace worn out ones that could not be brought back to life by a good blacksmith. You may even have had to buy new moldboards or had to have cracks properly welded and/or broken pieces replicated on your old ones. Your check chains are in place. Your mast height correctly matches what the manufacturer of your implement lift intended in their specific (and maybe unique) design.
Your moldboards are scoured as best as can be expected by utilizing electric power tools and/or good old fashioned elbow grease, and protected from rust by a good coating of quality Plow Coat. Coulter discs are sharp, scoured, and plow coated as well.
In addition to the hydraulic lift of your choice, you have successfully located and installed on your Jeep all of the special equipment that the vintage Willys-Overland Motors Inc. literature indicates as “required” before vehicle serial number 178936: Drawbar, heavy duty front springs consisting of 10 leaves, longer extension front shock absorbers, and front axle bumper block spacers. Parts required before engine serial number 190234: Fan and governor drive pulley. You may have even installed their “recommended” equipment: Heavy duty rear springs consisting of 11 leaves, governor, radiator chaff screen, propeller shaft guards, front bumper weight, and 7.00 x 15 tires. If your Jeep is a CJ-3A, you have raised your bottom mounted radiator by the required ¾-inch and verified that your hydraulic pump manifold is of the “new type” to avoid interference with the steering bell crank. Your plow has the depth wheel adapter, and you may have even found a contour control wheel to attach to it for further stability.
It is now time to get out in the field and try her out. Things do not work quite as expected. Books are reread, websites are revisited and vintage sales literature and plow manuals are consulted. You may even go so far as to bend the ears of respected elders. Adjustments are made and you try again. Things still do not work out quite as expected. Rinse and repeat. Rinse and repeat. Finally, after a lot of errors and a steady building of experience and confidence, you get the hang of it and start having fun plowing. Now you feel it is time to join up with some others who may be getting together for a plowing day, and to show them all just what an old Jeep can do. Weeeeell…not so fast…
Casual plowing events are usually hosted by local antique tractor clubs. In order to operate equipment, first one will probably be required to join their club beforehand. This is due to rules established by their insurance companies. Along with this is usually the requirement to sign a release. If the event happens to be at an organized working farm show, threshing bee, or harvesting demonstration, where there are to be paying spectators attending, the organizers will expect one to have all of their equipment in tip-top shape and working correctly beforehand. They take in money from admission put it back into the club in order to fund the show the following year, to buy seed, fertilizer, pay for insurance, etc. The object is to draw spectators to the show and the more who attend the better. No one wants to see someone making constant adjustments to implements and holding up the show. Most of the plowing at these shows is performed in a follow-the-leader procession. You will be plowing using some else’s previous furrow as a guide. And, someone else will be following close behind using your last furrow as their guide.
As they tell us at our antique tractor club’s fall show, “As long as you are making a lot of noise and a lot of dust, the guests will be happy.” Since these events are not contests, accuracy is not necessarily the goal here and furrows are not going to look nice to the trained eye. You may be plowing through fresh corn stalks right after the corn pickers have left the field. You may have a 12-inch two-bottom plow all set and working perfect for your practice plot at home. At a show, one may find themselves following someone with a 16-inch single bottom plow and are plowing inches deeper than they should be. Or one may be following someone with a 14-inch three-bottom plow behind a tractor with barely enough horsepower to pull it. They may be only scratching the surface of soil under the trash in order to keep moving.
Plows are designed to plow to a depth of half the width of the furrow each bottom turns over, plus 1-inch. Thus, a 12-inch (width) plow should be set to plow at a depth of 7-inches. A 14-inch plow set to plow at a depth of 8-inches, etc. You may even find that your plow may have the perfect bottoms for the particular soil you have in your practice plot. Don’t count on them being perfect for the soil type and conditions you may find at the show. For instance, slat based plows are designed for heavy sticky moist clay. They will not perform the same in sandy soil. Also, if you are not adjusted to plow as deeply as the guy ahead of you, your Jeep and plow will be leaning further to the right due to the deeper furrow you are following. This will cause your furrows to be uneven.
So we have all now graduated from Geometry Class. Your diploma will be in the form of how nice your furrows look in the future. For those wishing to continue on the path of learning and delve into Algebra II and Trigonometry, I might suggest reading a forum thread I joined in on 14 years ago that expands upon what we have been talking about. It can be viewed on the N Tractor Club website at the link below. I join in with the discussion by using the handle monroe 3pt about half way down the thread:
https://ntractorclub.com/forums/implements/messages2/7929.html
Don’t get too hung up on all of this though. The point of plowing with antique equipment is to have fun, and to enjoy the camaraderie of others with similar interests.
So without furrow ado, let’s get started!