It is a simple fact that many old machines leak fluids. Time, wear and tear on parts mean sooner or later those issues are going to need to be addressed. Ole Blue has had an oil leak from the front crank shaft for years. It has gone from a drip to a puddle on the floor to a splash on the oil pan lip that gets sprayed all over the engine bay by the fan. Each winter we had planned to address the problem, but something else, usually the hydraulic pump, got our attention first. The past couple of years we have restricted driving the 3a to a few hours at shows and with no shows in 2020 Ole Blue just sat, waiting for some attention. The time had come.
One of the joys of working on old Jeeps is the simplicity of getting to the engine. But to work on the front of the engine, you need to remove the grill and radiator (with the shroud). It takes a few minutes to disconnect the wiring from the driver’s side fender for the lights and to drain the radiator. Then a dozen or so bolts are removed where the grill is attached to the fenders and from where the radiator is attached to the grill.
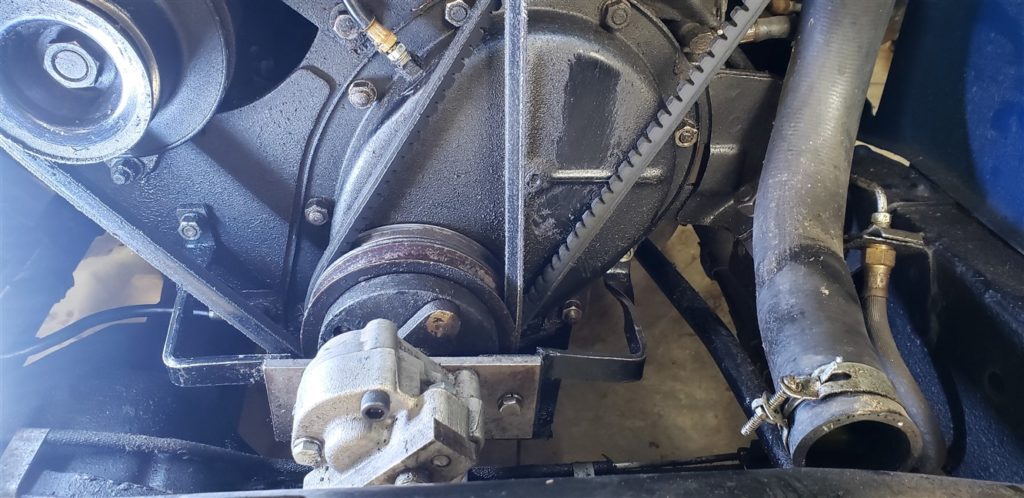
The old style Newgren pump bracket is held on by four oil pan bolts and two on the front of the engine. We have installed and removed the pump with the grill and radiator in place, but as you can see, having them removed makes this task simple. With the pump and connector removed, we could then remove the fan and generator belts. The remainder of the prep time was spent cleaning the engine bay.
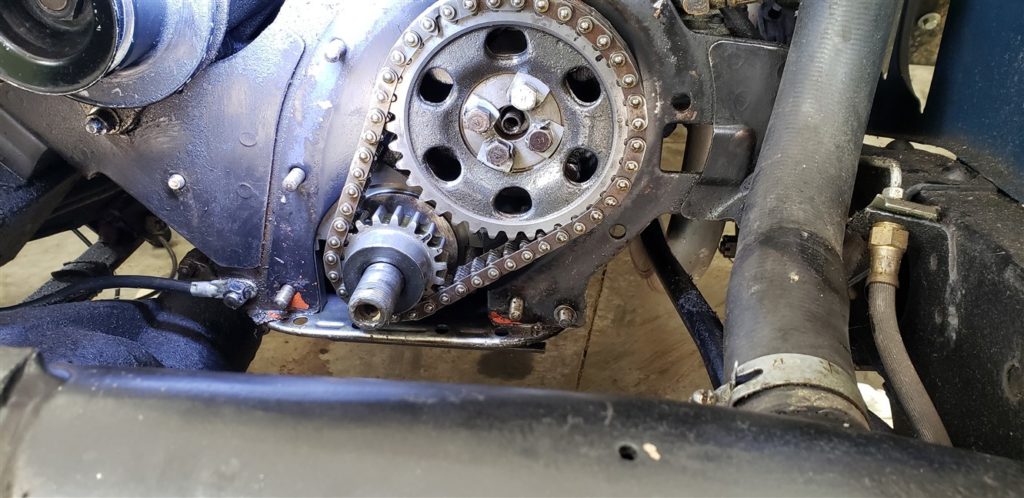
Ole Blue has an early model engine. Later model 2a and 3a motors switched to gear driven camshafts. This doesn’t matter in fixing our leak, but we have included this shot to point out the area below the crankshaft gear. The front lip of the oil pan and the two “corners” where the oil pan, engine mount plate and engine block all meet is notorious for leaking and we will have our own issues. More on that later.
There’s your problem…
As with many of our past problems, we searched for solutions on the CJ2a page. Once again, the forum came through with an answer. But first, the problem. There are two areas that can leak where the crankshaft and pulley meet. A common, but easily fixed problem is where the pulley slides on the crankshaft. Oil will sometimes seep along the shaft and leak behind the nut that holds the pulley in place. No amount of tightening will stop the leak and there are no seals to replace. However, a small amount of sealant or gasket compound placed behind the nut where the shaft and pulley meet will almost always fix that problem.
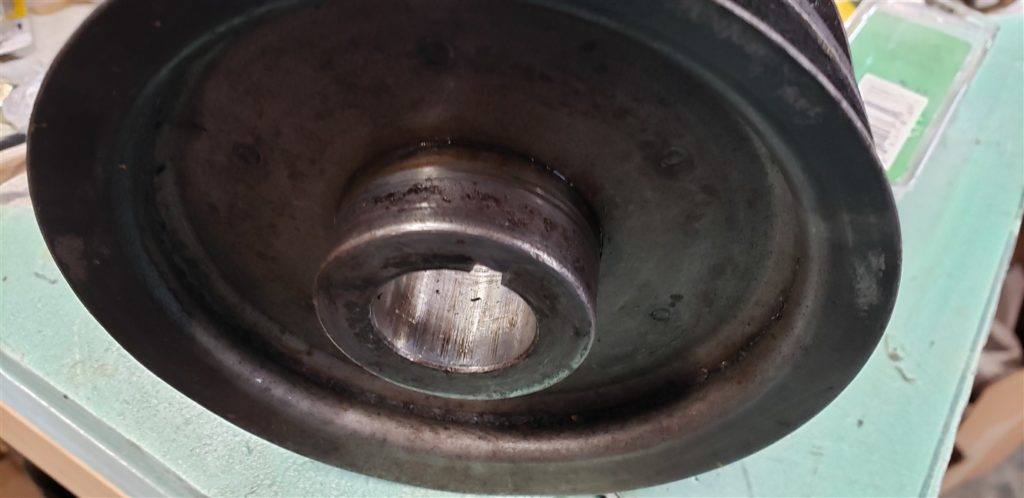
Our leak was between the outer pulley shaft and the timing cover seal. You can see significant wear in the above picture. The most common cure requires replacing the seal and the pulley, since both are readily available. We didn’t want to replace the pulley. First the pulley is the early style “flat face” lacking the three tabs found on most reproduction pulleys. Those tabs were added by Willys after the switch to the pump mount used by the later model Newgren, the Monroe and the Stratton lifts. So while the newer style pulley was readily available, we would have had to hunt for the older style. Plus we would have to drill new nut “anchor” holes. Not terrible problems, but we thought there was an easier solution,
The solution for us was to repair the pulley’s worn shaft. That would normally be a major undertaking, one far beyond our limited metal working skills. Luckily this is not an uncommon problem in the machinery world and there is a ready solution. The generically named “Speedy-Sleeve” is a very thin piece of aluminum that covers the worn shaft. No need to change the seal size. Installation is easy. Using the provided tool, you simply hammer the new sleeve in place. Brian W on the CJ2a forum provided us with the “Speedy-Sleeve” part number we needed.

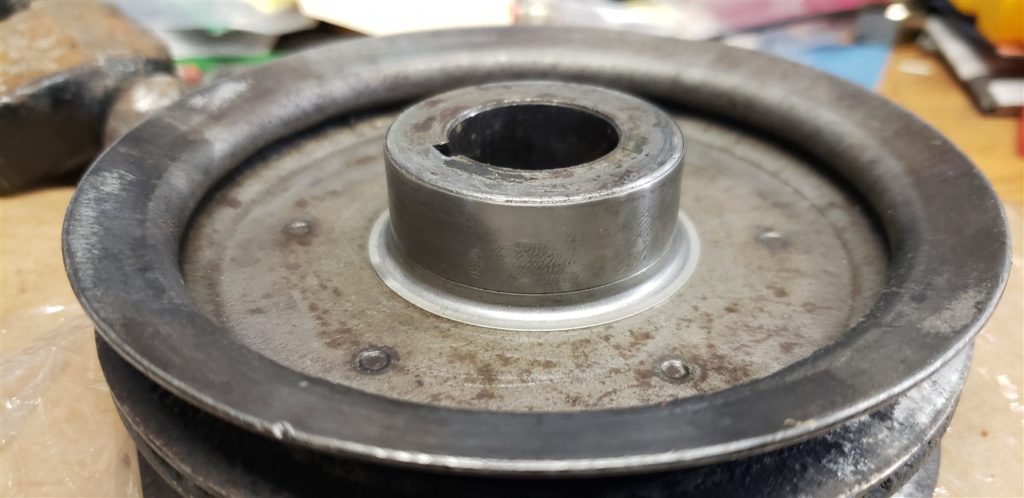
As you can see, you have a brand new surface. With the addition of a new timing cover seal, the leak disappeared.
But wait, there’s more…
Most stories, would end here. But like many of the stories we have posted, we are just at the beginning of this adventure. This is both a cautionary tale and another reminder to us if (when?) we face this problem again.
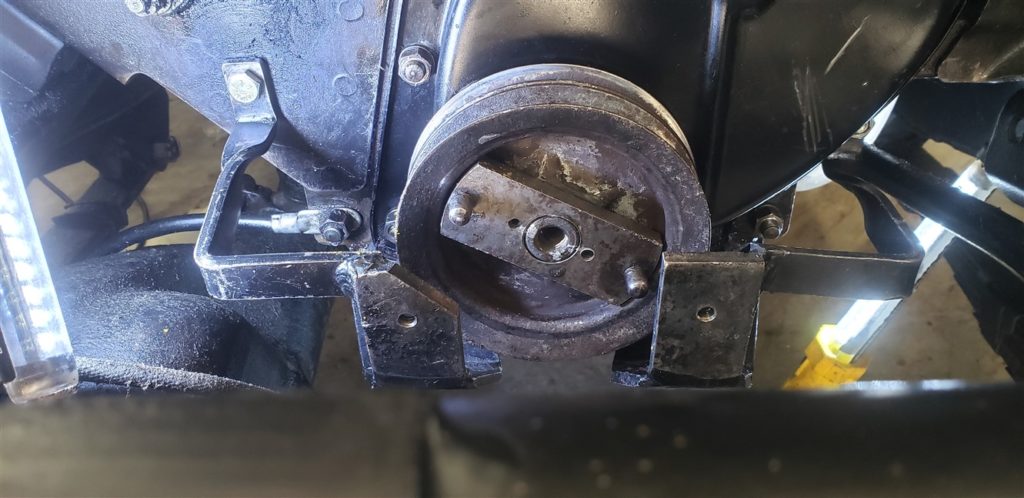
The first part of the fix, as outlined above went smoothly. The re-assembly was more problematic and, as usual, many issues were avoidable with a little forethought. The first issue was getting the pulley back on the crankshaft. While the pulley simply slides on the shaft, both are “keyed” so they are locked together. The crankshaft has a small half-moon shaped groove that holds a removable “key”(commonly known as a woodruff key). The pulley has a groove cut (visible in the “wear” picture above), so that when you slide the pulley over the “key”, the two are locked together. Simple enough.
That is until one stops the engine so that the “key” slot is at the 6 o’clock position. Every attempt to push the pulley on would result in the key falling out of the slot or rotating so as to prevent the pulley from sliding past. Grrrr. The solution was to place a tiny bit of grease to hold the key in place. The better solution, which we employed almost immediately, was to mark the location of the keyway on the tip of the crankshaft and to stop the engine so that the key is between 10 o’clock and 2 o’clock position before removing the pulley. Gravity will hold the key in place. If you look closely at the picture above, you will see some silver paint at about the 6 o’clock location. That is where the keyway is located. The other markings help to align the pulley nut with the anchor holes drilled in the pulley face.
Moving the leak…
Note to selves – start the engine BEFORE totally reassembling the Jeep. Confident that we had fixed the leak, we reassembled the Jeep, filled the radiator with coolant and started the engine. Drip, drip…
We had moved the leak to the front of the oil pan. Details are omitted here. As mentioned at the beginning, this is a known problem area. In our rush we hadn’t been careful enough and the result was doing the job not once, but three times before we got the leak stopped.
We did get the leak stopped, using a couple of the techniques found on the CJ2a forum, so we won’t repeat them here. We also learned a couple of things and are recording them here for future reference. In addition to the marking of the keyway discussed above, we learned that reassembly of the front end is easier if you loosen all the fender bolts (bolts to body).
Moving backwards…
Now that the floor under the front of the Jeep is dry, we will start looking at the “markings” from the transmission/transfer case area and the leaking PTO seal. Another day.