Farm Jeep Goes To An Antique Machinery Show

There is Blue, in the middle of a row of fine antique tractors!  After years of saying we were going to take the jeep to a tractor show, we finally did it.

Following up on our last post, Thursday was final preparation day.  The hydraulic pump was bolted on the mount in front of the crankshaft pulley, but not connected and the 265 lb front bumper weight installed (with the help of the engine hoist).  Finally, we gave Blue a quick bath to get the dust off.

One goal of Farm Jeep has been to collect and share information and stories about jeeps being used on the farm.  At most shows, tractors are lined up and each exhibitor determines what, if any, information to provide.  Most provide signs with the owner’s information and the date the tractor was built but very few provide additional details.  Believing few people would have seen a farm jeep, Barry resorted to pre-retirement skills and created a short paper-based PowerPoint presentation to accompany Blue.

It had been the plan to drive Blue to the Brown County show, since we can get there on back roads, with only a short stretch of busy highway.  But between the valve and clutch noises, we felt it best to give Blue a ride on a trailer.  So early Friday Barry picked up the rental trailer and loaded up Blue for the 30 minute trip.  It was an easy drive and Barry was soon standing in front of the registration desk asking where he could park Blue.  He explained it was equipped as a tractor and didn’t want to exhibit it in the old trucks and cars section.  After a couple of phone calls, he was told to park at the end of a line of John Deere tractors.

Along with the PowerPoint slides, Barry had 3 old ads mounted in picture frames to help tell the story.  After watching people’s interest, he determined that a better plan was a loose-leaf notebook with copies of ads from the Web site would be a better idea.  The combination worked very well for the second and third days.  We were the best documented tractor and it was really appreciated by the many visitors stopping by.

People seeing the jeep fell into 3 main groups; those who had never heard of a jeep “tractor”, those who had heard, but never seen and then a very few who had used a jeep on the farm or had neighbors or friends who had farm jeeps.  This latter group provide to be the most fun, and it was clear Blue brought back some great memories.

There was a large group of “I’m sorry I sold my jeep and I sure wish I still had it” visitors who also told stories.  There were several vets who wanted to talk about their military jeep adventures and a WWII vet recalling his days in the muddy fields of Europe.  It is  unfortunate that we didn’t have a way to record some of the stories.

Friday and Saturday were extremely busy, but by Sunday noon, most of the tractors had been loaded up for home.  We stayed until after lunch, then loaded up for a quick trip home.  It was great fun and we anticipate doing more shows in the area.  Next year will will drive Blue to this one.
All Dressed Up and Someplace To Go!

The Brown County Antique Machinery show is held the first weekend in May each year.  We have been trying to make that show for the past several years, but have never been quite prepared.  We aren’t finished, but we are going to take Blue on a road trip “as is”. 

Blue is running and even though we are planning to change the motor, it is road worthy.  It lacks a working hydraulic pump and the cable to control the governor.  At least people can see a real Farm Jeep.

The first task was to install the PTO shaft.  This is normally a very simple job, involving installing and bolting the rear shaft flange on the gear box and bolting the shaft in place.  A some point, the splined shaft on the rear of the gear box had been damaged.  The gear box had to be removed and the bolt hole had to be re-tapped.  So the normal 30 minute job turned into a 3 hour task.

The gearbox turned easily, so we filled it with gear oil and started the jeep.  The PTO worked perfectly.  Except for a small leak on the back of the box.  We will need to remove the box and see if it is a quick fix or a tear down.

Several years ago, we find a Willys belt pulley assembly on e-Bay.  It was mis-identified as being for a tractor, but we had done enough research to know a Jeep pulley when we saw one.  It was a paper pulley, instead of the more common steel type, and it had to be rebuilt.  There is still a company – www.paperpulleys.com – that rebuilds paper pulley drums and we had them build a pulley using our frame.  The drum has been sitting on a shelf for a few years.

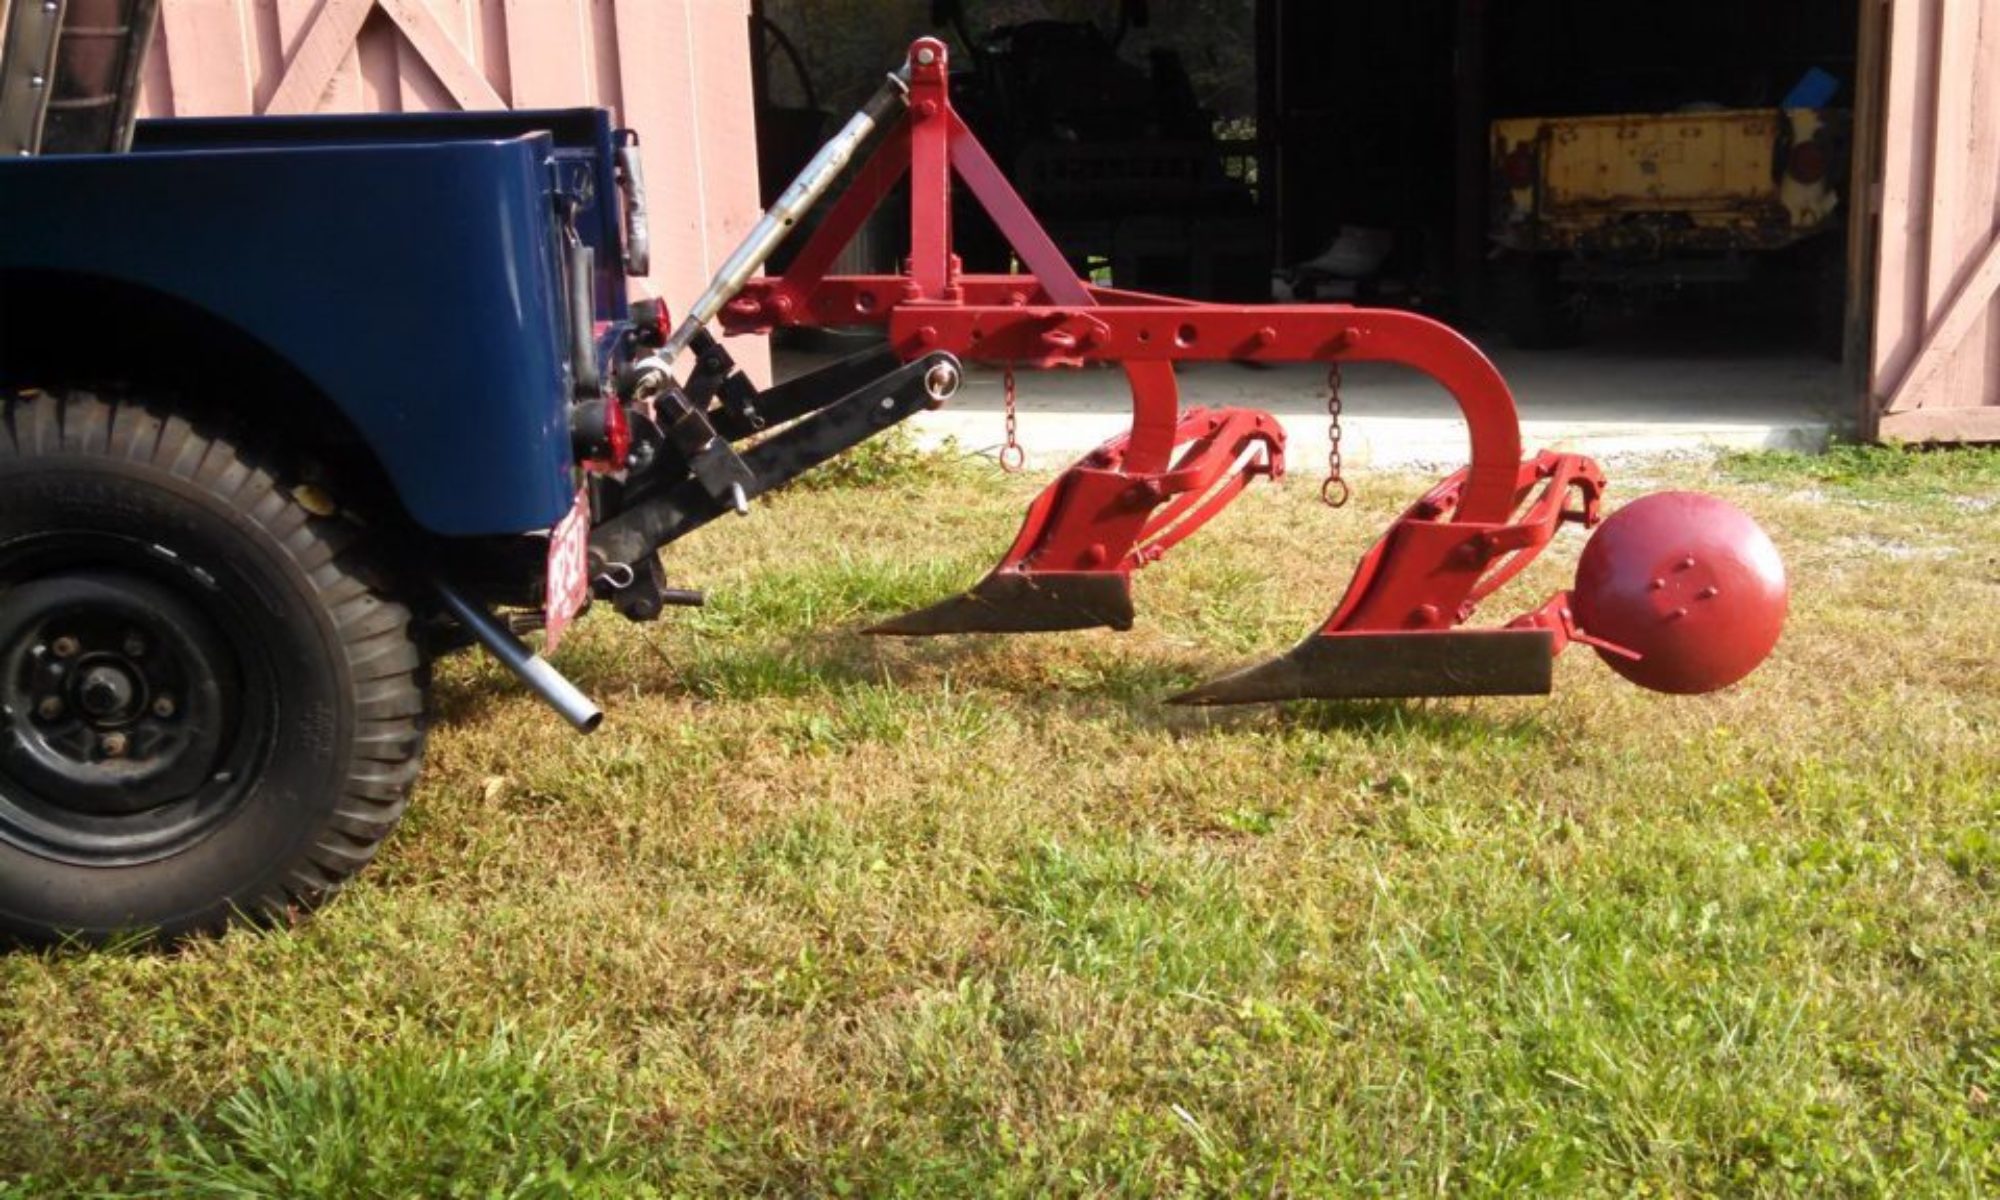
The pulley gear box had been on the shelf too and we decided to just clean it off and install it as a show item.  The assembly was a simple bolt-on process and the drum turns freely.  We need to paint the gearbox, but that can wait.

In the picture above, you can see the lift arm to the right of the drum being held in place by an original adjustable link.  The second link is rusted solid and will need some work.  For this show, we have used the reproduction links we had on hand.  This should at least give folks a idea of how the lift operates.

Other than a quick bath, we are ready to go.  We will report on our first outing

Farm Jeep Spring

Farm Jeep is coming out of its winter hibernation.  With the garage doors opened we changed the coil on the stand engine, to prepare it for the 12 volt 3a.  After a test start, we removed the engine from the stand and will prepare it for the exchange.  That means removing the face plate, which is a 2a style, and replacing it with 3a face plate.

Too much of a bling thing..

Getting the 3a to be street legal was a year-long struggle.  Among the requirements was working wipers.  The easiest fix was to install two “universal”12 volt wiper motors.  This project was chronicled in an earlier post.  Somehow, those chromed motors stuck out like a sore thumb on the windshield.  There had to be something better.

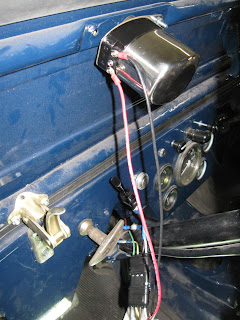
Original windshield equipment included a vacuum wiper motor on the driver’s side and a manual “hand” wiper on the passenger side.  Using a vacuum motor would mean changing the fuel pump (to power the motor) and might be a future change.  For now, we are going to use a painted motor with a built-in switch.

An original hand wiper appeared on e-bay and we purchased it with the idea of restoring it.  However, it was too far gone and a reproduction was our only option.  The reproduction is for the 2a, with the shorter, split windshield.  It is 2″ too short to work on the 3a.  A 2″ section of rod was welded in the middle to make it the proper length.  We need to find a grommet to finish mounting the wiper.

Ahead is an engine exchange and maybe a wiring re-route to accommodate the governor cable.

Still a mystery…

The new engines have settled in to their new home.  Barry had started the “stand” engine, just to hear it run again.  Evan and Barry discussed what they would like to do if they make the engine swap.  The first issue is to find another 3a faceplate or face (no pun intended) taking the fronts off of both engines.  So another shopping opportunity.

Removing the engine means taking things apart again.  While a necessary evil, it will be an opportunity to correct/change a couple of the things we did the first time around.  A good example is the location of the wiring harness through the firewall.  Where installed, it blocks what should be the exit point of the governor control cable.  There will also be the opportunity to examine the clutch installation.  There is a noise when the clutch pedal is pressed that neither Barry or Evan have heard from another jeep.  It may be a throwout bearing issue.

It has been years since the first motor was installed and that was without the body in place.  So there will be new tricks to discover and the need for lots of documentation to make sure it all gets back together.  Stay tuned for the adventure.

Meanwhile back in the garage, Barry has been researching the origins of both motors.  With the help of the great folks on the CJ2a page forum (especially Sean), the stand motor has been identified as an MB (military) engine built in mid-April, 1945.  Where it had been (and what vehicle it might have install in) remains unanswered.

But if the “stand” engine has secrets, the “box” engine is a true mystery.  It started out as, most likely, as an MB engine with a chain timing system.  Casting numbers and the assembled date of 6-21-45 mean it would not have had timing gears.  Unless it was an experimental engine.  A modification was made to the block and a section of cast iron was sewn into the section above the cam shaft.

After several exchanges of notes and pictures, Sean posted the following note –

“With those pics, I am now convinced you have a real “buy-back” block: was originally an MB engine, bought back as surplus by Willys after the war, whereupon they ground off the MB number & restamped the water pump boss with a current civilian production number.
But, I don’t think you’ll ever be able to recover either original number.  They did too thorough a job of eradicating them, too bad.
Questions/mysteries remain though.
Who did the conversion & when?  What do the other number stamps on the side of the block mean?  What was the “restamp” number?  We may never know.
The sole remaining letter on the water pump boss might be either a “J” or a “T”.  “T” was used on pickup trucks, which weren’t made until 1947.  Early engines were stamped either “2T” or “4T” (2wd/4wd)
But, stampings were done by hand, and often poorly/unevenly.  If/when a block got milled, some letters/numbers were only partially wiped out (easy to see in my number above).  Almost looks to me like yours might be a “J” with the lower curl wiped out (can almost detect a curl in both photos).
Now IF this engine had been bought-back after Willys changed to gear drive, the serial prefix at that time was a simple “J”, not the full “CJ-2A”.  And then it would have fit on 1-line, not the 2-lines needed for the full prefix.  So that’s a possibility.
I doubt the “T” for a couple of reasons:
  • Trucks weren’t made ’til ’47, much beyond the known, documented buy-back time period (though it is still possible)
  • The top “bar” isn’t wide enough for a “T”, but is for a “J”, such as on this buy-back
Sean” 

(You can read the complete article at http://www.thecj2apage.com/forums/2-motors-to-id_topic21610.html )

So for now the origins of the engine will remain a mystery.  Most fitting, since it will most likely end up in Ole Blue, who has identify issues of its own.

Jeep parts retrieval trip (JPRT)

Ole Blue’s motor just doesn’t sound right.  We have valve noise, white smoke, and low compression in the #4 cylinder.  Before we do much highway driving we need to do some major motor work.  While we would have the winter to do the engine work, Barry decided it might be worthwhile to find a newer engine.  So he began to search e-Bay and Craig’s List and also called some jeep parts suppliers looking for an engine.

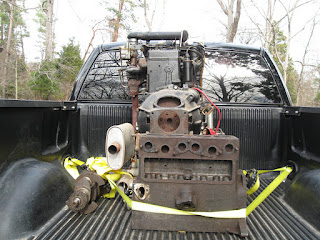
An ad appeared on Craig’s List for a engine from a 46 CJ2a.  It was mounted on a custom built engine stand so that the motor could be started and run.  It had been completely rebuilt and sounded like a good replacement (even if temporary) motor.  To make it more interesting, the seller also listed a second disassembled engine too. 

Readers might remember that we did a JRT (jeep retrieval trip) for both jeeps.  The motors were located about two and a half hours from home, so this called for a JPRT (jeep parts retrieval trip).  Unfortunately, Evan couldn’t make the trip, so Barry started out early on the adventure.  JRTs and JPRTs are adventures and it is always fun to meet the people and to learn the stories and histories associated with whatever we are trying to buy.

The trip to north central Indiana was uneventful and the GPS took Barry right to Randy’s (the seller’s) house.  Randy started the engine and the deal was made right then.  It was the sweetest sounding little L-134 Barry had ever heard.  As Randy said, it is highly unusual to be able to hear a motor that is out of the vehicle before you buy it. 

While Barry hadn’t really intended to buy yet a third engine, he couldn’t resist what he saw stored in a large metal box.  There were lots of parts, many new and the engine appeared to be complete except for the connecting rods.

Randy had purchased and rebuilt the one motor for use in a custom garden tractor.  The project was never completed, but he had taken the motor to some antique tractor shows.  He loved to just hear the motor run and is looking forward to seeing it returned to a jeep.

Randy had a tractor with a loader that made it easy to place the motor and stand in the truck bed.  After an hour of talking and loading, Barry headed south.  The return trip was also uneventful, except for some totally unexpected rain showers north of Indianapolis.

Two and a half hours later the motors were home.  With some help from Paula, Barry used his loader forks to get the motors in the garage.

 
The next step is to do some identification of what motors we now have.  External signs indicate that the engine on the stand might have a chain for timing (thus an early engine) while the “parts” engine has gears on the crank and cam.  But a very successful JPRT!

Ole Yeller gets a brake

The 47 CJ2a we call Ole Yeller was and still is our working farm jeep. It lives in the barn and gets little attention. It always starts and runs well. It does smoke a little and the body is still in terrible shape. The major tasks this time of year for Ole Yeller involve hauling chainsaws and equipment into the woods and pulling a trailer full of firewood up steep trails. Last week, Barry climbed into Ole Yeller for another round of wood cutting. It cranked, but wouldn’t fire.

As stated, this is a reliable starter. Something seemed to be wrong with the fuel. Barry pulled the glass bowl on the fuel pump and saw lots of brown particles on the screen. He cleaned it as best he could and reinstalled the bowl. He cranked the engine again and it still didn’t fire. Time for the time-honored, but dangerous, technique of pour a little gas down the carburetor to see if fires. It works and Ole Yeller seems to be running fine. But maybe it is time for a real fuel filter.

There is no evidence of a filter ever being installed and it seems to be a cheap investment. The auto parts store wanted to do a vehicle look-up to get a part number. After suggesting that the jeep didn’t have a filter they finally came up with a “generic” model. That should work. It didn’t. The short section of rubber hose was too small to accept the filter. But Barry did discover that the inlet line to the pump was loose. When he removed the rubber line, the steel inlet line swung free! That would explain the fuel problem, but the filter still seemed like a good idea. Back to the parts store for a different filter. The parts guy paraded six different filters out, all with fittings too large to fit the line. Finally settled on a packaged model with multiple fittings.

Evan was scheduled for a “jeep day” and, while Ole Yeller was parked in the garage, it seemed like a good time to get another project done. On the parts shelf was a brand new e-brake cable. None of the farm jeeps Barry had driven had a working e-brake. But the working e-brake on Ole Blue was great, especially on the hills of Lawson Hill Farm.

e-brake screen door spring

While Evan installed the new fuel filter, Barry started disconnecting the e-brake cable. One of the many joys of owning an old jeep is discovering what changes the PO (previous owner) has made. In this case, we have the multi-part (tab with hole for wire attached to a spring) brake lever return mechanism replaced with an old fashion screen door spring and a couple of bolts. Perfectly simple and perfectly functional!

Getting the cable disconnected was much more challenging. By all appearance, it was the original cable installed at the factory. The cable cover (metal) was attached with clips at two points on the engine/transfer case and to the firewall. The cable was attached to the brake lever and to the “cane” handle under the dash. The adjustment clevis had been coated with leaking fluid over the years, so the nuts turned easily, but required some time since there was limited space for turning a wrench and ratchet.

Separating the cable from the handle took a hammer and chisel. Evan managed to get the clip off the firewall and Barry was able to get the clip out of the engine block. The last clip was on the transfer case and covered by the transmission/transfer case skid plate. As we took a look at removing it, it was clear that the PO had bend it on rocks or stumps or something. The easiest way to reach the clip was to drop the skid plate. However, there appears to be a rivet in one corner and 3 bolts in the other 3 holes. Our second option is to drop the cross member, but that would be a major undertaking.
 

The big wrench extension

 The only other option was to reach in on top of the skid plate with a long wrench and use a socket through a hole in the skid plate. Luckily, Evan has long arms and by stretching could reach the top nut. Even luckier was the bolt breaking after a couple of turns.

At some point during this process, Evan asked if we should check and see if the e-brake was still operational. Barry had assumed that the frozen cable was the issue, but had no idea if the e-brake itself would still function. So Barry crawled under the jeep and activated the brake lever while Evan rocked the jeep. With both relief and surprise, the brake stopped the drive shaft from moving! If we could get the new cable installed, we could have a working e-brake.

The reinstall was much less dramatic. Evan noted that the install of the cable to the handle in the dashboard was much simpler that on the 3a. That was due to the hole in the dash were the PO had installed a radio. He could see what he was doing, With the handle reattached and the clips bolted back in place, Barry reattached the cable to the brake lever and hooked up the screen door spring. Evan pulled on the handle and we had a working e-brake! 

Access hole to right of the e-brake handle

 A test drive proved that we did have a working e-brake. It did require a hard pull on the handle on the steepest part of the jeep trail in the woods, but it did hold. We may do an adjustment, but for now we will enjoy our new safety feature.

Who needs wipers?

Our farm jeeps don’t have tops and, in the case of Ole Yeller, there is no windshield. So we have never worried about windshield wipers. That is until we decided it would be fun to be able to drive Ole Blue on the road. To pass the antique vehicle inspection, we had to have both a windshield and working wipers.

A 1949 CJ3A would have come with a vacuum wiper motor on the driver side and a manual wiper on the passenger side. Ole Blues windshield had no glass and an electric wiper on the driver’s side. The original vacuum motor was powered by the fuel pump. The fuel pump we installed in Ole Blue was a non-vacuum model. So the decision was made a couple of years ago to install electric motors.

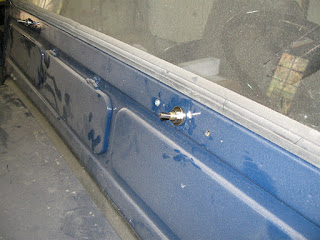
We purchased a pair that matched the one that came with Ole Blue. The “universal fit” wiper kits had been setting on the parts shelf. With Barry determined to get Ole Blue on the road, he finally opened the boxes to begin the process. The only instruction were for the wiring. The good news was Ole Blue’s windshield was full of holes, including those needed for mounting the wipers and no drilling was required for the wiper installation. The bad news was the shaft of the wiper motor was much too long to allow the blade to contact the windshield and it would not allow the windshield to be folded down on the hood. We expect to have the windshield in the folded position the majority of the time.

A quick search of the Web yielded little help in the way of installation instructions. There were suggestions for how to shorten the shaft. One method was to use a hacksaw to careful cut through the threaded tube while not cutting the inner shaft to which the wiper arm attaches. The second method was to use a Dremel tool with a cut off wheel. We went with the power tool.
The kit contained some rubber washers, a metal washer cover and a nut. We inserted the shaft through the windshield frame using the provided hardware and marked where the outer tubing should be cut. Using the Dremel tool, we quickly cut through the outer tube. Next we measured the depth of the wiper arm mount and, again, used the Dremel tool to cut the inner shaft. The second wiper was cut using the same measurements.

The motors were mounted and we began wiring the wiper motors according to the instructions. Since the wipers weren’t included in the wiring harness, we elected to run a wire from the positive terminal of the battery with an in-line fuse and a separate ground wire attached to the regulator housing. We used spade connectors to allow us to easily remove everything in case we want to replace the wipers at a later time with the vacuum/manual originals.
Since we wanted to have the windshield in the folded position most of the time, we used an improvised quick disconnect (a trailer light coupler). The wiring diagram showed two ground wires, one switched, and a positive wire. The switched ground wire apparently allowed for “auto parking” of the blade. We wired the units according to the instructions and placed the wires inside wire covers. We tied the switch, for now, to the lower steering column. The wires to the passenger side tucked nicely in a channel of the windshield frame.

We reconnected the battery and flipped the switch. It works! Next we mounted the blade arms and blades. Even though the motors were supposed to park when switched off, we had a hard time finding the right spot to mount the arm so it stayed on the glass. After a couple of tries we did get them into position.

During testing the wipers would some times not shut off when the switch was off. The spacing on the terminals is so close that there may have been a short. In any case we choose to give up the “auto park” and moved the switch to the positive wire.

The wipers performed without a hitch during the inspection and that was the goal. There is clearly room for improvements and we will most likely buy a new motor for the driver’s side that has a built-in switch and a manual arm for the passenger side.

Red (and White) Letter Day for Ole Blue

After an almost year-long process, Ole Blue is legal to drive on the streets and country roads. It took a letter to a newspaper consumer reporter, visits to a lawyer, numerous trips to the BMV and four police inspections. Since Ole Blue had arrived stripped of all standard identifying marks, we had to establish ownership and give Ole Blue a brand new vehicle identification number.

This story really begins in April 2003. Readers interested in how Ole Blue got to this point can start here http://www.farmjeep.com/projects/old-yeller/cj2a-part8.html. By the fall of 2010, Ole Blue was ready to roll, but lacked a working 3 point hitch, good oil pressure (a new pump had been ordered) and minor items needed for on-road operation like windshield wipers. (These fixes and additions will be reported later.) We began the process of getting a title and plates with some research on the Web.

It appeared from the BMV Web pages that we needed to fill out some forms and have a police officer inspect the jeep for identification. We took the forms to the BMV, only to learn that our failure back in ’03 to obtain a bill of sale (BoS) was a big mistake. Without a BoS of some sort, we weren’t going to get Ole Blue on the road.

We came up with the idea of enlisting a local newspaper reporter who works on consumer problems. Within a day, she had gotten answer from BMV headquarters on how we could solve our problems. Basically, we needed an affidavit detailing the sale. After visiting our lawyer, we were off to the BMV again. Three months later, after three more police inspections, and a bunch of late fees (for not doing this in ’03!) we received a new ID number and a real title.

Indiana does allow antique vehicles to display Indiana plates for that model year. The real plate must be carried in the vehicle at presented upon request. We had been lucky enough to find a set of 1949 plates in excellent condition. So on a beautiful late fall afternoon we mount the red plates with white letters and took Ole Blue for a short spin. We are on the road again!