Part 1 – JRT Take Two
Originally posted 04/15/2003
The Dangers of e-bay
The warm spring sunlight shown unflatteringly on the rusted remains of “Old Yeller’s” rear quarter-panels; there’s some sort of barnacle growing on the hood and nothing but sheer force of habit is holding the passenger side front fender in place: We’ve got body issues! Our friend Dottie, whom no one would confuse with a Jeep person, summed the situation when she asked “what doesn’t need to be replaced?”
We’ve known all along what we really dragged home was a frame, engine, and drive train awaiting a body transplant. We’ve also been (unsuccessfully) saving our pennies for a “repli-tub” from Willys-Overland and planning when to start the frame-off portion of the project. Then along came e-bay…
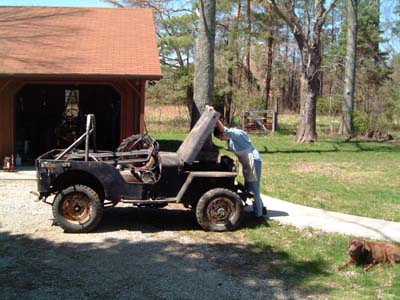
Both Barry and Evan scour e-bay for obscure Jeep parts (particularly hydraulic lift parts, governors, and hydraulic pumps) and browse the other Jeep sections for entertainment. Among the 6000+ Jeep items we found, and eventually won, a ’47 CJ-2A with no motor, but a body that not only looked good, but totally original. Best of all the Jeep was in southern Indiana just a couple hours away. Time for another JRT! That’s “Jeep Retrieval Trip” to the uninitiated.
JRT two…
We couldn’t have picked a more perfect day for the trip. Early spring in Indiana can be cold and stormy (the previous Saturday temperatures hadn’t risen out of the 40’s). The day started out clear and warm and dry. The dry part was important, although we didn’t know it when we left the farm at 7.
The trip took us through south central Indiana, on two lane highways, bordered by blooming redbud trees. Barry spent his youth in this part of Indiana, and it turns out the jeep came from a farm near his former hometown. The road winds through rolling hills and is doted with old farms and small towns. The trip went quickly, given we were trying to keep a lookout for treasures along the way. About the only “jeep thing” we saw was the body of a Willys wagon rusting away in a roadside junkyard.
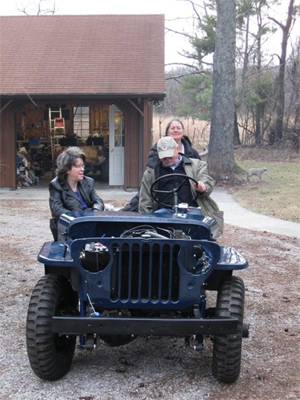
The drive couldn’t have gone more smoothly, taking a little over two hours. We met Josh, the seller, in a church parking lot in a small town. We had agreed to contact him when we arrived (we were a few minutes early) and he appeared 5 minutes later, driving a large Dodge 4×4 pickup with a giant, but friendly Doberman in the rear. His brother-in-law had come along for the adventure too. After introductions, we headed to the farm and the jeep.
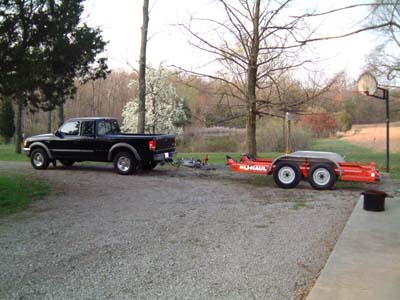
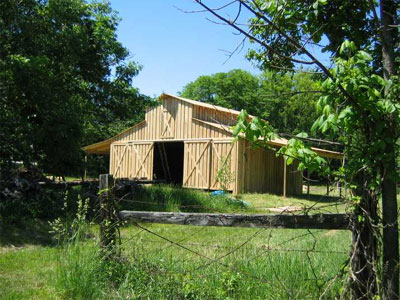
Our towing vehicle for this JRT was Barry’s Ford Ranger 4×4, pulling a U-Haul auto transport. When we reached the farm, after turning off the main road, we had to wait for the farm gate to be opened. On the other side of gate was a path leading up and around a steep hill. We were thankful for the 4-wheel drive and the dry conditions. If it had been raining, we might have had to enlist Josh’s big truck. At the top of the hill was an abandon farm house and out buildings. The rusted hulk of a ’50 or ’51 Ford sat off to the side of the house. The car didn’t look out of place with the other farm equipment scattered about.
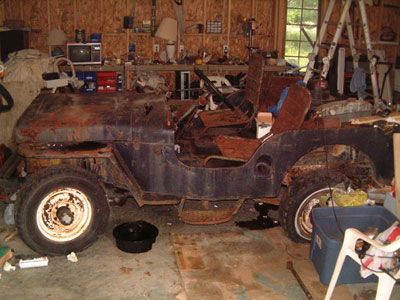
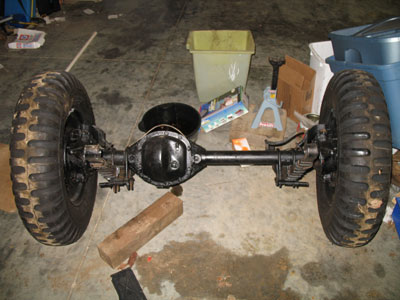
We wasted little time getting out and walking to shed to get our first real look at the jeep. The jeep was just as Josh had described it, complete with a couple of flat tires. Josh had planned on building a rock climber, but is moving to the southwest. He had already sold the motor and seats, since he planned to replace those. The body has some rust and some sheet metal repairs, but is in great shape. There are no extra holes cut in the dash and no signs of rust or repair to frame. There was little doubt that we were getting our moneys worth.
While Josh and Evan aired up the tires, Barry got the tow rig turned around and in position to load the jeep. By the time Barry had backed as close as he could to the shed, the jeep had been rolled out and was ready for loading. While we had equipped ourselves with chains, tow straps, and come-alongs for winching, Josh and Ev declared the jeep to be light enough so that we could just push it up the trailer ramps and on to the trailer bed.
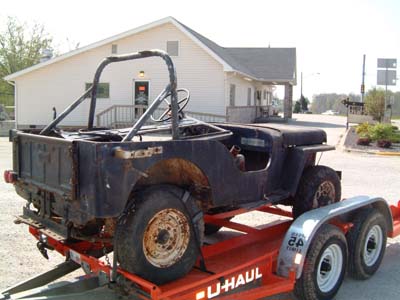
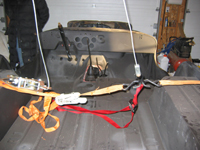
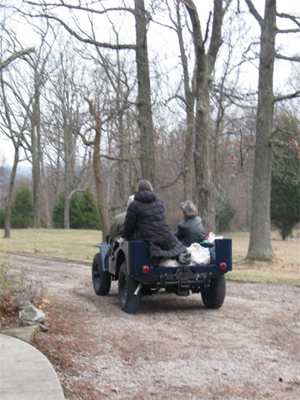
It took two tries to get the jeep up the ramps. The jeep rolled easily, but the U-Haul ramps were almost too far apart. The trailer is open in the middle, and as you can see in the picture to the left, the jeep just fit. On our first try, we were too far to one side, but made it easily on the second push. Josh and Ev picked up the rear of the jeep to center it.
It took another 5 minutes to tie the jeep to the trailer, using the provided wheel webs and axle chains. The actual loading process didn’t take more than 15 minutes, but we added a few more minutes just talking and observing the beauty of the old jeep. We headed back down the steep path and were underway in less than an hour from our arrival at the church yard.
We made one quick stop, after about 15 miles to check the tie-downs. The trailer was brand new (still had dealer tags) and it towed, and more importantly, stopped easily. Without an engine, the jeep was light enough so that the added weight wasn’t noticed and the Ranger did a great job. With the exception of a large number of cars pulling out in front of us, the trip home was uneventful – always a good thing.
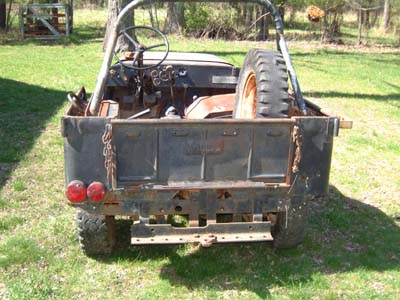
Back at the farm, Paula had fixed us a BBQ pork lunch and we toasted the new jeep. The post lunch inspection led us to believe the original color was dark blue, so the naming process began. We discussed “Baby Blue” but determined it was too old to be a baby, so just settled on “Ole Blue” for the moment.
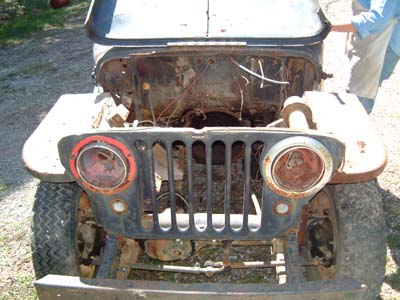
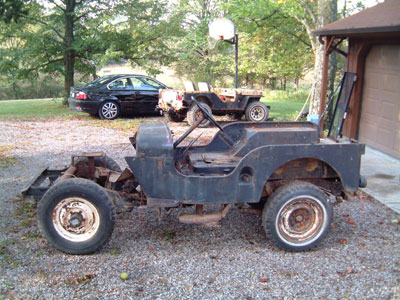
We pushed (Evan did most of the pushing, with Barry steering) Ole Blue off the trailer. More inspections confirmed our initial opinion that the jeep is solid. However, we didn’t find more clues to its real identity. Although advertised as a ’47 CJ2a, we had spotted a CJ3a windshield. The 3a,which replaced the 2a starting in 1949, was very similar to the 2a, with the exception of the new one-piece windshield, plus minor drive train (different rear-end) and interior body changes. Real identification marks and clues had been lost with the motor and vehicle ID tags.
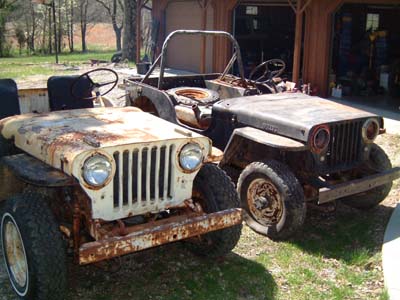
Ev pulled Ole Yeller along side Ole Blue, but we couldn’t see any obvious differences. Ev has since enlisted help form the Willys Tech Board to try and help us make a final determination of what we have. Stay tuned while we search for clues.


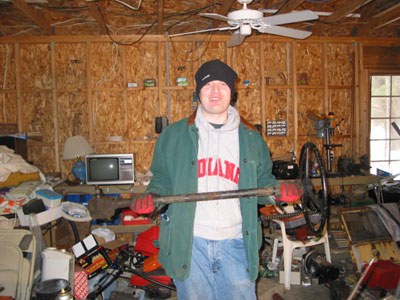
Pictures:
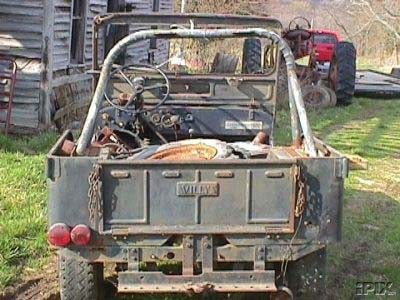
Top 3 are of Ole Blue at its former home. The car-carrier. On the trailer, during the trip home. Paula inspecting the running gear. Ole Blue front and back. The patient and donor.
Barry’s notes:
Compared to Old Yeller, I think Ole Blue has had an easier life. It would have been great to save the whole jeep. The JRT was wonderful, if too short. I think dragging jeeps home could become habit forming.
Evan’s notes:
Whether Ole Blue turns out to be another ’47 CJ-2A or a newer CJ-3A, we couldn’t be happier with our purchase. Josh (the seller) was worried we’d be disappointed in the Jeep’s condition… he obviously hasn’t seen our other Jeep.
Part 2 – What is it?
Originally posted 04/17/2003
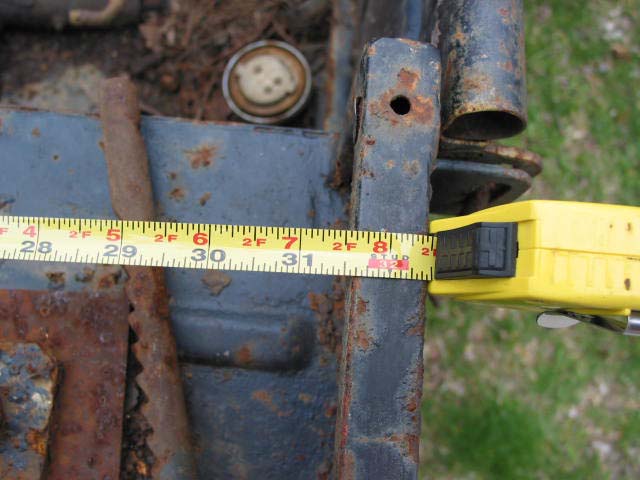
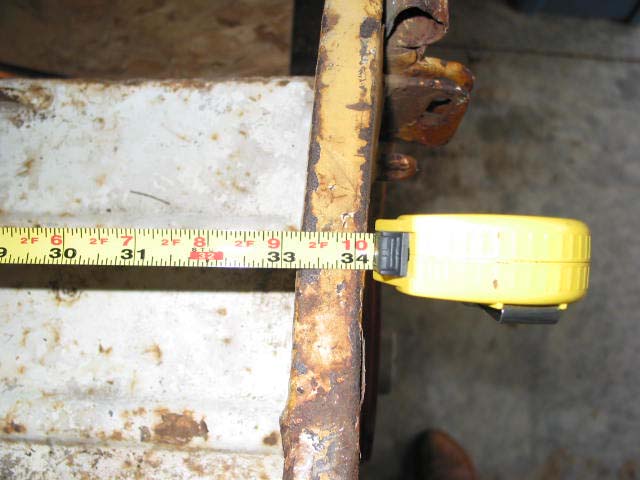
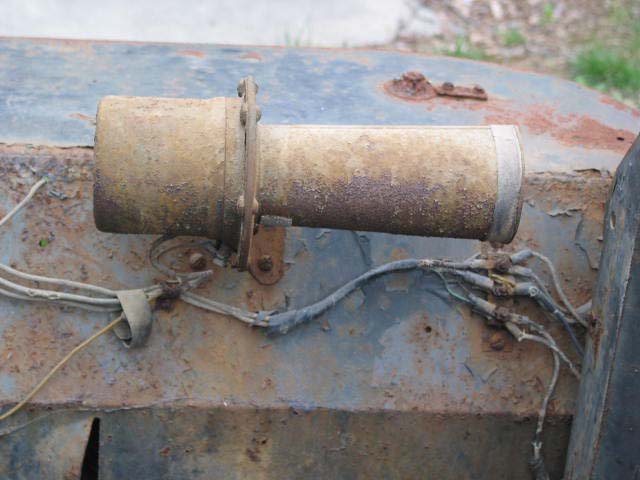
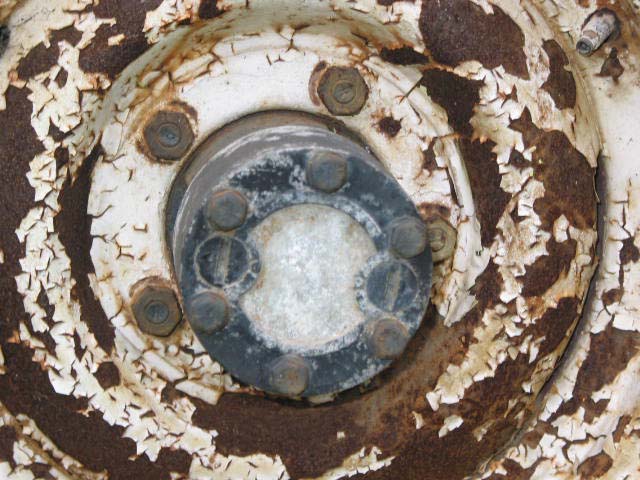
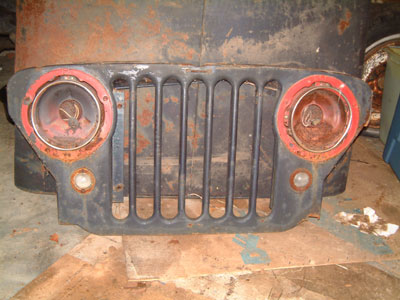
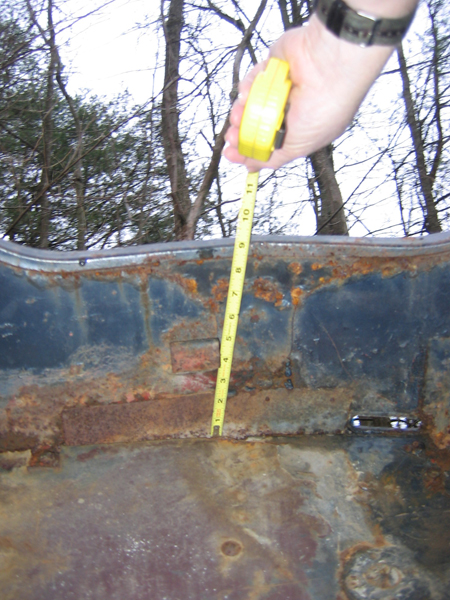
| ID Help As we mentioned in JRT Take Two, we spotted the CJ-3A style on piece windshield, but with no engine or VIN we wanted to if we really had a CJ-3A, or just a CJ-2A with the wong windshield. We started looking for help on Willys Tech Board by posting the following: http://autos.groups.yahoo.com/group/WillysTech/message/84608 My father (lhfarm) and I are restoring a ’47 CJ-2A and just picked up what may, or may not be, another ’47 2A as a parts Jeep. The seller thought it was a ’47 2A, but as it has a one piece windshield, that is in doubt. So, here’s the real question, without a ID plate, engine, or seats, is there any way to tell what we’ve got before we do a frame off? http://farmjeep.com/img/jeep/partsjeep-1.jpg Thanks, Evan 1947 CJ-2A 19?? CJ-?A FarmJeep.com Some Clues Willys Tech members responded with: I think that the best way to determine if you have a 2A or a 3A is by the length of the top of the rear wheelwell. I have a Willys advertisement that shows the 2A with a 35-5/8″ wheelwell and the 3A with a 32″ wheelwell. I measured my 3A wheelwell from the rear of the body to the top front edge and it is 32″. I don’t have a 2A to measure, unfortunately, for comparison. If someone can confirm this on a 2A, that would be great… and The difference is in the rear wheel housing. The 3A seats make for a little more room between the steering wheel and driver. Early 49 CJ3As had the 41 rear end… and If the rear axle is a D44, then chances are good it’s a 3a. if the rear axle is a D41 then it’s a 2a I think there is some difference in the frame horns too… and The 2A used gussets between the front frame horns and the bumper, whereas the 3A’s bumper bolted directly to the frame. If you’ve got them sitting side by side it should be easy to tell if there’s a difference. Based on the picture it looks like there are no gussets there (ala 3A style). Along with all the good advice from WillysTech, we also found some clues here: http://www.specialtyparts.com/vins/cj3avin.htm http://www.off-road.com/jeep/tech/cj-3a.htm http://www.film.queensu.ca/CJ3B/Siblings/CJ3AOrigins.html http://www.film.queensu.ca/CJ3B/SerialNos/SerialNosFrame.html http://www.thecj2apage.com/history.html http://www.thecj2apage.com/brochure/brochure_pg22.jpg What we’ve learned so far… Based on our measurements, the front bumper attachment, and the windshield, there seems to be little doubt we’ve got a 3A. It looks to us like “Ole Blue” has a D41 rear axle, so we think it might be an early (’49) 3A. We also thought the horn or the front wheel hubs might help narrow the date. Take a look and tell us what you think. |
Pictures:
From the top: one piece windshield, 3A wheel well measurement, 2A wheel well measurement, front bumper close up, bumper from above, horn, and front wheel hubs.
Part 3 – Body Blues
Originally posted 10/14/2003
Body Blues
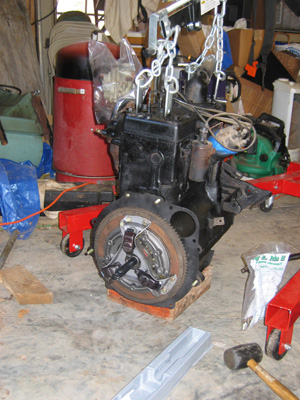
Since Ole Blue arrived last spring, it has been sitting quietly in the garage while Old Yeller occupied all our time and attention. Finally, in early fall, we began the disassembly process. The plan was to remove the body and start the “frame-up” restoration.
The fender is connected to…
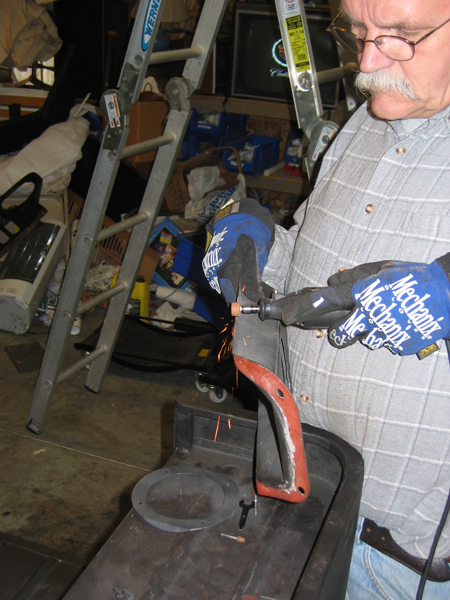
The simple structure of the jeep body components makes the disassembly process every straight forward; remove the grill, both fenders and the tub. With the engine already removed, the bolts and brackets holding the grill and fenders were easy to spot. We spent a Saturday morning removing those parts. It was great fun getting starting.
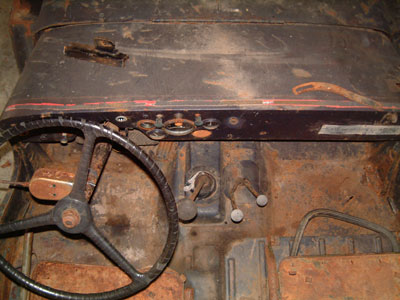
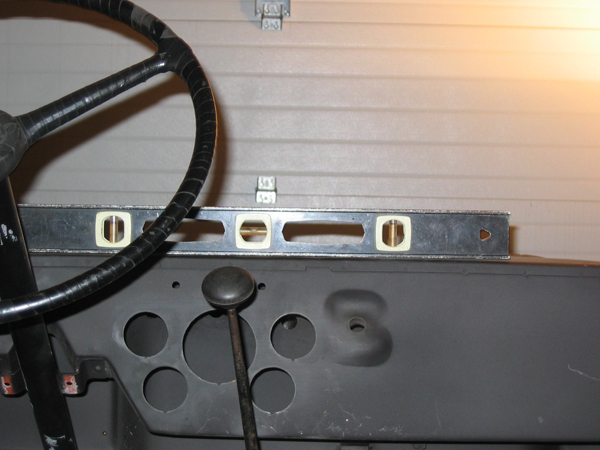
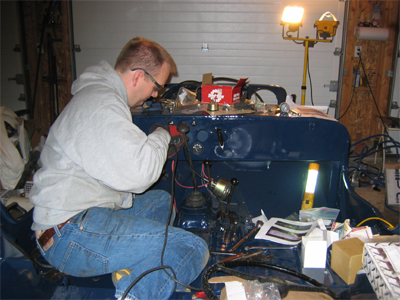
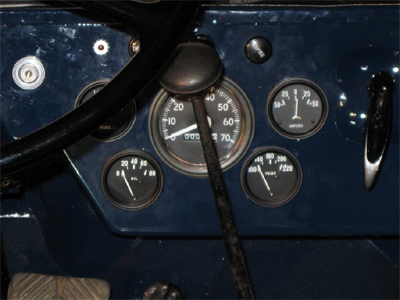
The second session found Evan focusing on the dash and firewall, while Barry worked on the body mounts. Barry was able to use the impact wrench on most of the body mount bolts, while Evan spent extra time removing gauges and accessories to be restored. None of the bolts will be reused and most broke in the removal process.
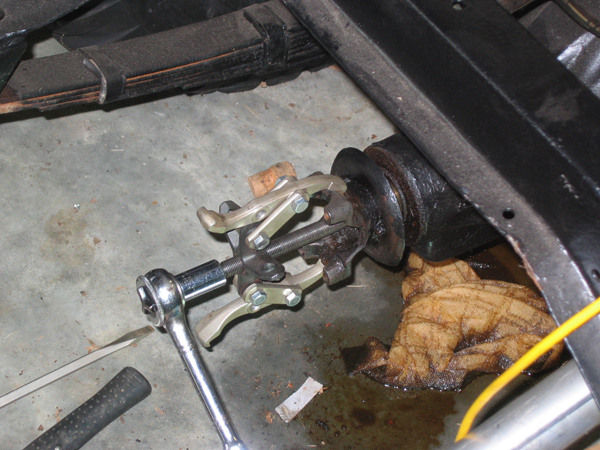
One item of concern was removing the steering wheel. We had read some articles that indicated that getting the steering wheel off can be a difficult task, requiring a special puller. Luckily, we were able to use our hub puller and the wheel popped right off.
The second session ended with the body mount bolts on the passenger side removed and the dash stripped. Evan had also removed the pedals and the transmission cover.
Lift off!
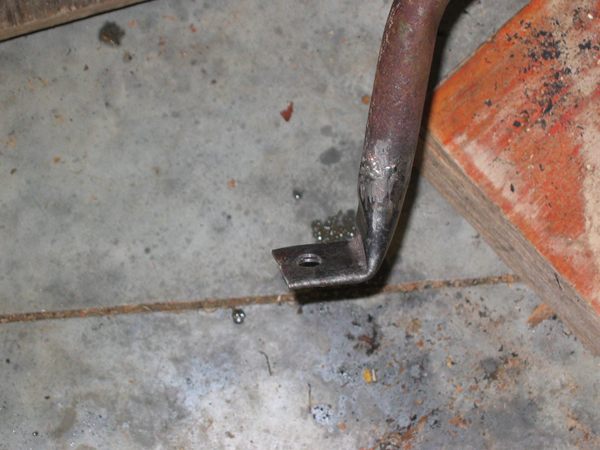
Session three started with the removal of the final body mount bolts. When the PO had replaced the front floor pans, they had simple welded new plate over the old floor. This meant that the bolt heads were sandwiched between the original floor and the new plate. We ended up cutting the final (we thought) bolts with a saws-all.
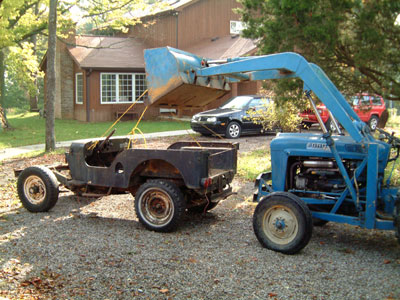
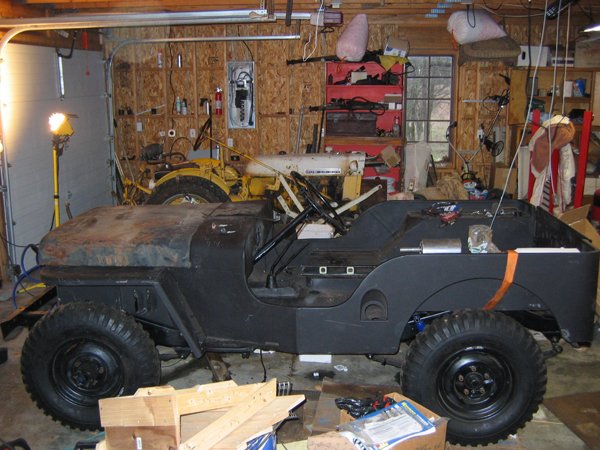
With the body ready to be lifted off, we aired up the tires and replaced the steering wheel before pushing Ole Blue out into the sunshine. Barry’s 1964 Ford 4000 tractor is equipped with a front-end loader and was the perfect tool for lifting the body off of the chassis. The tub is relatively light and we used a nylon rope attached to the tailgate hooks and holes in the dash. The rope was attached to a hook on the loader bucket.
Evan operated the loader and gently started lifting on the rope. The body moved upward a couple of inches, and then stopped. Clearly it was hanging on something. The body was free at the corners and appeared to simply need to be lifted up and back, to clear the shift levers and steering column. A second try and the body was still stuck!
After a more careful examination, we found a brace on the driver’s side step was still bolted to the frame. We had missed it. The offending bolt was quickly removed and the lift off commenced once again. This time the body came off without a problem.

The downside…
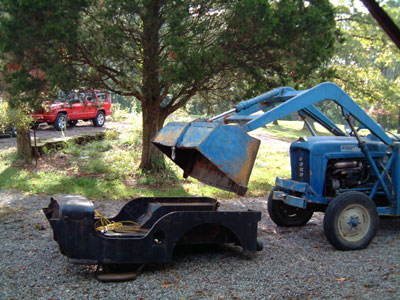
Once Evan lowered the tub to the ground, we decided to flip it on its side for a better look. What we saw was not pretty. The complete underside will need to be replaced. All of the channels are rusted and the rear deck has enough holes to warrant replacement. As noted earlier, the floor panels had been patched over, but we would want to do a proper repair.
While working on the dash and firewall, Evan had uncovered (literarily) a gash in the firewall. It appeared someone had taken a giant can opener and ripped the sheet metal. This had been hidden behind a patch. Neither of us could figure out what the PO might have been trying to accomplish.
The bottom line…
It appears we are faced with replacing everything underneath the tub and repairing the firewall. We will need to make a decision between the cost and effort of the repairs and a tub replacement. For the moment, we hauled the body out into the field and covered it for now.
The good news…
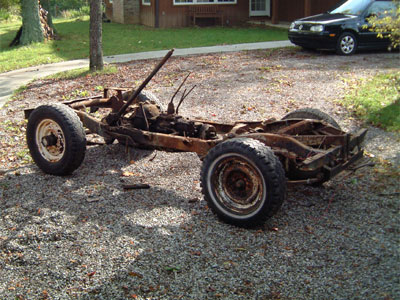
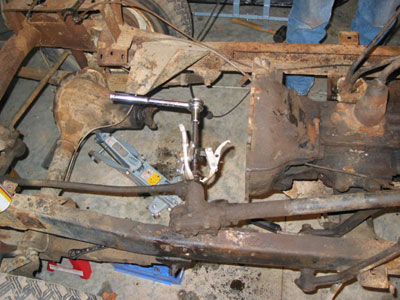
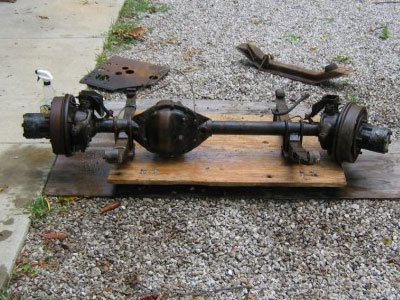
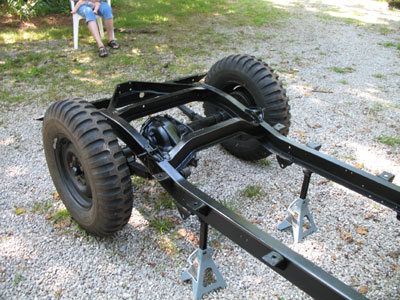
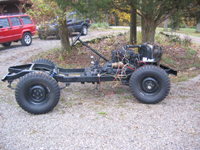
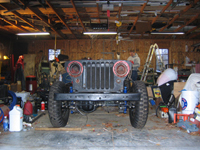
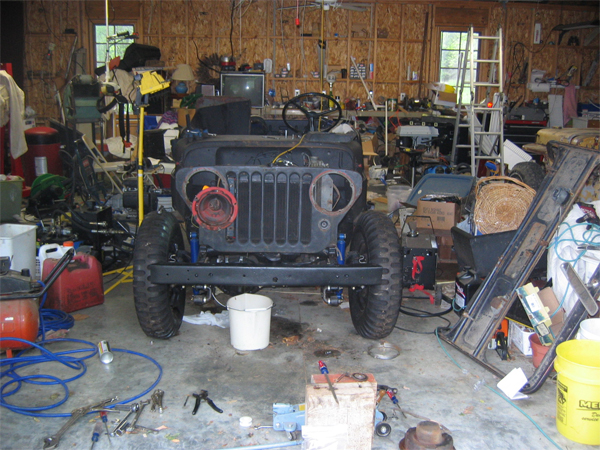
While we had been able to see much of the front half of the frame, the tub removal gave us are first real look at the total chassis. The frame appears to have surface rust, but no problems. The only repair needed will be to the top of the battery tray.
After cleaning off the chassis with an air gun and garden hose, we wheeled it back into the garage. Next up is removal of the drive train components.
Barry’s notes:
Those who know old tractors will see that the Ford is dressed in the wrong colors. When I purchased the tractor it was bright yellow. I cleaned it up and used spray cans to paint it Ford blue. The hood should be grey and I still feel guilty that I didn’t take the time to make it right. That is one lesson I plan to apply to our jeep restorations; if you are going to invest the time, get it right and do it right.
Evan’s notes:
Working on a Willys and driving the old Ford tractor: that’s a good day!
Part 4 – SPUG Nuts
Originally posted 10/14/2003
SPUG Nuts
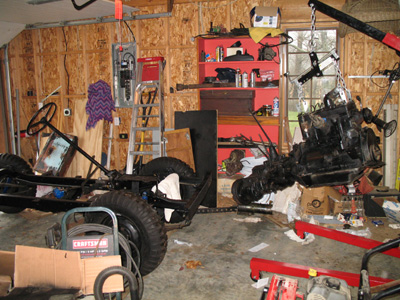
After months of inactivity, Evan and Barry were determined to brave the cold weather and do some wrench turning. Since the bodyectomy, Ole Blue has been sitting quietly in Barry’s unheated garage. Outfitted with cold weather apparel they spent the day removing the steering gear and the transmission and transfer case.
Grease and mud, baked for 50 years
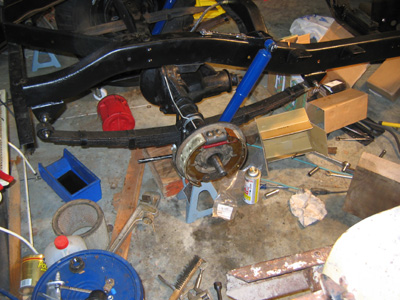
The first task was to remove the front and rear drive shafts. With the body removed, access was a breeze and removal of the U-bolts was aided by 50 plus years of grease and mud. The combination had prevented rust from forming.
While removing the shafts, we found we aren’t able to shift the transmission. This is not a good sign and most likely means we will be looking at an overhaul.
Steering clear
After removing the drive shafts, we decided to remove the steering gear box, steering column and wheel so it wouldn’t be in the way of the transmission removal. The gear box is fastened to the frame and come off without a problem. Removing the shaft from the rest of the steering gear was more of a challenge. We employed a gear puller and left the puller under tension while we broke for lunch and a warm up.
After lunch, a quick turn of the ratchet and the shaft broke free. Evan decided to become the poster child for the society for the prevention of unheated garages (SPUG).
Transferring the transfer
With the steering gear out of the way, we attacked the transmission and transfer case. Using screwdrivers, we had to find the bolts holding the transmission and transfer case in place. As with the drive shafts, the 50 + years of grease and dirt had created an effective rust barrier.
Using our engine hoist (a really handy device), we quickly and safely lifted the transmission and transfer case off the frame.
Cold enough
Checking SPUG rules, it appeared that it was time to head in by the fireplace and thaw some parts. But first, Evan had to move the 2a back to its proper bay. Next up, springs and things.
Barry’s Notes:
As we were removing bits and pieces, I did ask the question “Do you think we will every get this thing back together?” Evan’s reply was that we always have the 2A as our model. On one hand, this is very reassuring. But after looking at some of the modifications the PO (AKA Previous Owner) made to the 2A, it may not always be the best model to follow. And I do need to find a way to heat the garage.
Evan’s Notes:
The closer we get to the bare frame the more excited I get. I don’t feel intimidated by the magnitude of what we have to do, but I do feel encouraged knowing we’ll be starting with a blank canvas. Can’t blame any future problems on the “PO”.
Feb. 2004 – Aug. 2005 Update
Originally posted 08/20/2005
Meanwhile back at the ranch…
For a variety of reasons we have really gotten bogged down, both in working on the projects, and updating the site. Some work has been done, so consider this our catch-up.
1947 Willys Jeep CJ-2A: Project “Old Yeller” Update
In the mean time, we have been using the rust bucket ’47 as a real farm jeep. It is pulling wagons and hauling tools. Still fighting the hydraulic pump setup on the Newgren and are still searching for a proper pump. But it got a new set of seat covers (Barry’s Father’s Day gift) and it was a real “lipstick on a pig” event. Sure does make getting in and out a lot easier. The original seats had the vinyl worn through and you got snagged by a spring wire now and then.
1949 Willys Jeep CJ-3A: Project “Ole Blue” Update
Frame cleanup
POR-15
“New” engine
Wheel clean-up
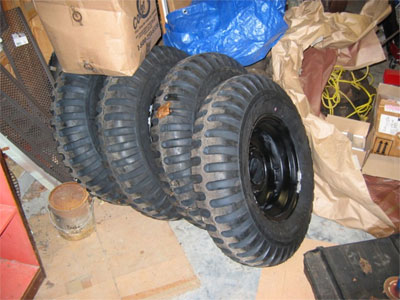
Tires for the 3a
We are in the process of finishing the frame (needs a top coat) and making the final list of “parts” needed to get to the 3a to the rolling chassis stage. Hope to have that done in the next month or so.
Non Jeep Update
New Jeep dog
Additional Willys storage
Part 5 – Paint, Parts and Persistence
Originally posted 07/16/2006
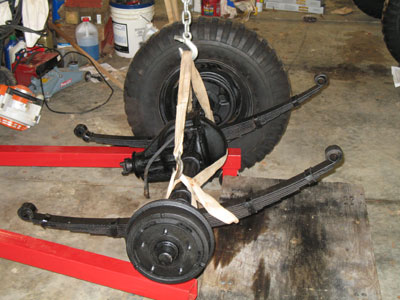
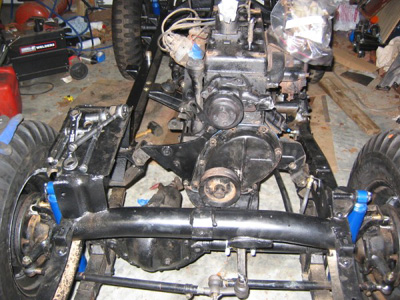
| Paint, Parts and Persistence It has been a year of incredible change; the birth of Evan’s daughter Madeline and the death of Barry’s father seemed to leave little time for jeep work. Ole Blue has been waiting patiently, and Ole Yeller has gone about the work of a farm jeep, needing only a brake fluid refill. But with the spring weather came the strong urge to “turn a wrench” and get the projects back on track – or on wheels in our case. Paint Paint on old jeep parts is like mulch on an untended garden. It is almost like magic to see the shabby and neglected turn to neat and newly alive. We have spent a number of hours using a power washer, wire brushes and old fashion elbow grease to remove 58 years of mud and grime. With each piece, we have stood back and marveled at clean, if rusty bits that transform to lovely jeep parts with just a little paint. Tires on axles We have come to love our engine hoist, as a true multi-function tool. Once we had the axles painted, we thought having the wheels mounted would make moving things around simpler. So we lifted the axles with the hoist and mounted the wheels. |
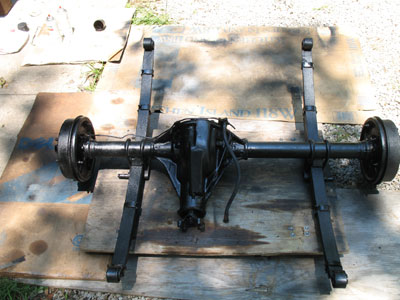

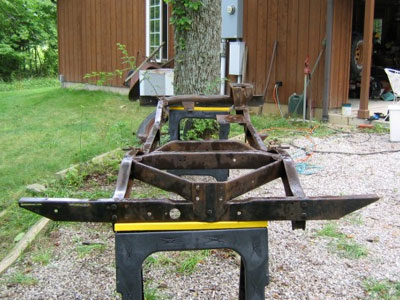
Axles on frame
Seeing the axles under the frame was pretty exciting. It took a little time to get both axles attached with new hardware. We temporarily replaced the steering linkage and added new shocks. This was the simplest shock job ever. And our guess is that this is the first new set in decades.
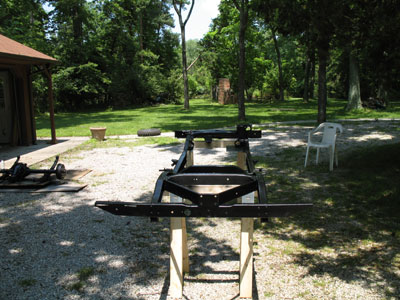
Rolling Chassis!
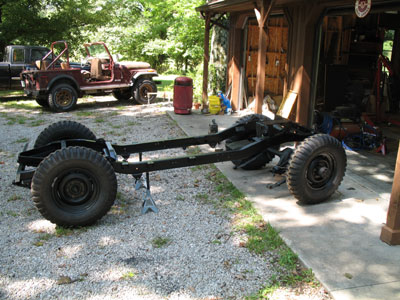
We did just that – rolled it back into the garage. And with the help of a pair of car dollies, we parked the once more mobile frame back in the garage. We might actually get this jeep back together!
Barry’s Notes:
Evan has been the driving force behind the return to the project. It has felt really good to be working on the project again. This is good therapy.
Evan’s Notes:
Spending a few days working on the Jeep reminds me that I need to play the lottery so I can do this full-time.
Part 6 – Hour by Hour, Nut by Nut
Originally posted 04/27/2007
Hour by Hour, Nut by Nut
With dogged persistence, Ole Blue is finally beginning to look like a jeep, instead of just a pile of parts. Circumstances, including family and job commitments have meant that we can only grab a few hours every now and then to work on the Blue. But for us, there are signs of spring and of major progress.
Steering in the right direction
First goal, get the jeep back together. Second goal, make it save to drive on the road. Among the first of many boxes of parts to arrive at the farm where new tie rod ends, bell crank and drag link repair kits. This part was pretty straight forward and with the return of the steering column, we reached a minor milestone. We now had a rolling, steer able chassis!
Braking up is hard to do
Having done a “brake job” on the yellow jeep, we assumed this would be pretty straight forward. While we had debated the merits of a brake upgrade, we chose for now to order all new parts; shoes, cylinders, lines, hoses, master cylinder and clamps. Only the backing plates, drums and brake pedal remained.As stated, Barry had some experience with jeep brakes (http://www.farmjeep.com/cj2a-part4.html). Of course a couple of years had past and a few details were forgotten. This job started off to be much easier. Without a body and drive train in the way, running new lines was a snap. Having purchased pre-formed brake lines was a great investment from Barry’s perspective.
On to taking the hubs off so we can replace the hardware. Remembering that this was a long slow process, we were prepared (we thought) for some grunting, banging and groaning. A couple of hours into the process, we began our (on-line) search for a better way.
What a difference a tool makes
A search of our favorite jeep forums led us to quickly discover that hub removal woes are common. It appears we were just plain lucky the first time around. The “Professional 3-Arm Hub Puller” from J C Whitney was highly recommended. Here is one product reviewOverall Rating:5 out of 5 Hub Puller for Early Jeep Rear Axles, August 22, 2006
By MightyMo from Toledo Ohio
Ease of Use/Installation:5 out of 5 Features:5 out of 5 Quality/Construction:5 out of 5 “Early Jeep (1945 to 1971) rear axles have the hubs installed with a taper. This is a LOCKING taper. (espically when the nut is tightened with an impact wrench)
Tighten it as tight as you can and strike the wrench end of the screw with a large hammer. Then tighten it more and strike again. After a few tighten/strike routines. (BANG off it comes)
I use this puller to get the toughest ones loose. Just be sure to keep the nut backed off only 1/8″. If the nut is not on to stop the hub/puller assembly they will fly accross the room when the hub comes loose.”
So we placed our order. And waited. And waited. Apparently lots of people had taken the opportunity to do a brake job and pullers were back ordered.
But it was worth the wait. As soon as it arrived we followed MightMo’s instructions (handy since none came with the puller) and the hub was off in 5 minutes.

The long and short of things
A pair of Willys brake shoes consists of one long and one short shoe. Barry thought he remembered which went in the front. Of course in his job of getting the hub off, he hadn’t paid attention to how parts were installed. But you guessed it. When we pulled the second rear hub (a mere five minute job with our new puller!), the old shoes were installed opposite of what Barry had remembered – and had installed – on the just completed wheel.
Rats. Back to the forums where it was confirmed that Barry was wrong. He was given a couple of “memory” helpers. “Put you best foot (shoe) forward (assuming that bigger is better)” and “Willys has a long face.” We are sure we will remember. But Barry now has had some extra practice at replacing brake shoes.
OH NUTS
The front hubs don’t require a puller, but do require a special socket to fit the large spindle nut. We had acquired the socket for the yellow jeep and quickly removed the outer nut. Note we said outer nut. There are two. Barry had forgotten that detail too. Luckily, Evan figured it out after several minutes of swearing and even applying the puller. There it was. That second nut, hidden in all that bearing grease, came off quickly and so did the hub. Needless to say, the second front hub came off without a hitch.
A clutch situation
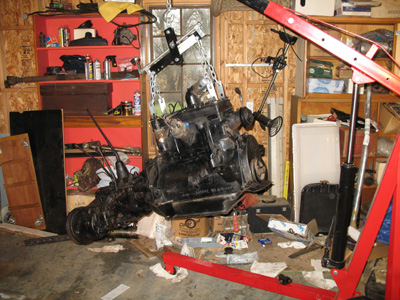
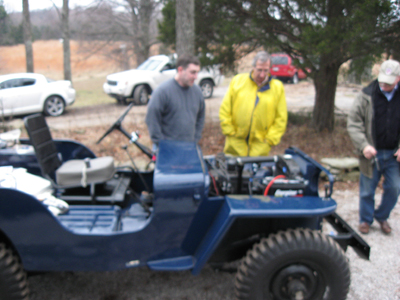
Blue arrived without an engine. So we knew that we would be adding a new clutch. The loss of both our chief mechanics meant we were heading into a project with no experience and no ready source of advice. After we read the manuals, we determined we need a couple of important items. To figure what size bolts we needed to attach the clutch housing to the flywheel, we purchased/consulted a reproduction Willys parts manual. The version we purchased covers several model and there are reproductions that cover just the 3a. In either case, the parts manual is an excellent addition to any manual collection.The second purchase was a $2 “clutch alignment tool”. We had to hunt through a few parts stores before finding what we needed. Armed with the alignment tool and the correct bolts, the clutch install was as easy as it will ever be. With both the engine and transmission out of the jeep, we had lots of room to work.
The mating game
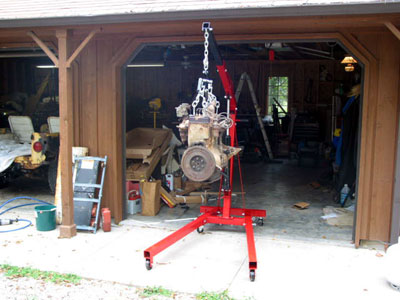
Once we installed the clutch, we determined it would be easier to mate the transmission to the engine and install both at the same time. After replacing the throw-out bearing and clutch fork, we used the engine hoist to help us position and align the two parts. Perhaps because of the difference in angle, and the need to go to the hardware store for more bolts, the process took longer than expected. But there we where. Suddenly we had an engine, transmission and transfer case ready to install!
Mountumental problem
When we purchase our engine from Harry Sheets, he had given us the proper engine mount for a 3a. One reason we were sure the mystery jeep was a 3a was the change in the motor mounts. On the earlier 2a, the mounting “tabs” both faced to the rear. With the 3a, the left side faces forward. The mounting plate bolts to the block, which means removing the timing cover. So before we could get the motor/transmission in the chassis, we had to disassembly the front of the engine.
The proper size socket and an impact wrench was all that was required to remove the crank pulley. When we removed the cover we found a timing chain, rather than gears. So we have an older engine. Not a problem, except we were a little of unsure of the fit of the newer style mount plate. Back to the forums and a quick reassurance that it should work got us searching for a set of gaskets. We found those at Walcks.
Tab A into slot B
With the new mount in place, all that was left was to insert the motor/transmission/transfer in the waiting chassis. We rolled the chassis from its parking spot to a regular bay. We got to try out the steering, which was great. Using the engine hoist, we raised the drive components and pushed the rolling chassis into place. A push here and there and it was in place! OK, it wasn’t quite that simple, but close and we’ve reached another milestone.
Part 7 – What a Sweet Sound
Originally posted 10/10/2007
Suddenly there is real progress!
No matter how hard we try, we can only manage to snatch an hour here and there to work on the jeep. But those hours are starting to add up!
That’s cool
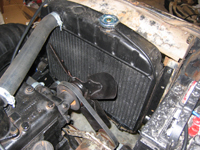
With the drive train in place, we really wanted to test fire the engine. That meant getting the “fluid” management systems in place – fuel, coolant and oil had to move. When we purchased the engine from Harry Sheets a couple of years ago, he had been able to supply us with the proper 3a “side mount” radiator. We had taken it to a local radiator shop for a rehab job. It turned out that all that was needed was a good cleaning and some paint to make it look like new. Replacing the radiator cap really made it look shiny.
Grill work
That renewed radiator needed a special home – Ole Blue’s grill has some issues. So Barry figured a replacement found on e-Bay was the answer. Even though advertised as a 3a grill, upon arrival, it turned out to be a 2a grill. Given Ole Yeller’s current state, a grill transplant may happen later. For now, a quick weld job to repair a rusted lower mount of the original grill bracket will have to do. It isn’t pretty, but it is the correct grill and has the mounting hardware for the radiator.
If it moves, replace it.
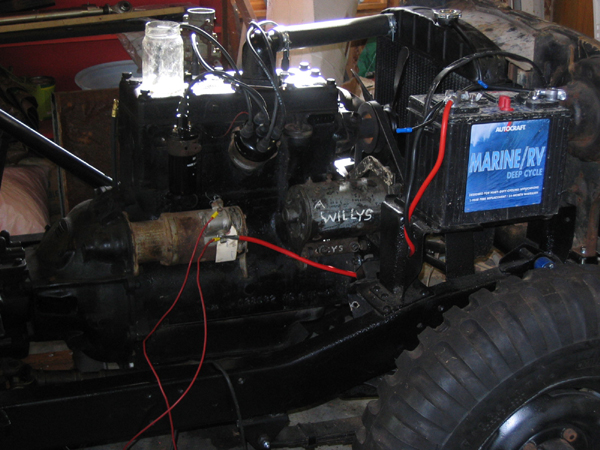
With no idea of how long the engine had been setting, we decided that we would replace all the external parts. Hoses, points, plugs, wiring, distributor cap and rotor, were ordered and installed. The engine had no fuel pump, so a new one was installed. We ordered all new fuel lines (tank to carburetor) and a new oil pressure gauge and lines.
We installed the starter and generator (although we didn’t hook it up). We purchased a new key switch (foregoing the original foot starter option) and did the basic wiring. We did a test “spin” of the starter. A twist of the key and parts moved!
Fuel of ideas
One of the exciting “features” of early Willys Jeeps is the fuel tank under the driver’s seat. With the tub still on the floor, some rigging was in order to get fuel to the engine. Barry had been pondering modifying a lawn mower tank as a temporary solution. Luckily, we had made a visit to Harry for more parts. We had asked Harry for some ideas. He said the easiest solution is to stick a hose in a regular gas can. Good idea.
We obtained a 3 foot length of rubber fuel line, along with a barbed fitting that screwed into the inlet of the fuel pump form the local Auto Zone store.
There comes a time…
Suddenly we were ready to test fire. Everything was double checked. We cleared the area of tools, stuck the gas hose down the spout of a gas can – and moved a fire extinguisher within quick reach.
Evan would work the choke and throttle. Barry would turn the key. First crank. Evan reports fuel moving into the fuel bowl. Second crank, slight drip of gas at the carburetor. Test halted for a quick tightening. Third crank – it fires! And dies. Evan makes minor adjustments to the throttle. Fourth crank – it starts and continues running!
A champagne moment
Evan and Barry stood there listening, in a state of shock. Paula, who had been watching yelled “This calls for champagne!” Barry switched the engine off and Evan started a quick inspection while Paula retrieved the champagne and glasses (always need a bottle in the fridge just in case something needs toasting). There were minor leaks in the oil gauge line and around the fuel pump. A couple of wrench turns and both were fixed.
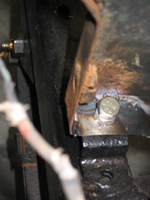
We noticed a little coolant seep from the front of the head. We had taken the four corner head bolts out and bolted on the engine leveler. We had also forgotten to torque them down after we had installed the engine in the frame. A quick application of the torque wrench and we are ready to fire again.
But first we raised our glasses in a toast to that old engine.


Sounds like a winner
Without touching the chock or throttle, Barry hit the starter again. This time, the engine started with only a second or two of cranking and settled into an idle. Evan had stuck the exhaust system in place before our first test. It sounds wonderful. Good oil pressure and no smoke of any color. More grins and more champagne!
Are enthusiasm was only slightly damped by a few drips of oil coming from under the crank pulley. We appeared to have made a rookie error in installing the new seal when we replaced the mounting plate. We will replace it again, when we have the grill removed for restoration and painting.
Suddenly it seems possible…
The new body has been sitting in the middle of floor since we purchased it last spring. With the test firing such a success we are ready to do a test fitting. We are also planning for all the additional items we want to install before we mount the body after painting. That includes rerouting the exhaust (required by the Newgren lift), installing the PTO and moving the Newgren lift from the 2a to its new home.
Stay tuned!
Barry’s notes: This was a special moment. I’m only sorry the dads had been here to hear it fire. They would have been proud.
Evan’s notes: Simply amazing. I’m not surprised it started, just that it started so easily. Harry sold us a great engine.
Part 8 – Body Fine Work
Originally posted 11/13/2007
Take her for a spin
With the motor running, it was now time to move on to a couple of more tests before the mounting the body for a fitting. We wanted to check out the clutch, transmission and transfer case. During the test fire, the transmission and transfer case were in neutral and the clutch engaged. While it wasn’t possible to do a test drive – lacking a seat among other necessities – Barry decided a test drive with the jeep on jack stands would work. Evan said “Great idea, especially if you would like a new door added to the rear of the garage.” As in what might happen if it slipped off of the jacks while all wheels were engaged.
Plan B
Evan suggested that disconnecting the drive shafts might be a safer and saner approach. While Evan removed the shafts (and some of the thrill), Barry rigged up the generator wiring, with the new regulator and amp meter. The generator is a 12 volt model, since we are upgrading from 6 volt to allow us to run a 12 volt hydraulic pump.
Starting the engine went as before, with Evan working the controls. Now the testing began. Evan worked the clutch pedal and we engaged the transfer case and transmission for the first time. Evan eased up on the pedal and the rear shaft started to spin! Barry moved more levers (with Evan doing the clutch work) and we had the front and rear (four wheel drive!) working. No clangs, bangs or bad sounds!
No charge for that
While parts were spinning along, it appeared the generator wasn’t doing its job. The meter showed a discharge when cranking the engine, there was no indication that we were producing juice. We have located a repair shop and will take the generator in for testing and repair.
The body in question
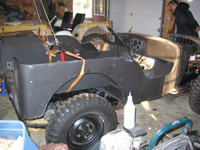
For the past few months, the new tub has been resting comfortably on the floor of garage, in front of the 2a’s parking spot. It has been a handy place to stack manuals and other items, but the time had come to prepare it for its new home. We decided the best course of action was to take the chassis to the body. We moved the 2a and pushed the chassis out on the drive and turned it around so the body could be lifted on from its resting place.
For fitting and testing purposes, we used duct tape to secure the body mounts in place. This was a nice tip we picked up on our visit to Willys-Overland. A nice jeep feature is the simplicity of the body. Just a tub, fenders, grill, hood and tail gate. The tub is the largest part, but the two of us can lift it.
The body had been resting on a couple of dollies and was easy to spin around. With a couple of grunts, we were able to lift the body up on the frame and over the steering column (with the wheel removed). But no matter how hard we tried, we couldn’t get the gear shift and transfer case handles within 6 inches of the body opening. Something isn’t right.
I remember when
We debated removing the steering column, but tried to figure out how much of a headache it would be to reinstall it with the body (and motor) in place. Barry recalled that the nice folks at Willys-Overland said that you could remove the transfer case shifters for the test fit, but you had to put them back before the final body install. He also recalled that the old tub had been lifted off with the steering column and shifters in place.
A quick review of “Part 3 – Body Blues” clearly showed that we had been able to remove the old tub by lifting it up. Neither of us could remember the exact way we had gotten it off. But lifting the body higher seemed to be in order.
Up lifting experience
The old Ford has been replaced with a shiny new tractor and that was a clear option. We could use the front end loader and try reversing the removal procedure. However, weather has become a factor. We are heading into winter and it was raining on and off while we were moving the jeep to mount the body. An indoor solution seemed like a good idea.
A few years ago, Barry had purchase a one-man jeep top removal kit for the CJ7. This consisted of a metal “T” with “J” hooks that fit under the doors and the rear lift gate. The “T” was attached to the end of a come-along. Screw an eye-hook in the ceiling, attach the pulley, anchor the end of the come-along and crank away. This seemed like a workable solution, replacing the “T” with a nylon strap harness.
Twist and shout
With the rear of the body up in the air, it still didn’t seem possible that the body would slide down the steering column and align with the holes for the shifters. At some point, mostly likely after heating up the garage with several four letter word combinations, we twisted the body toward the driver’s side. The gear shift popped through the transmission tunnel! Shouts of joy!
More twisting while simultaneous lowering the rear and with Paula pushing from the front was needed to get the body to slide down and over the transfer case shifters. A quick check showed a good fit, although we have two of the rear body mounts in the wrong location. But it sure looks nice!

Coming up next
We need to make sure of the tub fit and alignment, including all the pedal holes (which appear dead-on) and pto shifter and we will also attach the new fenders to make any adjustment to their fit. We will need to weld the fittings for the gas tank strap in place and check for other modifications. We will need to make some decisions about painting options – do we outsource?
Stay tuned!
Barry’s notes: I can see spring time jeep rides!
Evan’s notes: So, you may be thinking “they got the body off, how come they couldn’t remember how they did it?” When we pulled up “Part 3 – Body Blues” to look at the photo we also noticed the page was dated October of 2003. Honestly, how many of you remember anything from 4 years ago? Whatever the case, I can’t believe we picked up the 3A as a parts jeep in April of 2003, it doesn’t seem like that long ago.
Part 9 – A whole lot of progress in a whole lot of months
Originally posted 10/14/2008
A whole lot of progress in a whole lot of months
Life and work continue to get in our way, but that just makes the time working on “Ole Blue” even more special. We are long over due on updates and will try to be more diligent in our efforts.
Fits like a … jeep tub
Way back when we discovered that the original tub was beyond repair (at least for us) we did as much research as possible on replacement tubs. Since all reproduced tubs originate from the same factory, we know that we would have to do some “fitting”, drilling and “adjusting” to get a proper fit. While there was added cost in a Willys-Overland “Repli-Tub”, it was money well spent. They promise a bolt on fit and that is what we got. We did have to remove some metal to get clearance for the transfer case shifters, but this was minor work, well within our capabilities.
On the level
Among the “parts” that came along with the tub were rubber mountings, the size and shape of a hockey puck. We needed different sizes to level out the tub and spend some head scratching, trying to figure out how to slice them down to size. A little more historical research revealed that restores had found what appeared to be cut up tires used between the body and frame.
As you might have noticed, Barry’s garage is full of “stuff” and is often a source of frustration when trying work. But it is also a source of useful “stuff”, in this case a rubber tire liner that was just the right material for making our own mounts. A drill and a hole saw and we were in business. Much closer, we think, to the OEM design.
Dropping the bolts in place (no body work needed), we soon had an on the level tub.
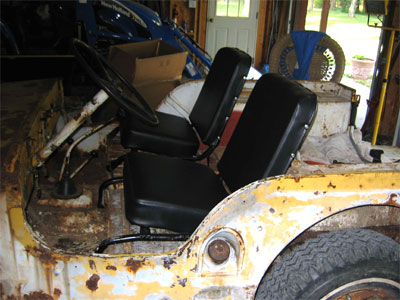
Seats all around
Along with a missing motor, Ole Blue had given up its seats. Sometime in the past, we had picked up a set of seats. Because of the slight changes in the tub from the 2a to the 3a, we needed to make sure we had the correct, 3a seats. Before we could mount the seats in the tub, we need to repair some metal work. A foot on the driver’s seat was missing and required a reconstruction. The seat also had a section of the tube frame rusted through, as did the passenger seat. We obtained matching steel tubing (from the metal rack at a local big box store) and mended the seats to the best of our abilities. They aren’t beautiful, but Evan noticed they were a pretty close match to some of the factory welds.
A trip to the old tub (now resting at the edge of the woods) yielded the passenger seat mounting brackets. While there, we took measurements locating both seats and the gas tank strap.
Tanked
One of the design “features” of early jeeps is the placement of the fuel tank under the driver’s seat. It is held in place by a small bracket and a strap. Before mounting the driver’s seat, we needed to weld a bracket to the floor and one to the inside of the body. It is a good thing the brackets are mostly hidden. The welds are ugly, but should keep the fuel tank in place. That seems like a good idea.
With the tank strapped in place (for now), we were able to position the driver’s seat. With the seats in place, this looked like something you might be able to drive!
In the hood
With the tub fitted, we moved on to other body parts. The new fenders attached without a problem. Next we attached the hood. We are using Blues original hood. In addition to the factory install dents, this hood has taken a beating. We are still going to have to straighten the hood and after some hammer work, it is beginning to look like a job for the pros.
Finally, we started to mount the windshield. Even though you might recall from reading early reports, windshields have historically not been a part of our jeeps. But since this jeep is expected to be road worthy, we want to have it as an option. When we lift it in place (especially easy, since it is missing the glass) we found that the arms were sprung out by a couple of inches. Another job for pros.
Paintful decision
With the body parts all assembled, we fought off the temptation to get side tracked by doing enough wiring and plumbing to take a test run. We would get the body painted and on for real. The paint color decision was made early on – the original Normandy blue. We had even obtained reproduction lacquer paint, when we had intentions of doing the painting ourselves. Doing so would mean building a painting booth and upgrading the garages compressed air system (we would need to add filters and driers for a start). Then there was the matter of time. The more we discussed what was involved, the more we believed this was a job we should outsource.
Luckily, the family wrecker and body shop is just 10 minutes up the road. We disassembled the parts and loaded them in a small trailer. We did note that removing the tub is a lot simpler than replacing it. We also took along our lacquer paint and an original paint chip card we had picked up at some point.
The good news was the shop could hammer out the hood and fix the windshield. However, they no longer work with lacquer paint and neither do most of the body shops in our part of the country. Given the choice of trying to locate a shop who would use the original paint or using a more durable modern enamel, we picked going for the best match and newer technology (but no clear coat).
We unloaded the trailer and headed back to the garage. Barry’s head was still spinning from the estimate (which included a family discount), but Evan was already making a list of things to be done before we could mount the body.
Next up
Control the bleeding.
Barry’s notes: I no longer doubt that we will be on the road with what has for so long been a pile of parts. Seeing the complete body on made that possibility very real.
Evan’s notes: My only real concern with “outsourcing” the painting is that the finished product may turn out to be too nice. We’re talking about a farm jeep here! They’re not supposed to be clear-coat shiny, they’re supposed to look like you painted it in your garage… or barn.
Part 10 – Cleanup on bay 2
Originally posted 10/14/2008
Cleanup on bay 2
The reader may recall that when we started the engine we noted leaks from the front of the engine. We also had leaks from the transmission output shaft and from the rear end. We needed to get those fixed while we had easy access – before the return of the painted body.
Seals the deal
We had assumed we had incorrectly installed the front crank shaft seal, but further examination showed are leak was related to the oil pan gasket. Just a different rookie error. This time, when we removed the oil pan, we took the time to remove almost 60 years worth of gunk in the pan. While we had the timing chain cover off, we went ahead and replaced the seal, since we had ordered a replacement. We replace the timing cover with the correct gasket and crossed our fingers.
There’s a tool for that
The parking brake is located on the end of the transmission output shaft. We had cleaned the drum and replaced the shoes. Now we had gear oil leaking onto the drum. Not a good idea and a sure way to ruin a set of brakes. We disassembled the brake shoes and activation lever (all the while not paying attention as to how they would go back together) and removed the brake drum. That part was straight forward. Getting the seal out was another matter. Nothing like a hammer and screwdriver for most jobs like this. We made several attempts, but other than bending the seal into a completely unusable state, we weren’t making much progress. We didn’t want to take a chance on scratching the shaft, so we decided there had to be tool for this. Sure enough, a trip to town and to an auto parts store produced a $6 seal puller.
Sure enough, a quick of the puller and the seal went flying across the garage. Maybe a little less force will be needed the next time. We installed the seal, but not the parking drum. We wanted to check for leaks first.

No yoking
On to the rear end yoke. Our handy hub puller made removal of the yoke pretty straight forward. This time the seal puller was less successful, but we did get the seal out. Barry proceeded to reinstall the new seal, using the yoke cover and nut to drive it in place. Standing back to admire his work, he utter something unprintable when a drip of gear oil appeared under the seal. Another rookie error. The seal was not perfectly aligned – it was canted very slightly – and had been driven in at a slight angle, ruining the metal to metal outside seal.
Luckily, we had a spare seal (we had seen the leak when we first got the jeep and order a seal then). The yoke was taken off and we got more practice with the seal puller (which was starting to bend in a couple of places – what did we expect for $6). There has to be a tool for getting a seal back in – a seal driver. After seeing a picture on the internet, Barry fashioned a driver out of a piece of plastic electrical conduit. This time, Evan carefully aligned the seal and used our improvised driver to make sure the seal went in straight.So far, no more drips!
Now I remember
When we removed the parking brake drum, we carefully laid all the pieces aside. With no drips from the transmission shaft, it was time to reassemble. Neither of us could remember how the brake went back together. It had been a few days, but we had also had the assemble apart for cleaning and shoe replacement before we replaced the seal. Perhaps it is brain rust, but nothing short of digging out drawings in the repair manuals helped. Once we saw the drawings it was an “of course” moment and the reassembly took a minute. Ole Yeller is due for a parking brake rebuild. Think we will remember?
Next up
On to another uplifting experience.
Evan’s notes: Not the most fun we’ve had doing the restoration, but to hijack a bumper sticker “A bad day working on the Jeep is better than a good day at work.”
Part 11– Another uplifting experience
Originally posted 10/15/2008
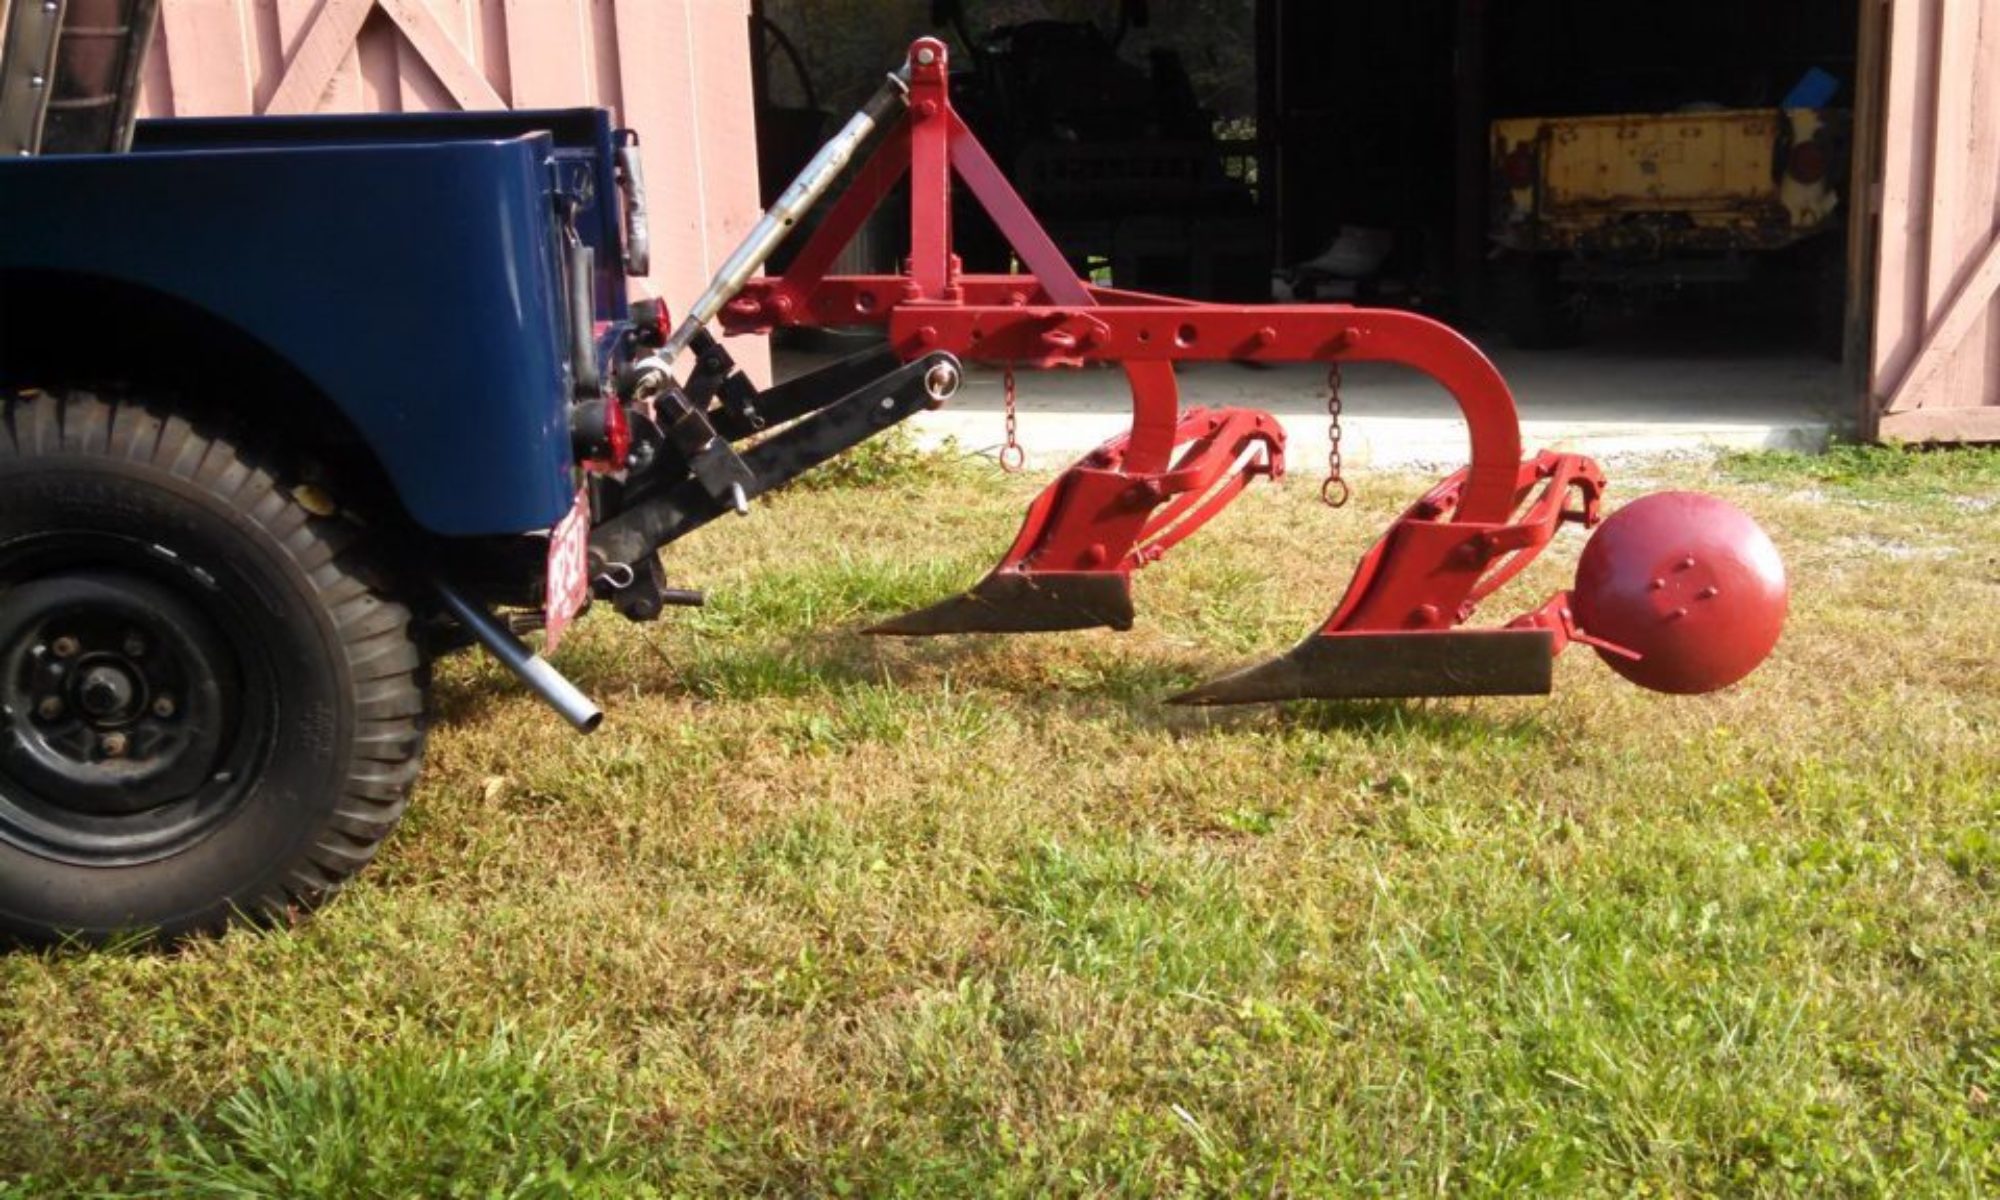
Our plan all along had been to move the 3-point lift from the 2a and install it on the 3a. With the body at the paint shop, the time was right. While the Newgren lift was designed as an aftermarket installation it isn’t something you want to do often. We have gotten pretty good at installing and uninstalling the lift, using two floor jacks and cribbing. Jacking up the unit, which isn’t especially heavy but awkward to handle, lying on your back, and moving the lift around to allow inserting of the bolts took about 30 minutes. While we could do it faster, but safety is an issue and we value our hands and fingers. With the body off, we could reach through the frame and lift the Newgren in to place. You can actually see how to align the bolt holes and the process took no more than a couple of minutes. The installation will never be this easy again.
Pumps, pumps everywhere
We now have a collection of hydraulic pumps, including 12 volt models and two versions of Monarch belt driven “hi-lo” jeep pumps. The latter two were sent off for seal replacement. We continue our search for an original Newgren crankshaft driven pump. In the meantime, a NOS (new-old-stock) Monroe pump appeared on e-bay. We broke open our piggy banks and won the auction!
While we don’t know if the marriage (Newgren lift with a Monroe pump) is historically accurate, we are hoping they are the combination we have been seeking. We are having custom hydraulic lines built that will run from the front of the engine to lift.
Pulleying my leg
Barry has had experience with crank driven pumps before, on older tractors he has owned. When the new pump arrived, he went in search of the appropriate “coupler” (sometimes referred to as a “lovejoy coupling”) to mate the pump shaft to the crankshaft. His internet searching didn’t turn up a ready solution. He finally remembered that he had purchased a reproduction of a Monroe lift parts manual. A quick check showed that a special pulley – made with tabs – was required and the Willys part number was listed as well.
Off in search of another special part. However, a quick note to the G503 board yielded a very pleasant surprise. The part number shown in the manual was the standard equipment pulley from early in the 2a production period on and was readily available. Our engine was an older model and had a flat pulley face. Barry did a quick check of the 2a and sure enough, it had the correct pulley with the three prongs. A new pulley was ordered and installed.
On a historical note, Willys must have had plans for a number of crankshaft driven devices or assumed that the addition of a hydraulic pump would be a common option. This might warrant some more research.
Exhaustive research
A requirement of a Newgren installation is the relocation of the muffler, from under the bed to a driver’s side location. We had made this change on the 2a, following the instructions on the original Newgren installation documents. The cut we made placed the “hump” in the pipe in front of the rear axle. The 2a’s exhaust pipe is banged up and crushed where it passes over the axle. We choose to do our own measurements this time.
We also moved the rear hanger and we hope this arrangement will prove more durable.
A miraculous mounting
The body parts were painted within a week after we had dropped them off and had been parked on a trailer in the barn. While we worked to complete body-off projects, we couldn’t wait to get the tub on the frame and to start the final reassembly. By now, we have some experience in removing and installing tubs. The first tub removal involved my old tractor with a front-end loader. We weren’t all that careful and just lifted it off.
When we installed the new tub for the initial “fitting”, we rigged a pulley system in the garage. It was not an easy process and involved lots of lifting, pulling and tugging. Also, when we removed the tub for painting, we scratched some paint on the steering column. We wanted to be more careful with our freshly painted tub. So an improved mounting method was needed.
Many of the restorations we had read about suggested four or five strong bodies could place the tub without much difficulty. Timing was an issue and when we were ready to mount the tub, we had three bodies and a dog available. Evan had been working on a web sling design, using the tractor again. It would allow us to easily tip and tilt the body while it was suspended above the frame.
Barry’s late spring project had been to weld a 3 point hitch attachment to a quick attach plate for his front end loader. He exchanged the front bucket for the 3 point hitch and added a boom pole, to create a hydraulic lift that would allow the tub to “float” above the frame.
Evan and Barry unloaded the tub from the trailer and placed it on a ground cloth. Evan fashioned his web sling and hooked it to the boom pole. A test lift proved it was a good concept and we decided to give it a try.
With Barry operating the tractor and Evan adjusted the tilt of the body (made easy by the sling) and Paula steadied the front. Winnie (the dog) wasn’t needed and just guarded his soccer ball. The tractor held the weight of the tub and allowed for a very slow lowering as Evan made sure of the initial alignment.
Once the steering column was inside the body, Evan pushed the frame back as the tub was lowered. When the shift levers entered the opening, the tub was gently lowered until it rested on the frame. Success!
Next up
A rebolting development
Part 12 – A Rebolting Development
Originally posted 01/09/2009
When we did the test fit of the body, we had wisely bagged and marked the rubber mounts for each bolt hole as we removed the tub for painting. We had also ordered “anti-squeak” welt for mounting the fenders and the gas tank. So the mounting process was pretty straight forward, until we got to the bolts in the bed.
Step bolts, the “correct” bolts for the mounting holes in the bed area, are similar to carriage bolts (round head, square shoulder), but the head is flatter. The idea, we assume, is to allow cargo to slide easily inside the bed of the jeep. Barry had purchased a set of “correct size” step bolts off of e-bay, but they were too short (by a ¼ inch) for our body/frame combination. We had conducted the test fit with standard bolts. Unfortunately, Farm Jeep’s nearest town no longer has a real hardware store. The large box stores were no help. Luckily, Barry’s day-job is located in Bloomington, home of Kleindorfer’s Hardware.
Kleindorfer’s is one of those, sadly, few remaining real hardware stores with several knowledgeable staff, who provide real service. Barry took the too-short step bolt in and handed it to the guy who met him at the front door. He said “I need a couple of these, only longer” and away they went into the back storage room. The whole transaction from the time Barry walked in the door until he walked out with the correct length step bolts took less than 5 minutes.
The step bolt hunt led us to an obvious Farm Jeep improvement. We replaced the standard hex head bolts in the foot wells with elevator bolts (think step bolts with a flat head). If Willys were still around, we would suggest that engineering change.
Engauging work
Ole Blue came with a complete set of rusty gauges. To expedite the process, we choose to purchase reproduction gauges, with the idea that we would keep the old gauges for a possible rebuilding project in the future. (Editor’s note: Is it possible to use the term “expedite” in regards to a project that has taken six years?) With the body firmly bolted to the frame, Evan began the task of installing gauges in the dash.
The fit was tight enough to require removal of the paint along the edge of the hole for a couple of the gauges. We also wanted to do this part of the installation before we reinstalled the gas tanks and seats, to give easier access to behind the dash.
Wire where we?
An early Ole Blue Christmas present had been a complete wiring harness from Walck’s. When Barry opened the box to start the re-wiring process, he discovered a 2004 calendar! He also discovered that a FJM (Farm Jeep mouse) had chewed some of the cloth wire covers. Nothing that a little black tape couldn’t repair.
The Walck’s wiring harness was a breeze to install. Color coded wires and great documentation made an otherwise daunting task fun.
Next up
A new family member!
Barry’s notes: I enjoyed the wiring and would highly recommend this for anyone restoring a Willys.
Part 13 – A New Jeeper in the Family
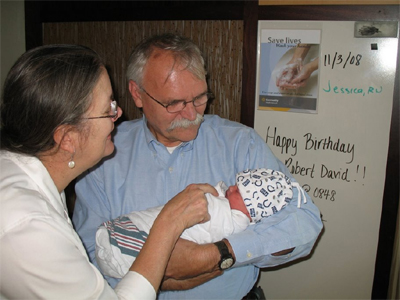
Originally posted 01/09/2009
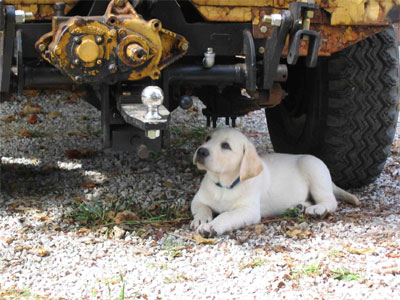
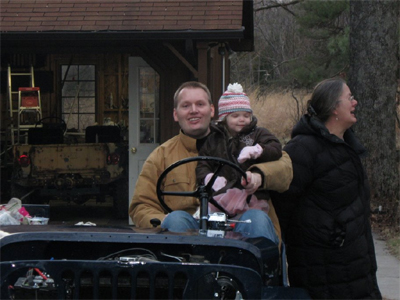
Work on Ole Blue has slowed a little for the very best of reasons. Evan’s and Tammy’s son Robert (aka Robbie) was born in early November. We are sure that it won’t be long before Robbie joins sister Maddie as a Farm Jeep mechanic. We are also looking forward to giving Robbie his first jeep ride, as soon as the weather improves.
Parting is such sweet sorrow
In the meantime, the search for just the right parts continues. Without a doubt e-bay has made finding parts easier, but it is not without its pitfalls. Sometimes, we (especially Barry) buy things we really don’t need. But there is always that bargain that is just too good to pass up. This time the bargain was in the form of a complete PTO setup that was not described in a manner that would cause it to appear in a farm jeep search. We didn’t really need another PTO setup, but Barry couldn’t resist the urge to bid. With some minor repair on one of the shaft boots, this will most likely be the setup we install on Ole Blue.
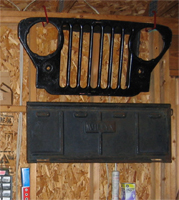
On the down side, we have purchased a couple of mislabeled items. The reader might remember the grill that was described as being for a 3a, but in fact was for a 2a. The latest error was a set of headlight buckets. Again, these were described as fitting a 3a, but they are for later model CJs. The upside is we have ended up repairing and using the original parts. We are also using the 2a grill as garage art (doesn’t every garage need wall art?). Barry’s New Year’s resolution is to look a little closer before hitting that bid button.
Good things come
Evan has been patiently searching and waiting for a Newgren pump. The search, which began when we acquired the Newgren lift in 2003, came to an end when a complete pump appeared on e-bay and Evan was the successful bidder. Amazingly, all the parts were there, although one bracket arm was missing. That has been repaired by our local welding shop and looks like new.
We took the pump to a hydraulic repair shop and have just learned that it isn’t repairable. We (with the help of the shop) are searching for a substitute. If one isn’t available, we will see about a custom rebuild. We still have the option of installing the Monroe pump, so this shouldn’t slow us down on our goal to have the jeep ready for spring plowing.
Tanked again
Robbie arrived slightly ahead of schedule and the reassembly of the jeep stopped just short of our next milestone of starting the jeep and driving it out of the garage. Barry decided that a nice Christmas present for Evan would be to make the jeep drivable. That meant installing the gas line and tank, roughing in the wiring harness, installing the driver’s seat and replacing the steering wheel.
Replacing the tank is a snap, since the tank is strategically located under the driver’s seat. Attaching the gas line, however, is another adventure. We had purchased a new, solid fuel line and the first task Barry faced was finding the proper routing. Ole Yeller has a “replacement line” made up of pieces of solid steel tubing and rubber hose. So it was of no value as a guide of how the solid line weaved in and around the body and frame. After several tries, Barry dropped a note to our friends at the CJ-3A Information Page and they provided detailed routing information (http://www.cj3a.info/tech/line.html).
Once the line was in position, the hard part began. The end of the line bends 90 degrees at the opening in the floor and has a male flare fitting that mates to a nut welded to the bottom of the tank. The line, once in place doesn’t move. The tank, once in place (but not strapped down) will move only slightly, and then only when considerable force is applied. The quickest way to ruin the tank is by cross-threading the connection. After what seemed like hours of trying to screw the line into the tank, Barry gave up and removed the tank and line from the jeep.
With the tank on the bench (upside down), he still couldn’t get the fitting to screw into the tank beyond a half turn or so. The fitting in the reproduction tank seemed to be slightly out of spec. There are only a few threads inside the nut, before the mating flare and Barry couldn’t see a way to run a tap to clean the threads. Closely examining the threads, Barry was sure he wasn’t cross-threading the connection and decided to use the flare fitting as a tap. Using a wrench, he slowly eased the fitting deeper into the nut. After each quarter turn, he would back the fitting out and recheck the threads.
When he finally felt like the fitting was solid and he could screw the fitting into the nut with his fingers, he remounted the tank and line. It took several more tries before he got the tank and line aligned and he could screw the fitting in by hand. He did one final tightening of the nut, then crawled out from the under the jeep. Either the fitting would hold or it would leak. In either case, putting gas in the tank would have to wait for another day. Barry had had his fill of gas tanks.
Up next – Wire was I again.
Part 14 – Wire Was I Again
Originally posted 01/09/2009
With the gas tank in place, Barry could connect the fuel gauge sender and work on the remainder of the wiring under the dash. As stated before, the wiring harness made connections simple, but we were missing a few holes in the reproduction body. Putting holes in the freshly painted body is not something Barry enjoyed. Luckily, the holes were small and we had the original body to use as a template.

With the dash wiring nearly complete, Barry moved on to installing more of the wiring harness. The harness comes in sections and Barry once again turned to our friends at the CJ-3A Information Page (via the CJ-3A Page forum) for mounting instructions. Other than the need to drill even more (small) holes, this part of the wiring was straight forward.
The rear lights are just the standard replacement type and not the original 3a style. That might be a future upgrade. The 3a has a single terminal block mounted on the driver’s side fender, just in front of the horn. With the wiring harness temporally in place (proper clips are on order), we could start and move the jeep without fear of a loose wire getting wrapped around a driveshaft or the fan.
Taking a turn
Do Farm Jeeps need turn signals? Jeep Tractors didn’t even bother with headlights. However, we do plan to drive Ole Blue to town now and then and we do want to be safe and civil. Back to that civil part in a minute.
We purchased a “universal signal switch” that mounts via a metal band to the steering column. We purchased the wiring harness with the turn signal option, so again, the wiring was a very straight forward process.
Speaking of straight and civil, the switch doesn’t have automatic cancellation (automatically returning to the center position after you complete a turn), so the odds are high that we may be seen driving down the road doing the “perpetual turn.” In researching turn signals for the front (still to be done), we came across an article where options were discussed for alerting the jeep driver of this condition. Suggestions included load flasher units or a small warning light mount on the top of the windshield. Maybe in a future release.
Lit up like a Christmas tree
We are building our 3a with the 12 volt option. With the wiring, except for the headlight and front parking/turn signals in place, Barry went shopping for the appropriate blubs. He printed off the electrical information page over on the CJ-3A page (http://www.cj-3a.com/wiring%20diagrams.htm) and headed to the local auto parts store. All the bulbs were available, with the exception of the headlights. They would have to be a special order. By chance, Barry’s second stop of the day was the local farm supply store for some more hardware. He wandered down the automotive aisle and there on the bottom shelf in boxes that appeared to have survived the flood with Noah, were model 6014 blubs. Columbus did experience a flood earlier in the year and they may have gotten wet, but at $8, we will take the risk.
Barry installed the blubs in the various sockets, dropped a new battery in place, pulled out the light switch – and they worked! Well at least the tail lights, brake and turn signals worked. The dash light didn’t, but that was a grounding problem. Barry had to remove the fixture and grind the paint off the dash hole. The wires on the turn signal were reversed, but this was a simple reversal of push-in connectors. We have lights!
Next up – Drum roll please
Part 15 – Drum Roll Please!
Originally posted 01/09/2009
The reader will remember that Barry was on a quest to give Evan the chance to start and drive Ole Blue as a Christmas present. Santa’s elf was running a little behind (darn those pesky gas tanks!)
If the Fates allow
It came to pass that the first time Evan was at the farm and thus able to receive his present was also the occasion of the Lawson Family Christmas party. This turned out be perfect as it allowed Santa’s elf time to finish up some last minute items and it also allowed us to involve the entire jeep family. But we are getting ahead of the story.
Among the elf’s remaining tasks were the installation of the steering wheel and the driver’s seat. Those would seem essential to a successful driving experience. The old steering wheel was cracked and, we think, held together with electrical tape, neatly wrapped around the wheel. As much for safety and comfort as for looks, we had opted to purchase a reproduction steering wheel. The new wheel went on with the aid of a socket and hammer. It will stay in place for a long time. As an added bonus, the elf screwed on the horn button. It works too!
The driver’s seat was put in place and bolted to the floor. The new seat cushion was placed on the pan. It can be installed later. We are ready to roll – almost.
No gas, no glory
When last we left the gas tank, Barry had crawled out from underneath the jeep and walked away. If Evan was going to start and drive the jeep, he needed a supply of gas. Plan A was to install the gas tank and hook the gas line to the engine. There was no plan B.
On the day before the party, Barry finally got up the nerve to test the connection. He careful poured about a quart of gas in to the tank. With somewhat less than perfect confidence, he looked down at the garage floor. No wet spots. He poured another quart. Still no wet spots. There are no security cameras in the garage (they are all on the outside), so the little elf victory dance went unrecorded.

Let’s have a party!
In true Lawson fashion, we enjoyed a wonderful meal and lots of stories of Christmases present and past. In the late afternoon, Barry invited everyone out to the garage to watch Evan try out his ride. The weather was cloudy and cold, so coats, hats and gloves were donned. The party wandered outside and the garage doors were thrown open (OK we used the openers).
Evan climbed behind the wheel, turned the key and – well it just cranked. We hadn’t started the engine for over a year. But a few more seconds of cranking and a shot of starting fluid and the engine roared to life. Evan let the engine idle for a few seconds, shifted the transfer case and transmission in gear and slowly let the untested clutch out. He pulled smoothly out onto the driveway!
A Farm Jeep moment
Shouts of joy and amazement! After almost 6 years, Ole Blue is alive. Other than the idle being too fast and the clutch pedal hanging up on the body (just a scraping noise), it seems to be in great shape.
The first ride (down the drive and back) honors went to Paula and Sally, with Barry driving. Barry parked Ole Blue and invited everyone back in the house of a celebration toast.
It was a good day.
Next up – These little things
Barry’s notes – Without a doubt, this was a special day. I’m really glad that it turned out to be a family event. That is what this whole project is really about.
Evan’s notes – Best present ever. Ever!
Part 16 – These Little Things
Originally posted 03/25/2009
With Ole Blue back in the garage under its own power, we started to attack all the little things still needing to be done before we can drive on the road or in the field. The list is still long and winter has returned. With no heat in the garage, work has slowed, but there is progress to report.
Lighten up
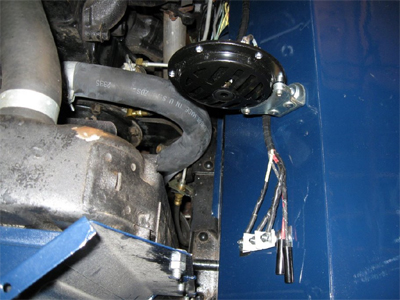
Ole Blue had the traditional turn signal treatment of the day. There was evidence of turn signal light mounting holes in the fenders and extra taillights in the rear. We have already “gone modern” by using dual filament bulbs in the rear (a single light to serve as tail, brake and turn signal) and decided we would make the parking lights do dual duty too. So the challenge became how to modify the parking lights.
The design of the parking lights on the 3a is extremely simple. The grill is indented and a single filament bulb socket is seated in the small hole. The plastic lens covers the small bulb and the space between the cover and the body is too small to house a dual filament bulb and socket. Modifying the grill seemed like the only solution.
After some searching, we found our friends on the 3a page had a solution that required minimal modification. It uses a standard socket, available at any auto parts store, and enlarging of the socket hole – http://www.cj-3a.com/installing_front_turn_signals.htm. While this looked promising, Barry had another plan.
Bright idea
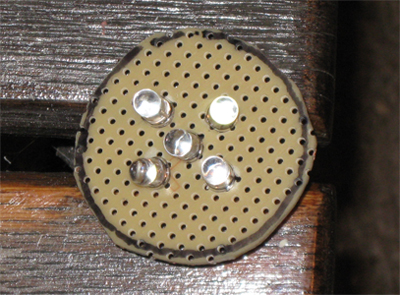
Over on the tractor forum Barry frequents, there are ongoing discussions of using LEDs for tractor lighting needs. LED assemblies are available that simply replace traditional bulbs, but individual LEDs are available so you can build your own. Inspired by the guy who made his headlights out of individual LEDs and the bottom of a Coke can, Barry ordered four white and six yellow 12 volt individual LED bulbs from superbrightleds.com. These are small, wired (3 feet of wire!) and cost $2-$3 each.
Using the old lens cover as a guide, Barry made an LED holder out the bottom of 6-pack carton (always a ready supply near the beer fridge). Perfect jeep repair material, at least for proof of concept. Three yellow LEDs wired together form the turn signal array and two white LEDS form the parking light array. The cardboard holder fit nicely behind the lens and the small collection of wires didn’t require any drilling of the grill. With only a slight amount of guilt for being too modern and not authentic, Barry decided to go with this plan, at least for now.
While the 6-pack cardboard base added some “class”, Barry wasn’t sure it would hold up over the years. LEDs are directional and don’t require a reflector but something stiffer and more durable than cardboard was needed. In one of his many “parts” boxes Barry spotted a perforated circuit board. The perfect material. A trip to Radio Shack produced a set of 2’’ square boards. A trip to the sander to make them round, and small holes were drilled to fit the LEDs. They are ready to test and install. The positive leads from the three yellow bulbs were soldered together, as were the positive leads for the white LEDs and each was fitted with a quick connect lug. All the ground leads were soldered together and fitted with a ring connector.
Installation was simple. All the wires easily fit through the gill hole. The turn and parking leads were plugged into the appropriate wiring harness connector. The LED ground wire was attached to the screw holding the lens ring. A quick check and we now have parking lights and working turn signals front and back. Finished!
Well maybe. The white lights are very white and do show up well against the grill. However, Barry is not sure of the “look” and may trade them out for yellow. The three yellow LEDs for the turn indicator do produce a nice bright light, but we may want to add more (there is plenty of room for up to four) just to make sure the turn signal can be seen. Those are easy changes that can wait for another day.
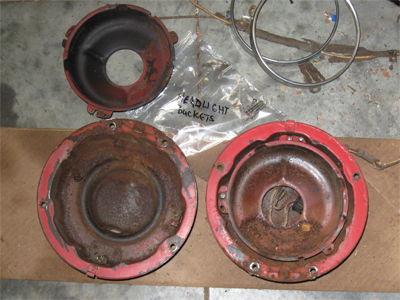
Buckets of rust
The reader might recall that Barry had purchased a set of headlight buckets that were in great shape but were the wrong model for Ole Blue. So we were stuck with repairing the originals. Headlight mounts for jeeps consist of an outer shell (we assume this is the “bucket”) and an inner metal liner that hold the bulb. This inner liner is fastened to the outer shell with screws and springs. The springs hold the liner in place, while the screws allow the headlight to be “aimed”, moving the inner liner up/down and left/right. The buckets aren’t sealed and over the years, water had leaked in and caused considerable surface rusting. The springs were broken and rust eaten. Luckily (engineering?) Willys used brass inserts for the adjustment screws, so those were not rusted and the shells came apart easily. We had ordered new springs and grommets from Walck’s. Now about that rust…
Good enough
One would think that when a project covers years, some of that time would be taken to do the perfect restoration. With some things where having the body off provides a one-time opportunity to get it right, we have done a proper restoration. With other items that we can easily return to in the future, we have taken the “good enough” approach. The headlight buckets are a good case in point. If we were doing this properly, we would have sent the parts off to be sand blasted and made them appear factory fresh. From a functional standpoint all that is needed is to take a wire brush to the rust, a spray can paint job, install the new springs and we are ready to go. We can always remove them in the future and do a proper restoration. Or perhaps we should leave some things for Maddie and Robbie.
Today’s lesson
For now the buckets received “good enough” treatment. Looking “refreshed, but not restored” the buckets needed to be reassembled. Let’s see, install the new springs, hold the inner liner just right, and insert screws. Easy. An hour later, Barry had one bucket assembled. Ten minutes later the second bucket was assembled. He guessed if he had to do a third, it would have taken less than 5 minutes.
It bears repeating here that these old jeeps were made to be serviced in the field and while they sometimes require special tools, most assemblies aren’t complicated. They are simple. Sometimes the assembly methods are so simple that they are easily missed.
Without going into great detail, but with enough so that if we do this again we can read this and remember, here is the story. As stated above, the brass nut assembly for the adjustment screws made it easy to disassemble. The brass nut assembly fits into tabs (one is visible in picture of the disassembled buckets at about the 4 o’clock position) welded on the side of the outer shell. When Barry disassembled the buckets, he bent the tabs slightly and the brass assembly slide out. When he reassembled the first unit, he squeezed the tabs so that the assemblies were snug. Mistake. The design was for the assembly to have some movement within the tabs (they could “rock”) to allow the alignment screws to enter the nut at a slight angle. Without the movement, Barry had to pull against the very strong springs so that the screw was straight up and down above the nut. In his first attempt, he cross-threaded the soft brass in his effort to get the screw started. The next 30 minutes was spent taking the bucket apart, re-threading the brass nut with a tap and swearing. After the second attempt yielded the same results, the next 15 minutes were spent staring and repeating “this is way too hard.” A little voice said “you know, if that nut was at a very slight angle, this would work…”
After this moment of enlightment, Barry quickly loosened the tabs and made another attempt. Success! That little bit of movement had been engineered into the bucket. So simple.
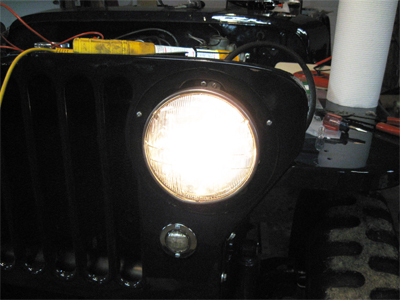
Bright and shiny objects
The rest of the headlight install went smoothly. Again the wiring harness made hooking up the headlights a simple process. We will wait to add the fancy chrome outer rings (which hid the innards and the adjustment screws) until we do the garage-wall-headlight- aim.
Meanwhile, before affixing the headlight wiring to the grille and routing it under the grill’s top lip, we needed to install the hood welt. The “kit” came with a length of fabric (the welt) and shiny metal rivets for attaching same to the top of the grill. This serves as a cushion for the hood. The small rivets are shaped like a clothespin and the “legs” are spread to each side, holding the welt in place. Without a doubt, there exists a special tool for installing the rivets. We used a screwdriver to spread the legs, then a pair of curved Visegrips to tighten the rivet to the body. Nothing special here. Just another of those little things to be done.
Next up – In the hood
Part 17 – In (and under) the hood
Originally posted 06/16/2009
Spring has arrived and so does the hope of hitting the road. Just a few more tasks and Ole Blue should be ready to hit the highway, or at least the fields. Blue has been reassembled except for bolting on the hood and adding new seat cushions and backs. While not required for road testing, having those items in place seemed real signs of progress.
Ole Blue’s only remaining original sheet metal is the hood. It has lots of lumps and bumps that we did our best to bang out before it was painted. Our body shop guy did say “You know that dark blue is really going to make the dents show up.” He was right, and against the smooth new fenders and body some of the bumps and lumps look even bigger. But those are marks of a jeep life well led and we will honor them by leaving them for all to see.
All in the family
The best part of this ongoing journey has been the time Evan and Barry have spent together. Add to that the involvement of past and present family and we have a wonderful, shared adventure. Maddie has become a regular member of the crew. While there is some sitting and watching, Maddie likes to be involved. So when the time came for putting the new seat cushions and backs on the frames, Maddie was there with her screwdriver.
Sometimes Maddie just likes to work on her own 2a. On a warm spring day, she declared to her dad that it really needed to be washed. She is truly a member of this jeep family.
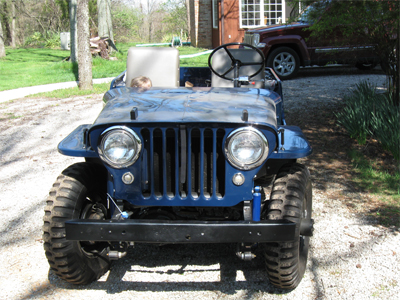
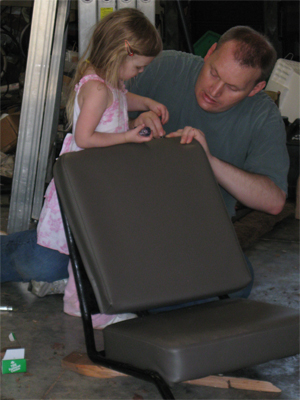
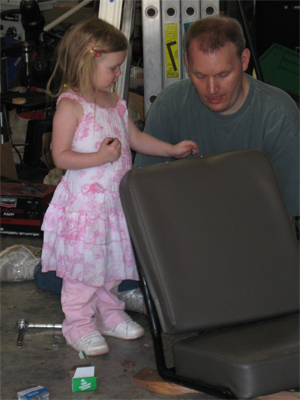
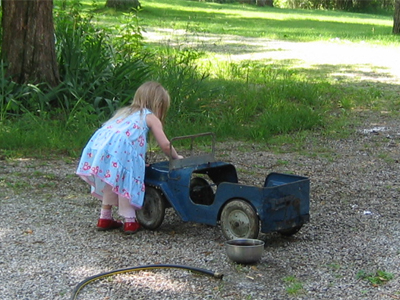
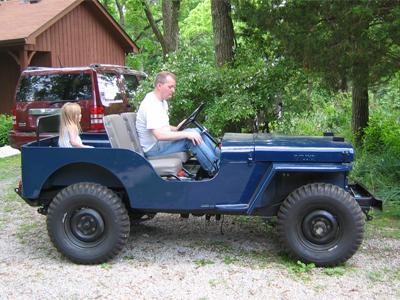
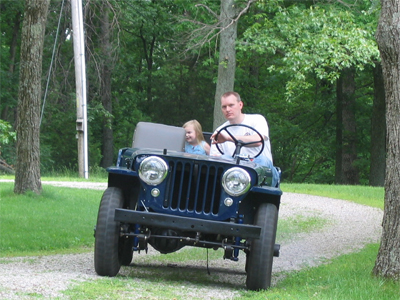
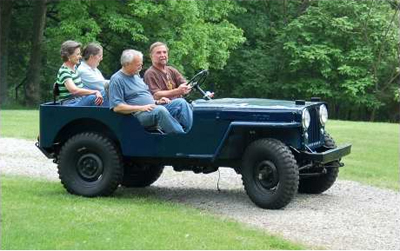
Under pressure – or not
Our first test of the engine was done with an oil pressure gauge installed. On cold starts, the pressure was around 25 psi. Good enough. Later, when we were able to go for short test runs, we noticed that the pressure was dropping to near zero at normal operating temperatures. This was very different behavior from Ole Yeller, whose oil pressure starts around 40 psi and only drops to about 25 psi when the engine is at operating temperature. Something must be wrong.
Our first thought was that we might have caused a blockage when we cleaned the oil pan; perhaps we had loosened some sludge when we wiped down the pickup screen. Or maybe we just needed a new oil pump. After all, this engine is 64 years old (we believe) and we don’t know how many hours/miles it has on it.
We decided to attach another pressure gauge, just to make sure the new gauge wasn’t at fault and to get a more accurate reading. We installed an inexpensive gauge in the engine compartment from the auto parts store as a quick test. When we failed to get the connections good and tight, we at least knew we had some pressure as oil shot out as soon as the engine was started. The new gauge showed about 5 or 6 psi at operating temperature. That seems low.
Back to the well
Before ordering a new oil pump, we thought a little research was in order. Just how big of a job will this be? We turned, as we have so many times, to the well of knowledge to be found in the many jeep forums. Among the hundreds of “low oil pressure” topics were several that listed the “normal” idle pressure as low as 6 psi. The 1947 CJ2A operator manual shows “(s)tandard gauge reading is approximately 35 at 30 miles per hour and 10 at idle speed.” So at least for the moment, we will live with the low readings. But before we do much highway driving, we will revisit this issue.
Taking a back seat
The major advantage of a Newgren lift is the bed remains open, for hauling bags of feed, fertilizer or friends. Ole Blue came with no seats, so we aren’t sure if a rear seat had been installed. For our purposes, we purchased a reproduction rear seat. Maddie, having assisted in installing the seat cushions volunteered to be our tester. When our friends Rick and Deb visited, we all loaded up for drive around the yard and more testing. Ole Blue looks like a real jeep, ready for a trip to town.
Time lines
The test trips around the yard and down the drive showed some high-speed engine issues. Ole Blue starts easily and idles smoothly. But under load, the engine is lugging, hesitating and, occasionally, back firing. Most likely, we believe these are timing and/or carburetor issues. We will start with timing, since we have installed new points and might not have them set properly. Besides, setting the timing is easy right? Just aim your timing light at the timing marks and turn the distributor until the marks align.
The timing marks on our engine are etched into the flywheel and are visible through an inspection hole at the bottom of the bell housing – if you stand on your head. Using a mirror (in place of head standing) we hooked the light up to the No. 1 plug and started the engine. No lines or markings were visible. By turning the engine by hand and still using a mirror to look inside the inspection hole, we did locate the set of markings. Why couldn’t we see them with the timing light? Perhaps we needed to apply some white paint so they would show more clearly. That didn’t help.
Back to the Web and more searches on timing. This time, Barry stumbled across a note about some early flywheels being installed 180 degrees out – instead of lining up with the No 1 cylinder, they align with the No. 2 (fourth in firing order) cylinder.
Next up – Timing is everything
Part 18 – Timing is Everything
Originally posted 07/14/2009
There are a number of interesting stories surrounding the development of the jeep and Willys’ success in winning the military’s development contract. The “Go-Devil” engine was a key component of the winning design. Developed for the Willys motor cars in the late 1930s, it was a simple design that was reliable and easily maintained. The “Go-Devil” saw duty as “stationary” engines in welders, generators and compressors in addition to the military and civilian versions of the jeep. We aren’t sure if our engine started life as a welder or under the hood of a jeep. In any case, a good jeep experience requires a good running engine and Ole Blue’s engine wasn’t running well. It started easily and idled smoothly, but ran poorly under load and at high speed. Our best guess was an ignition timing issue.
The old ways are best
As stated in the previous part, we determined from the distributor rotor position that the No. 2 (fourth in firing order) cylinder aligned with the top dead center (TDC) marking on the flywheel.
Barry dropped a note on the G503 forum asking for advice on timing the engine. Here is the response he received from “Cuz (AKA Wes K)”:
“Using that flywheel timing mark with a timing light is tough and very inaccurate due to movement and accessibility and varying viewing angles. If you can now see the mark then your timing is at least close. Try the old fashioned way of static timing. Set the points to .020. Bring your # 2 TDC on compression. Slowly back the crank up until you can see the IGN timing mark. If the points are open now go a little further back until they close. Now slip a piece of clean white paper between the contacts. Now while maintaining a slight pull on the paper slowly rotate the crank forward until the paper pops loose. Where is your timing mark now? This is the point at which your # 2 plug is firing. If it’s on the mark then no battle with the stuck distributor is necessary. If it is off you will have to free the housing by soaking with PB blaster and gently working it back and forth until you can swing it enough. Then start over.”
First we set the points to .020, then Barry placed the paper between the contacts while Evan used the fan to slowly rotate the crank, stopping when the paper “popped” free. The IGN timing mark was visible, but not aligned with the mark on the bell housing cover. We have a timing problem.
Degrees of freedom
Changing the timing is accomplished by loosening the clamp that holds the distributor housing in place and moving the housing. Normally, the housing turns easily and most adjustments involve only slight movements. Ole Blue’s distributor housing wasn’t moving. It was stuck. Neither Evan nor Barry could get any movement, so we applied liberal amounts of PB Blaster and improvised a tool. Using an oil filter strap wrench, Evan began to apply force in both directions, being careful not to crush the housing. After several minutes there was slight movement. We took turns with the wrench and continued to gently but firmly increase the movement until the housing broke free and could be easily moved by hand.
On the mark
We could tell the reader how we knew exactly which direction to turn the housing so that we were advancing or retarding the timing. But it wouldn’t be true and we do best with simple instructions. This time, we aligned the IGN mark on the flywheel with the mark on the bell housing. We moved the housing so the points just opened. We repeated the paper test and the marks aligned! Evan jumped behind the wheel and cranked the engine. It didn’t start, but it had been a few weeks since our last test. After a few more cranks the engine fired, much to the relief of all present.
The engine sounded good at both idle and when revved. Barry suggested a driveway test was in order and Evan backed the jeep out of the garage and headed down the drive. No backfiring or other unwanted engine noises were heard. The smile on Evan’s face as he drove back to garage told Barry that we got it right the first time.
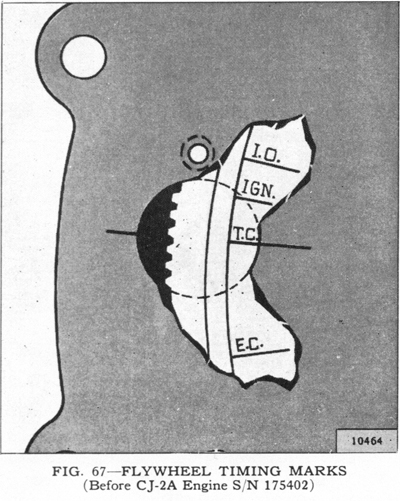
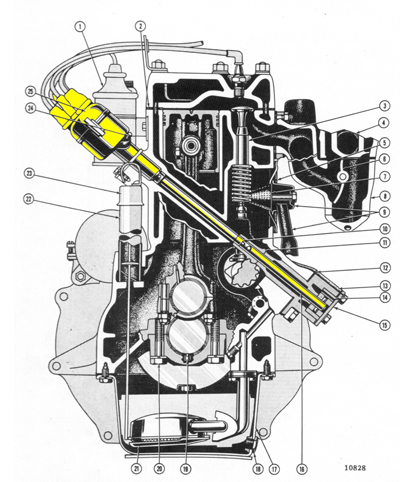

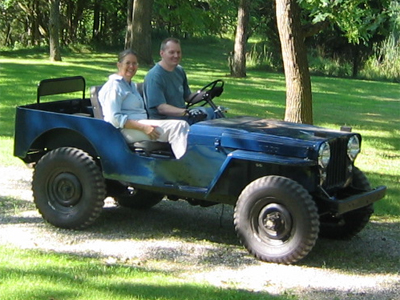
On the road again
Evan took Paula for a spin down to the bottom of drive. The quarter mile drive goes through the woods and up a steep hill and is one of the reasons that jeeps have always had a home here. Another good test of engine performance and Evan reported that the engine performed flawlessly.
It was Barry’s turn for a test ride and when they reached the bottom of the drive and the county road, temptation got the better of him and he told Evan to make a right turn onto the pavement. It was another amazing moment that was six years in the making.
Knowing we were so not legal, Evan drove a short distance before turning the wheel over to Barry for the short drive home. We had been driving in low range, so Barry shifted in to high range and quickly reached an amazing 30MPH! At least at 30, the jeep drove straight and true. In a couple of minutes we were parked safely in the garage. It was a good jeep day.
Next up – Stay right there
Barry’s notes – In February of 2004 (Part 4) I looked at the parts and pieces spread across the garage floor and asked Evan “Do you think we will ever get this back together?” He said we would and has always been confident that we would indeed drive it on the road. I’ll confess to having some real doubts then. But not now.
Part 19 – Stay Right There…
Originally posted 08/18/2009
Hanging from the frame cross member, behind the engine was the old “stay cable.” What, you might ask, is a “stay cable” and why do I need one? From what we have read, the jeep engineers were concerned about sudden stops sending the engine forward on its rubber mounts and putting the fan blade into the radiator (this must have been before they designed the brakes). While there was little concern for driver safety (remember you are sitting on the gas tank) the “stay cable”, along with various guard plates (brake master cylinder, oil pan and transmission/transfer case) were intended to protect the jeep from harm.
The old cable had been removed – forcibly by all appearance – from Ole Blue’s original engine. New cables are available and this was one of the easiest and quickest restoration jobs. The cable, which has a ball on one end and a threaded rod on the other, is inserted through the cross member and bolted to the bell housing. Perhaps it doesn’t warrant a mention in the restoration annals, but how else would you know about this little piece of jeep history?
Stay right there – part 2
Back around Part 10, we had rebuilt the hand brake, emergency brake (e-brake) or parking brake. Those are all terms used for the driveshaft drum and brake shoes located just behind the transfer case. The brake is operated by a lever with an attached cable. The cable is routed into the engine compartment, through the firewall and attaches to a handle sticking out of the dash that is housed inside a ratcheting bracket. Pulling the handle out forces the brake shoes against the drum and prevents the rear driveshaft from turning.
Unlike a regular hydraulic brake system, the e-brake relies on a cable, brackets and springs to make everything work. Missing from our reproduction body, but still part of Ole Blue’s original body were the underbody return spring mount and the firewall “upper cable clip” mount. The old body sits quietly rusting down by the barn. We are very glad we kept the body and didn’t send it to recycling heaven. We are still learning from it and taking the occasional needed part.
Once again, Barry reluctantly donned his helmet and put welder to body. We doubt that many will ever notice the stout, but ugly welding job. A strong spring and wire hook attach to the lever and return the brakes to the “free” position as the brake handle is released.
The brake system requires that the cable body remain firmly in place when the handle is pulled. Two reproduction clamps are available for the top (firewall) and bottom (frame cross member). There is a third clip, which holds the cable way from the spinning front drive shaft. No amount of on-line hunting produced the third or middle clip. We know it mounted to the engine and had determined that we would need to fabricate our own simple mount.
See, I knew we would need that
The reader may have noticed that Barry’s garage is, shall we say, cluttered. It is very much like his desk at work and most likely the way his mind is organized too. But sometimes that habit of tossing on the pile instead of tossing out pays off. One day while searching for something else, Barry spotted the old e-brake cable, removed during the original disassembly of Ole Blue. And there, big as life, was a clip in the middle of the cable. Proof, once again, that you really might need that stuff some day.
Getting a handle on the situation
With all the cables, springs and clamps in place, it was time to adjust and test the e-brake. The manual is very specific about adjusting the e-brake, complete with instructions on how touse the brake tool or screwdriver as a lever to move the “star wheel” to snug the brake shoe against the drum. With therear of the jeep jacked off the floor, we were able to “lock” the shoes against the drum. According to the manual, we needed to “back-off” the star wheel exactly 7 clicks.
Pulling out the dash handle did, indeed, lock the wheels, but we couldn’t get the handle to stay in the “pulled out” position. Since neither Old Yeller nor Ole Blue ever had a working e-brake, we weren’t sure exactly how it was supposed to work. We assumed we pulled the handle out and turned it to lock in the “on” position. It didn’t want to stay.
Were we missing something in the new body’s “ratcheting bracket” or was it an operator error? Researching the operator’s manual resulted in just the instructions to “set the hand brake.” Looking at Ole Yellow’s bracket, Ole Blue’s original and new body brackets didn’t reveal any obvious differences.
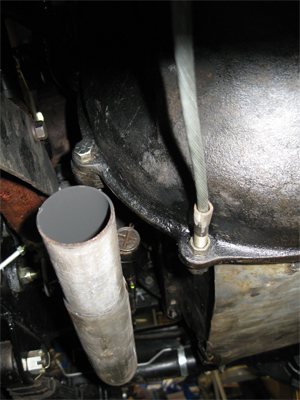
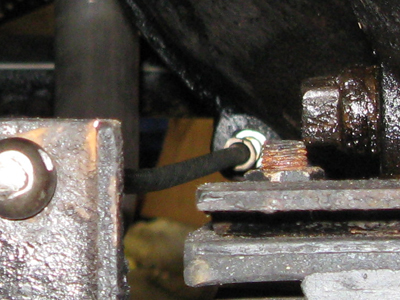
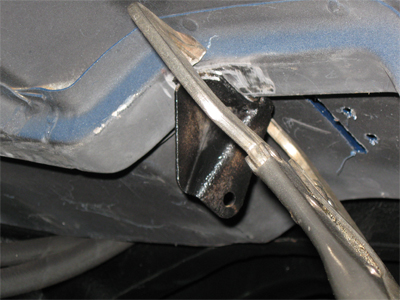
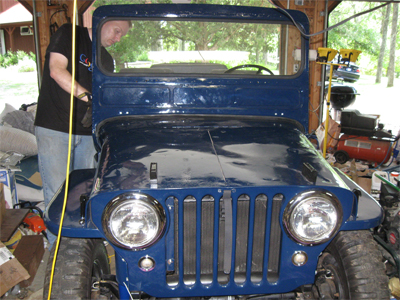
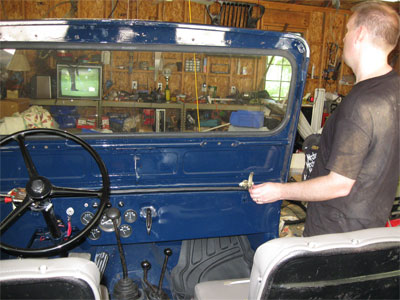
If at first…
Evan left for the day, still scratching his head. Later that evening and after a few beers, Barry sat in the driver’s seat, pulling on the handle and turning it 90 degrees to the right. After a few tries at various lengths, he found a spot that would “lock” and was able to repeatedly release, then lock the handle.
Backing the jeep out garage, Barry headed for a small incline. He tried setting the hand brake, and then removed his foot from the brake pedal. The jeep started rolling. Pulling the hand brake out further stopped the forward motion. We either have an adjustment problem (7 clicks is too many) or a problem with the handle operation. The good news is that the e-brake does work, we just need to fine tune it.
Stay right there – part 3
As stated in the Jeeps in the Family section, all the jeeps that have lived here have done so without a windshield. The jeeps were rarely on the road, didn’t have tops and no windshield meant you had the ability to drive in the woods without worrying about low hanging branches. Then there is the wind in your face.
Ole Blue will be roadworthy and we had the original windshield repaired, painted and had new glass installed. Installing and removing the windshield is very simple. A single bolt on each side of the body allows the windshield to pivot and fold flat against the hood. We’ve even installed a new tie-down strap on the front of the grill that holds the windshield in place when it is folded down.
Except for mounting the new seal backwards (just had to remove and reinstall 12 screws) the installation went without a hitch. We had purchased new latches for the dash and windshield, which lock the windshield in the upright position. Those were a simple bolt-on process, as evidenced by Evan’s ability to watch a golf game while doing the install.
Next up – PTO’d
Part 20 – PTO’d
Originally posted 09/08/2010
The past year has flown with work and family taking priority (as always) over finishing Ole Blue. Progress has been made, if not recorded (which as you will see later, may be an issue). When last we left you, we were down to the final few elements to get Ole Blue on the road and decked out in farm jeep gear. Specifically the PTO and the Newgren lift, complete with a crank mount hydraulic pump.
The PTO (power take off) unit is a fundamental part of a farm jeep. The earliest civilian jeeps offered the PTO as an option and the transmission was designed so the PTO gear box was a direct bolt-on. The original body had a cover on the transmission tunnel that was removed to allow the shifter to be positioned without any modifications. When we purchased our replacement tub, we specified that the PTO opening be cut as part of the body preparation.
We have been lucky enough to collect a couple of complete PTO systems (shifter, shaft and rear gear box) over the years, so Barry picked what he thought was the best of the lot to install. Installation is as simple as it gets. First, remove the 5 bolts holding the cover on the back of the transmission. Position
the shifter lever up through the hole in the floor and bolt the shifter in place. It is that simple. But it didn’t work for us.
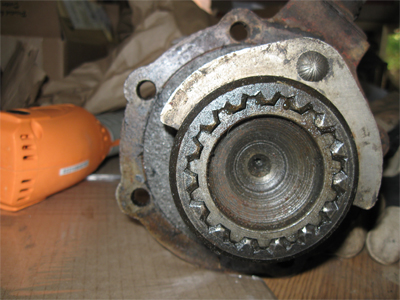
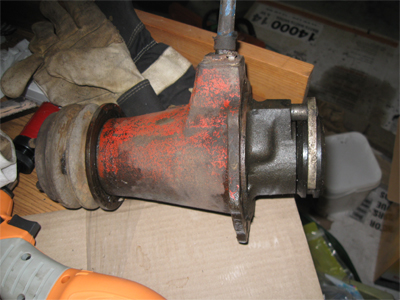
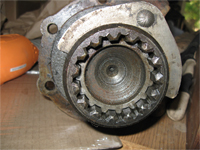
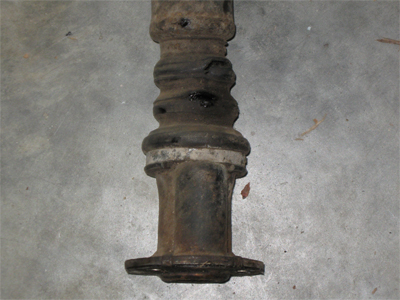
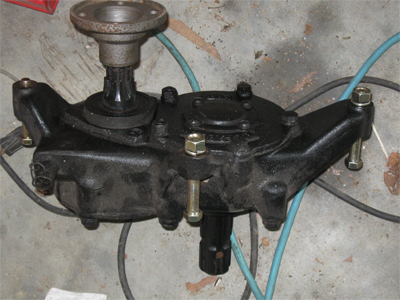
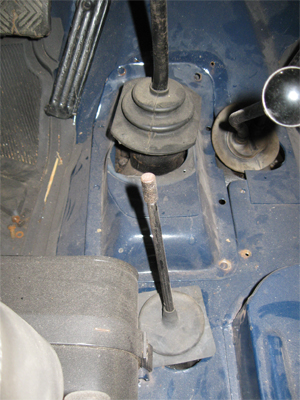
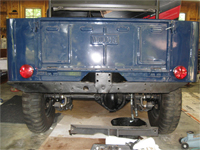
Barry had tested the shifter before installing it. It is a simple sliding mechanism that pushes a gear on the end of the shifter into the outer ring of the output gear in the transmission (see photo). The shifter had operated smoothly on the floor, but would not engage when installed. Part of our plan for this site has been to document our work so a) we can return to it later as needed (more on that later) and b) to share our experiences with the reader. In this case, that documentation process saved us a lot of frustration.
Pictures taken before, during and after we take something apart and reassembly it are an important documentation tool. When something doesn’t go back together (or together for the first time) we use the pictures to find clues to the problem. Barry took a look at the picture of the PTO gear on the back of
the transmission. He saw that one leg of the cotter pin through the castle nut had not been bent up and was blocking the shifter from completely engaging.
Removing the shifter was easy and Barry quickly bent the leg of the pin over the nut. He replaced the shifter and hopped back in the driver’s seat. The shifter easily moved in and out of position. Barry started the engine, put the transfer case in neutral, engage the PTO and put the transmission in 1st gear.
Looking under the jeep, he could see the PTO spinning along. It works!
Rear geared
The PTO gear box mounts directly to the bumper. The bumper and frame are pre-drilled and an opening for the shaft was also standard on all jeeps. In our case, the Newgren mounts to the bumper and frame first, then the gear box is bolted on. Other than the gear box being very heavy, the process is straight
forward. The final step is to attach the flange for the drive shaft to the splined input shaft on the gear box. The Newgren instructions call for an additional spacer on the input shaft, to offset the slight rearward position of the gearbox caused by the lift frame.
Shafted
The PTO shaft is one of the more difficult items to locate. There were different lengths produced for the early CJ series, trucks and for the early CJ5s. Ole Yeller came with a complete, working PTO, so we had measurements when we went shopping. The shifter, gear box and shaft we are installing came from the same jeep. All appeared to have had little use. The only damage is to one of the rubber boots on the shaft. It has small tears, as can be seen in the photo. Replacement boots are available (we have one), but changing them is a complete adventure.
This page http://48cj2a.com/ptoshaft.htm has excellent directions for the repair. Not having access to a repair kit or even a shop press, we will try doing a patch job. For now, we will give the shaft a coat of paint and try some epoxy on the boot.
Next up – There’s a reason for that.
Barry’s notes: One of the best clues we have to the age of our jeep is the date stamped on the transmission housing – November 1949. I wonder how the person assembling the transmission missed it. Perhaps it was getting close to the end of the day or there were other distractions. Maybe he was
thinking of Thanksgiving. Or maybe he did them all that way.
Part 21
Part 22
Part 23
Part 24
Part 25
Part 26
Part 27
Part 28