There are instructions for that…
After installing the new motor, we were ready to get the hydraulic pump attached and ready to work. Before remounting the pump, Barry wanted to replace the shaft seal, to cure the slow leak. As noted elsewhere, Newgren used the same pump found on an International Harvester Model C tractor. A search found that the seal was available and an order placed. When the seal arrived, it was a pretty simple process to take the pump apart and remove the old seal. The new seal was tapped in place and we were ready to mount the pump.
 |
| Above is pictured a portion of the pump bracket and the crankshaft pulley with the “special nut” installed. Set screws (small dots) are visible on either side of the threaded crankshaft |
The pump connects to the crankshaft with a “special nut” (a steel bar with a short stud at each end), a rubber disk and a matching steel bar with studs that fits on the pump shaft. We have installed and removed the pump probably a dozen times over the years, so don’t need the installation instructions. Or so we thought.
We quickly mounted the pump and started the engine. The lift worked perfectly for a few minutes. And then it stopped working. A quick inspection showed that the special nut had come loose from the pulley and was allowed the coupling to slip. The pump wasn’t turning fast enough to work. No problem, we just need to tighten the “special nut” on the crankshaft. Making sure it was tight, we tried again, with the same results.
Time for a bigger hammer, or in this case a bar between the studs to REALLY tighten the nut. This did keep the nut from coming loose, but created a huge oil leak out the end of the crankshaft! Rather than report the hours spent trying to stop the leak, we will simply report the fix. We needed a new “slinger” behind the timing chain cover and, mostly importantly, we used Permatex Ultra Black sealer between the shaft and pulley. Time to attack the problem of the nut coming loose – over tightening was not the answer.
It was clear that the problem had surfaced with the pump seal replacement. More force was required to turn the pump when it was not leaking (a good thing). The original instructions called for two small set screws on the “special nut” to be removed with the nut in place against the pulley. Two small holes were to be drilled into the face of the pulley (using the set screw holes as a guide). We had not figured out how to do this without removing the front of the jeep, so had just tightened the set screws against the pulley face.
Figuring that the average farmer or Willys dealer would have not wanted to remove the radiator and grill, there must have been a method for drilling the holes. We have a right-angle power drill and it worked perfectly for the task. Regardless of the method used, the properly installed special nut hasn’t come loose. Another lesson learned for us. Follow the instructions!
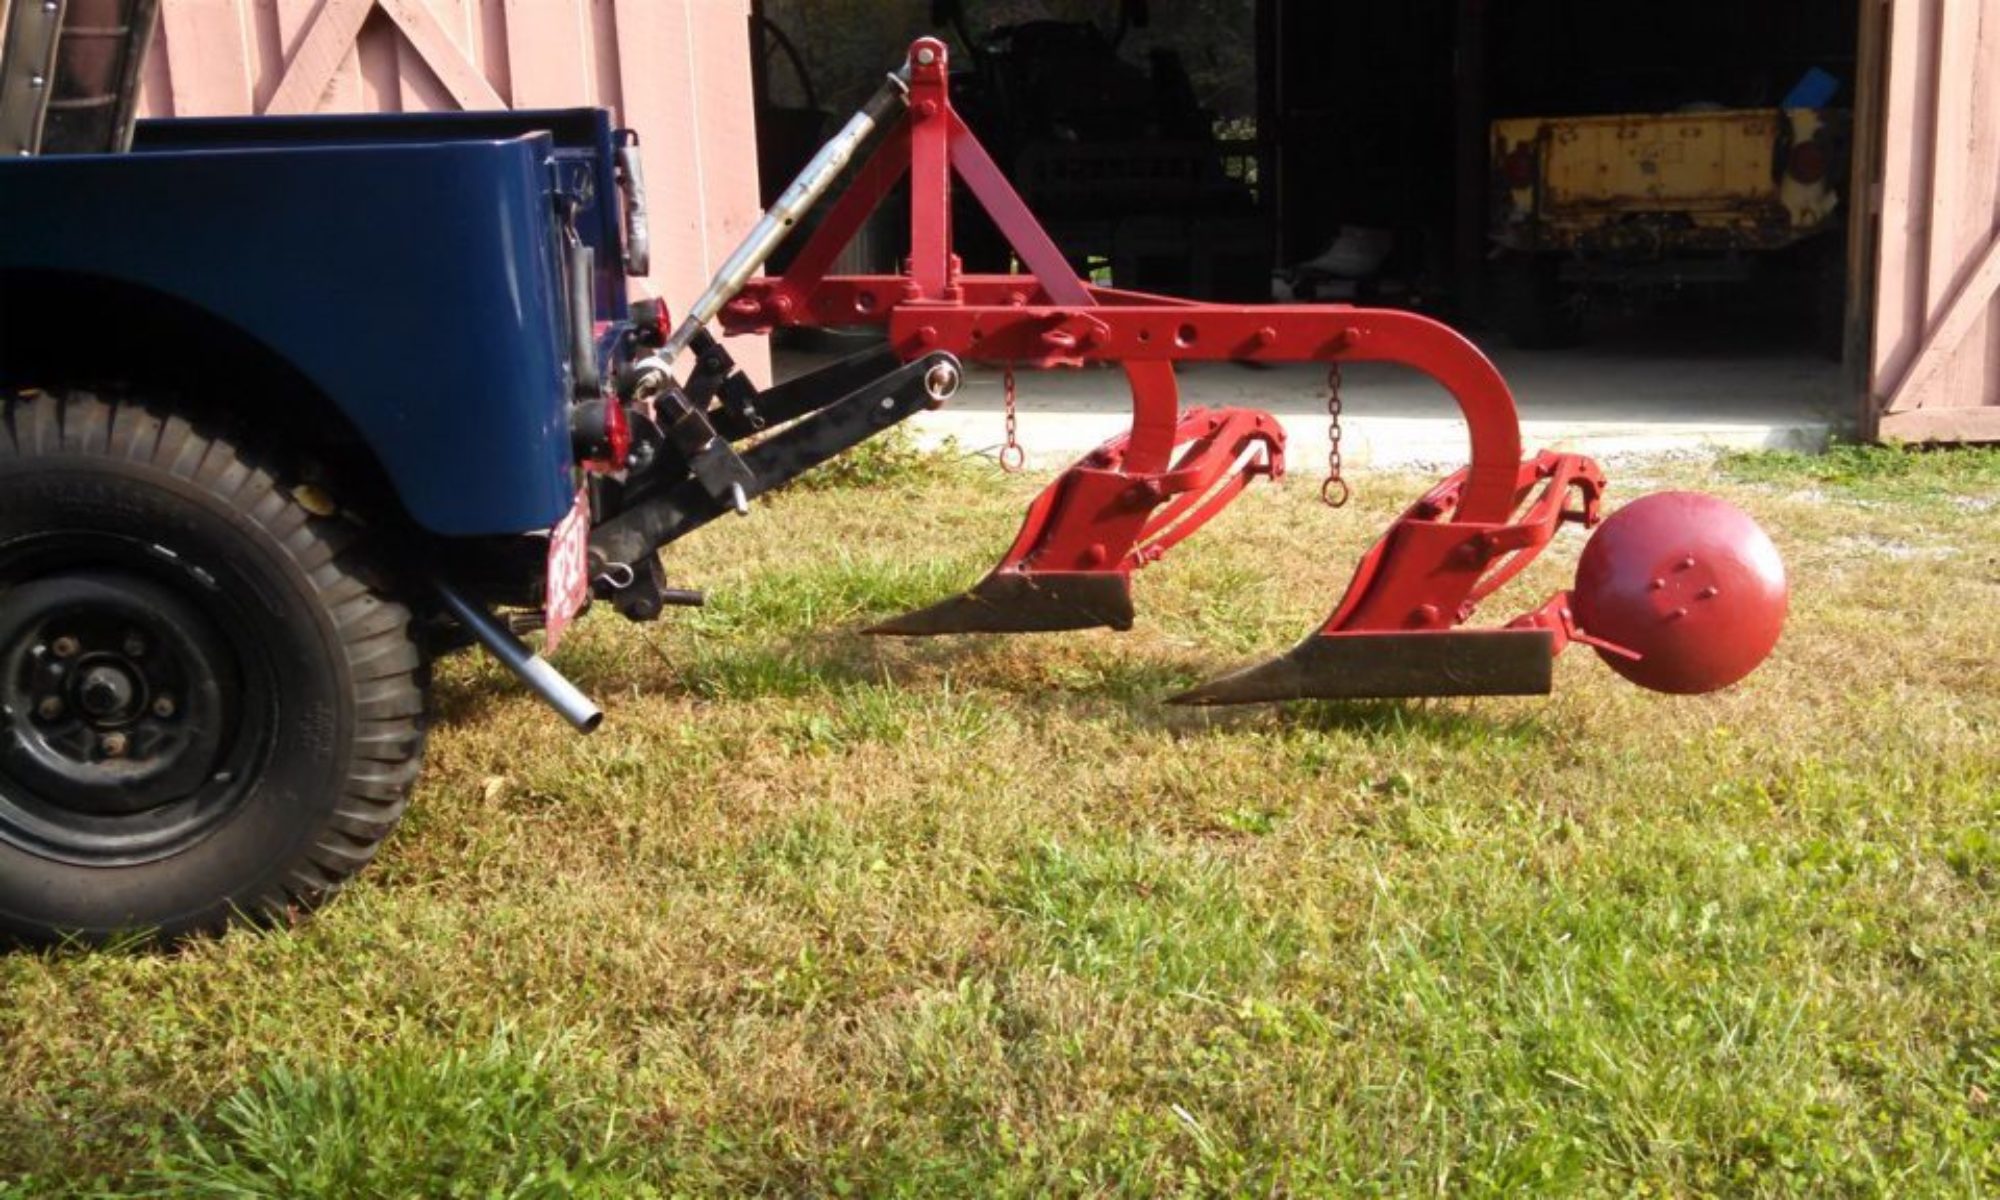
A Newgren plow of our own!

Our friend Craig loaned us his early Newgren plow to display with our jeep a couple of years ago. Since then we have been telling Craig that if he won’t sell us his plow, he should help us find our own. And he did just that!
Craig had sent me a note about attending an antique tractor parts meet. Not being able to attend, Barry did tell him to bring home a Newgren plow if he saw one. Craig sent back an ad for a Newgren plow near Knoxville, TN. Three days later, Barry made a flying trip to pick up the plow.
It is a beautiful later model 2-12 slat plow. It is missing the coulters and the gauge wheel bracket, but the other parts are in excellent condition. We will be looking for the missing parts and working with plow expert Clint Dixon to bring it back to its original state. Clint says that he knows of only 7 other examples of the later tall mast Newgren plows. That makes it even more exciting.
A prize of our own…

In addition to attending antique machinery shows, we have wanted to take the farm jeep to the local county fair. We finally had a chance to enter the antique farming exhibit. While we hadn’t expected to be judged, we ended up with a blue ribbon. The blue ribbon was for “best in class” and being the only entry in the jeep class, we were an automatic winner. Still, we will proudly display the ribbon in garage.
This was also the first time we have displayed the jeep backwards. It had become clear that with the front end of the jeep lined up with the fronts of other tractors we presented no clues about the jeep as a tractor. Visitors would glance at the jeep and walk on down the line. If we could get them to the rear of the display, interest went way up.
So the fair offered an opportunity to try our reverse display. It was an absolute success. This is how we will display the jeep at future shows.